
[pinit]
[pinit]
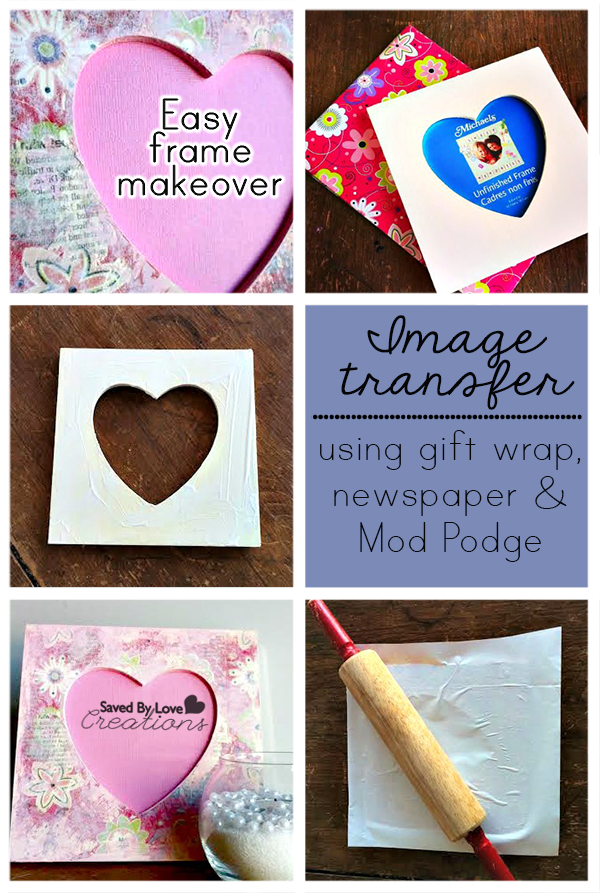
Today Cyn from Creative Cynchronicity is here to share a super cool image transfer technique using gift wrap and Mod Podge. I can’t wait to try it out and I think you will feel the same way. Enjoy!
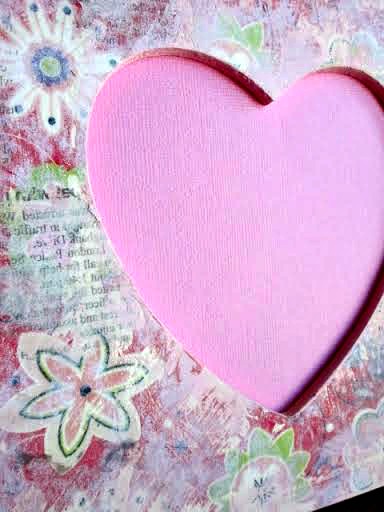
My daughter is getting married this spring so when it comes to Valentine’s Day, I’m thinking of things that will also work in relation to the upcoming nuptials. Since we have some lovely engagement photos around here in need of framing, I decided that the perfect Valentine gift for my daughter and her fiance would be a pretty heart shaped frame. Not only that, but I’m currently planning the bridal shower and it’s going to be all vintage-y and pink and romantic so this works perfectly for that too.
SUPPLIES:
Mod Podge
Gift Wrap
Newspaper
Frame or other surface to transfer onto
Foam brush
Acrylic or Chalky finish paint
Sandpaper
Brayer, rolling pin or credit card
 I started with one of these simple, inexpensive wooden frames from Michaels and some leftover wrapping paper. You want the paper to be pretty bright because once we transfer it onto the frame, it will come out much duller and lighter. The other supplies you’ll need are: Mod Podge, a foam brush (confession: I prefer to use my fingers!), scissors, scraps of newspaper or book pages, some paint (I’m using Deco Art Chalky Paint because I feel it has just the perfect finish for this vintage feel I’m going for) and a small scrap of sandpaper. A brayer or a rolling pin is great to have on hand too but if you don’t have one handy, you can just use the Mod Podge bottle.
TUTORIAL:
 Now, check your frame before you get started to see if there are any little rough edges that could use a bit of a sanding. Spread some Mod Podge all over the front of the frame. Here’s a little hint: If you want to try to get more even coverage, spread a medium layer of Mod Podge on the frame ensuring that you get it all over, including right in the corners and all around the heart shaped opening. I put mine on somewhat sporadically because I really wanted to get a “shabby chic kind of effect” with it. Even if you do get complete coverage, just remember that this is not a perfect transfer process and it will still come out looking somewhat distressed.
 Lay your paper face down onto the Mod Podged frame and here’s where your brayer or rolling pin can come in handy for getting good adhesion to the frame. Leave the paper on the frame for about a minute or so. You want to be able to remove the paper from the frame – you don’t want it permanently adhered! – but you also want some of the design to be left behind. You can take a peek by carefully lifting up a corner of the paper – as you start to peel it away from the wood, there should be a bit of tension and you should see some of the paper’s design on the wood.
 You’ll have some bits of the white backing of the paper left behind as well as the printed part that you want there. Dampen your fingers and rub gently to take away some of that backing. I left a bit behind, once again to add to that aged quality of the project.
 To add to the interest of the design, I used some bits of newspaper in some of the areas where the wrapping paper didn’t really adhere. I followed the same Mod Podge procedure that I did with the wrapping paper.
 Once I was finished with putting on any of the papers I wanted, I went on to the paint. Now, even if you were using the foam brush for the Mod Podge application, I strongly suggest you use your fingers here. I found I had better control of the paint which is important because I didn’t want it all over the frame. I was strategic in applying small amounts of the paint very lightly to small sections of the frame and then using my finger to spread and blend it out so that it had a lovely transparent quality to it.This was also when I painted the edges of the frame. Once the paint was dry, I used a bit of sandpaper then to go over the whole frame, roughing up and distressing the paint and paper to finish off the aged, vintage look of it.
 Seal your project with a top coat of Mod Podge and let it dry. You could write a poem or message in the center of the frame or add a special photograph and you’re all set with a gift for your favourite Valentine!
