Archives for October 2013

5 Amazing Potato Soup Recipes

[pinit]
Amazing Potato Soup Recipe Roundup @savedbyloves

[pinit]

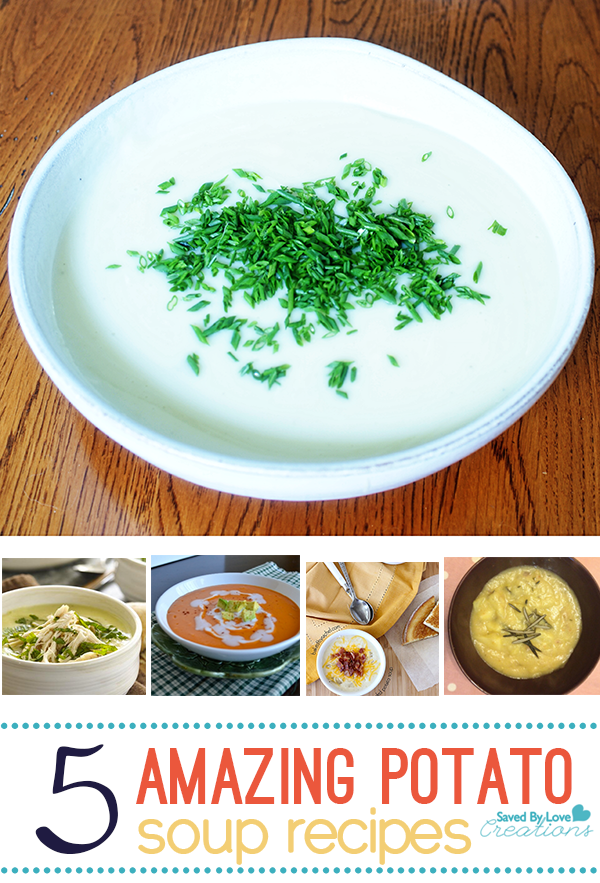
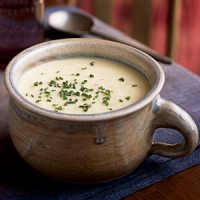
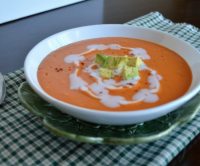
Potatoes are a staple in the world for many reasons.  We all grew up with them, right?  They are relatively abundant, inexpensive, versatile and have some pretty significant health benefits as well.  Did you know that diets low in sodium and high in potassium reduce the likelihood of stroke and high blood pressure?  That is all icing on the “they can be used to make some pretty savory soups” cake.  Here are five mouth watering recipes to go to when you want to branch out from french fries and mashed potatoes (which, by the way, are exquisite in and of themselves).  Perfect for the cool nights ahead… enjoy!


Over 50 Quick Crochet Patterns for Great Gifts

[pinit]
Over 50 Crochet Gifts to Make

[pinit]

I have been giving you quick, easy crochet patterns here and there, in anticipation of holiday handmade frenzies everywhere. Today I am sharing a collection of over 50 of my favorite crochet gift ideas with free patterns so you can make them yourself!


Great Crochet Gift Idea; Free Pattern Mug Cozy

[pinit]crochet pattern coffee mug cozy[pinit]

Every year about this time, crochet hooks and knitting needles around the globe are busy preparing handmade holiday gifts.  I oscillate between crochet and knitting, but this year it seems to be all about crochet for me.  I wanted to share this great Coffee Mug Cozy Crochet Pattern from Akamatra.  This gift is perfect for a large chunk of those on my list.  With all my vintage buttons, I will be accessorizing each cozy with its recipient in mind.

Check out some of our other Crochet and Knitting projects for more gift ideas and inspiration!


Crochet a Funky Bracelet with Scraps

[pinit]Crochet Bracelet Pattern[pinit]


I love quick crochet projects, and I think you may have noticed the bracelet obsession here at SBLC.  This crochet bracelet pattern from The Spotted Hook is right up my alley!

For plenty more DIY bracelets, see SBLC’s bracelet tutorials, and our 50+ bracelet roundup!

Recycled Crafts and Decor Project Gallery from SBLC

[pinit]Recycled Project Gallery with hundreds of eco friendly craft ideas you can make @savedbyloves[pinit]

We have been busy gathering all of SBLC’s recycled craft projects and roundups into on spot!  Now you have a go to destination for inspiration on crafting with junk.  Feel good about yourself as you make beauty while helping to clear the landfills.  Just click the thumbnail above or here:  Saved By Love Creations Recycled Project Gallery.  Enjoy!

Over 50 Awesome DIY Shelves to Make

over 50 cool DIY shelves to make @savedbyloves #woodworking #repurpose #reclaimed[pinit]

This week’s 50+ round-up is all about DIY shelves. It is amazing what you can use to create shelving, so think outside of the box and keep your eyes peeled while you are out there junking!


DIY Faux Wood Pallet Sign With Foam

[pinit]How to Make a Faux Pallet Sign @savedbyloves @floracraft[pinit]

Remember over the summer when I shared how to make a faux wood pallet American flag from foam?  Today’s project, much like the flag, uses  Smooth Finish™, a paintable coating for FloraCraft® Make It: Fun® Foam to create what looks like wood pallet art, but weighs much less and doesn’t require power tools!  Follow along and see how to create this “LOVE” faux wood pallet piece.

Make a Faux Wood Pallet Sign

SUPPLIES:

Flora Craft Products

Smooth Finish™

Make it Fun® Foam 2 – 1″ x 12″ x 36″ sheets

StyroGlue®

Foam Cutter (you don’t have to have a special cutter, but it makes the process much easier)

Serrated kitchen knife waxed with candle or soap if you don’t have a foam cutter

Antique white chalk paint

Mod Podge Mat Finish

Antiquing glaze

Lint free cloth

Yardstick/straight edge and sharpie

Craft stick for stirring

Putty knife or spatula

Pre cut Chipboard letters or Die cut machine and cardboard

Black Screws

TUTORIAL:

Making wall art with styrofoam

I used three 6 inch planks for my wall art piece.  That means I cut the 12×36 inch pieces in half long ways.  Use a straight edge and marker to draw the line.

How to Cut Styrofoam

 I clamped two of the foam sheets together to cut them in half both at once.

How to Use Smooth Finish

Stir the Smooth FInish with a craft stick and apply with putty knife to foam.

How to Paint Styrofoam

Once the Smooth Finish is dry, paint with your choice of paint color.

How to make a DIY pallet sign

How to glue styrofoam

Insert connectors (about 3 for each connection site) and glue along entire slat edge.

How to attach styrofoam

I prepared my letters by cutting several of each from cardboard and gluing them together with paper cement.  I cut one each out of coordinating scrapbook paper, glued that as top layer, and sanded/inked the edges.  I used clamps and scrap wood to apply pressure to glued planks and let that dry overnight.

MakeItFun Foam Faux Pallet Project

I used short black screws for aesthetics, and glued letters to planks using Fabri-tac.  I hung my piece by piercing it with a single nail in the wall.  That’s it!  I adore my new piece!

Visit  Sharon at Crafts n Coffee Blog for great tips, tricks and project ideas using foam.

DIY Dollar Tree Halloween Door Bats & $100 Giveaway

[pinit]Printable Bats[pinit]

As you may know, Dollar Tree is one of my favorite places to go for creative project supplies.  I love wandering through the aisles letting my imagination run wild with ideas.  Just recently, I discovered Dollar Tree Value Seekers Club, which is packed with crafts, recipes, décor, tips, contests, insider information, frugal fun ideas, and other awesomeness.   You can join too, for free, and get a chance to win a $20 Dollar Tree gift card!   You will never run out of seasonal inspiration, as the creative content changes each month.  Just pick out a project, print the project sheet or save it to your phone, and then use it as your shopping list in the store!  Today I am sharing how I created this bat door using Dollar Tree supplies and a bat template I found while browsing the fun Halloween projects.  It is super simple and it cost just $3.

***I received compensation for this post.  All opinions are mine and honest!

DOLLAR STORE SUPPLIES:

Dollar Tree Craft Halloween

You can use Dollar Tree black poster board, construction paper or foam sheets for your bats; For the number of bats I made, I used 2 sheets of poster board

Scissors or Die cut machine with software you can use to cut imported images

Bat Template Available at Dollar Tree Value Seekers Club

Printer unless you are using die cut machine

Clear tape


TUTORIAL:

Dollar Tree Crafts

Download and print the bat template from Dollar Tree Value Seekers Club “Front Door Bat Printable” project, or download and open in your die cut machine’s software.  I used Sure Cuts A Lot (which I don’t think is available anymore) and my Cricut machine.

DIY Dollar Store Bat Silhouettes

If not using die cut machine, cut out the bats on the free template with scissors,tape to your black poster board and cut around them to create your bats.

How to Decorate for Halloween

Tape your bats to the door and enjoy!

I love the look and the simplicity of this project.  Join Dollar Tree Value Seekers Club for it, and tons more inspiration!

$100 Dollar Tree gift card giveaway

Want to win $100 from Dollar Tree?  Sign up for Dollar Tree Value Seekers Club and leave me a comment below this post telling me which project you want to try if you win!  Good luck.

Here are some other great projects inspired by Dollar Tree Value Seekers Club:


50+ Awesome Things To Make From Wire

[pinit]

50+ Wire Crafts to Make @savedbyloves

[pinit]

Calling all creatives out there, today’s 50+ roundup is going to feed your inspiration banks. We gathered over 50 super awesome things to make from wire. You can get craft wire for pretty cheap, and as you will see, you can even use wire hangers! From Christmas, Halloween and Valentine’s Day projects, to jewelry to home decor and gifts, you can find a wire project for about any occasion. If you have a wire project we didn’t find, send it to us. Enjoy!


Revamp a Mirror into A Coat Rack for Your Entryway

[pinit]DIY Coat rack from Mirror #chalkpaint @savedbyloves[pinit]

With some scrap wood and chalk paint, you can revamp a junky thrift store mirror into this handy, distressed entryway coat rack.  This entire project was pulled off for less than $10!  I am always in need of more shelves for my pictures and knick knacks.  When I saw a similar mirror in Ana White’s book of woodworking projects for the home – “The Handbuilt Home”, I it called to mind a mirror I picked up at a garage sale for $2.

How to Revamp a Mirror

Ana White Wood Working Plan

This is the picture of Ana’s Version from the book.

How to Build a Mirror

All I did was use pallet wood scraps and cut 3 planks to fit the width of my mirror, using my mitre saw.  Two of the planks I placed perpendicular at the bottom and one horizontally at the top for a bonus shelf.  Using my scroll saw, I cut out the decorative shelf brackets for the top and bottom shelves.  To attach the shelving pieces to the mirror, I used my Kreg Jig for pocket holds, and wood glue.  The brackets I placed with my Ryobi Air Strike Nailer and wood glue.  I painted the mirror with Annie Sloan Paris Gray Chalk Paint and sealed with clear wax after sand distressing.  To finish, I added three coat hooks I picked up from the hardware store.

More of SBLC’s woodworking adventures:

Powered by CGView

Privacy Policy