
[pinit]
[pinit]
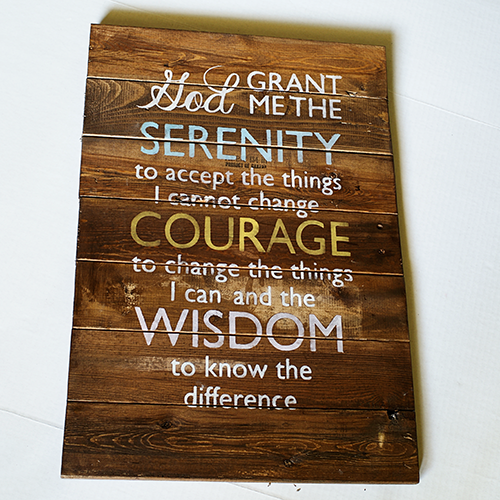
I have been a long time fan of making signs from reclaimed wood. If you have tried to make a pallet sign, you may have run into the same dilemma as I have. How do you attache the wood pieces together? Some people use the pallets as they are and just paint on them. I prefer each plank to be the touching edge to edge. Before I discovered the Kreg Jig, I scabbed my pallet planks together like I showed you in this How to Make a Sign From Reclaimed Wood Tutorial. This is a way easier process using the jig. You drill perfect pocket holes based on the wood thickness and the join is flush, edge to edge. A Clean, strong, quick and easy attachment, that I am told doesn’t even require wood glue! I used it anyway because I am just like that. Pallet signs have gotten way easier since I made this investment. This is not a sponsored post! Read on to see how it works.
SUPPLIES:
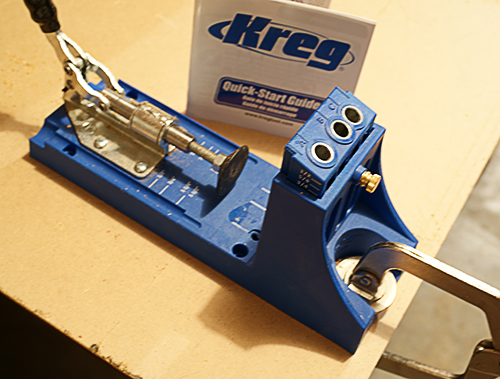
Kreg Jig with drill bits and clamp
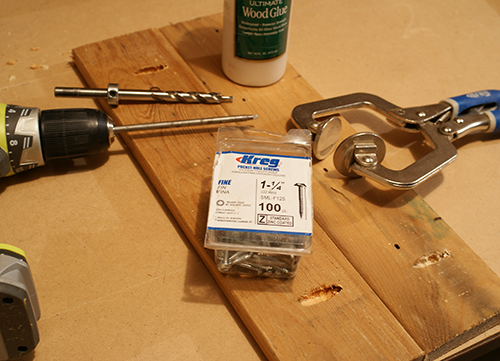
1 1/4 inch Kreg Screws
Shipping Pallet Boards (I pry mine off of the pallet with a pry bar a.k.a I have my husband do that part)
Stencils for words (I cut mine with my cricut machine)Wood Stain and lint free cloth
Acrylic paint (I used Tim Holtz Distress paint but anything will do)
TUTORIAL:
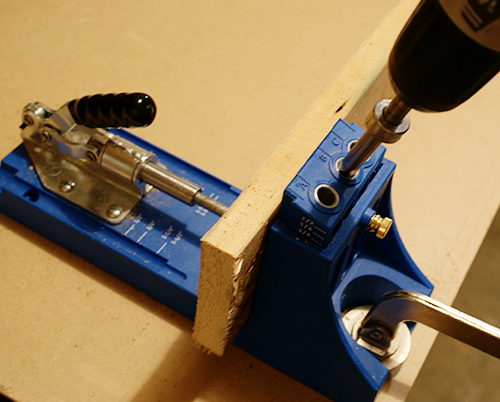
I drill two holes in each pallet, one one each end, a few inches in. The pocket guide is set to 3/4 inch since that is the thickness of this pallet wood. You can go down to half an inch but remember to use shorter screws. There is a great chart that shows you what settings to use. So the neck of the drill bit has a stopper that you set, then the guide with the holes that you drill through is set to that number, and there is a corresponding screw length. The jig comes with a handy chart for quick reference. SUPER easy!
Once your holes are drilled in each board (except the bottom one, which doesn’t need holes), swap to the screw driver bit which is shown in the drill in this photo (both bits you need come with the jig).
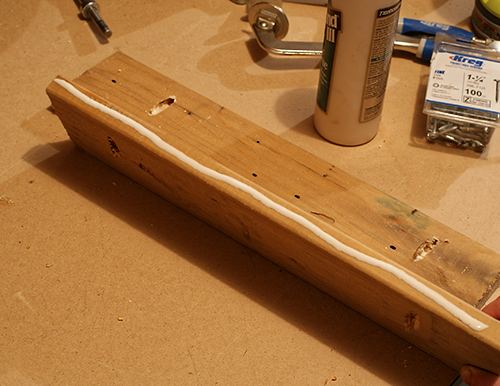
Add some wood glue or don’t (see above).
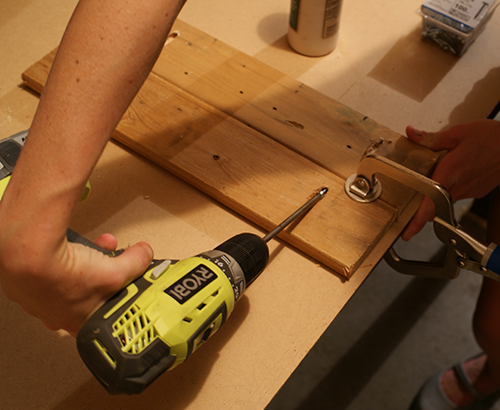
Then drill your screw into the pocket hole.
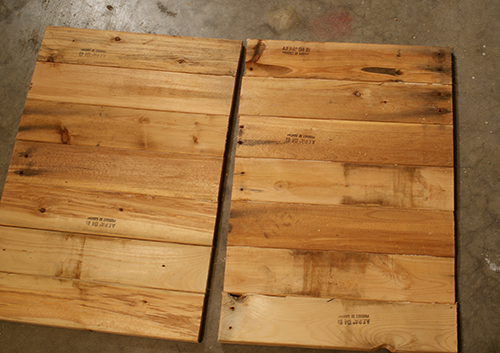
Keep going until all of your pieces are attached. I stained my sign with Walnut color Minwax Gel Stain. Let dry.
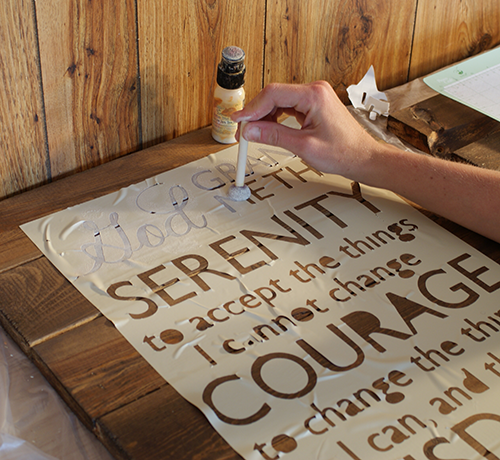
Use your stencil to create the phrase. I cut mine from contact paper using my Cricut.
Attach wire to the back with nails or a staple gun and hang!
