Archives for July 2013

Over 60 Things to Make From Paper

[pinit]

Things To Make From Paper #diy #homedecor #upcycledjewelry @savedbyloves #papercrafts

 [pinit]

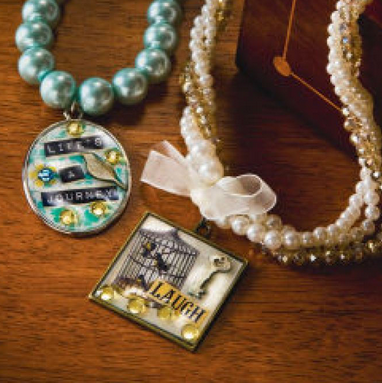
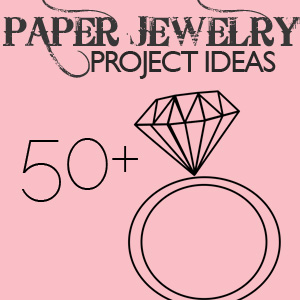
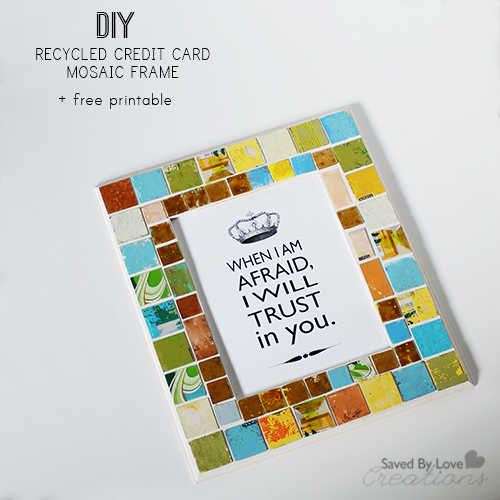
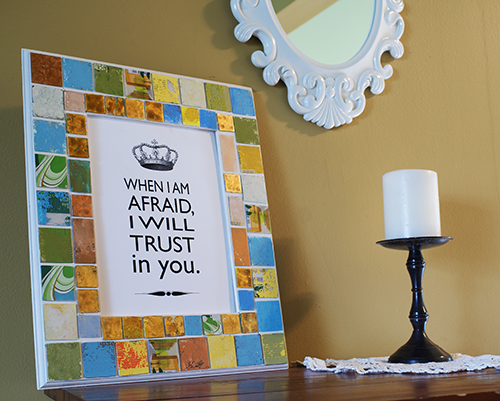
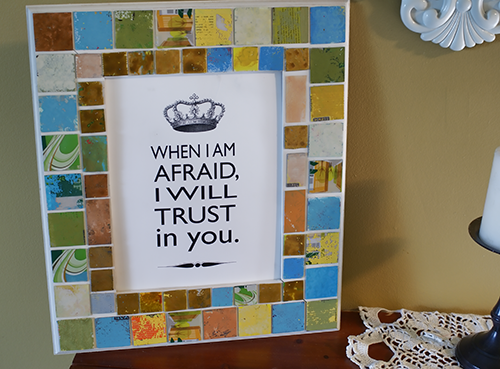
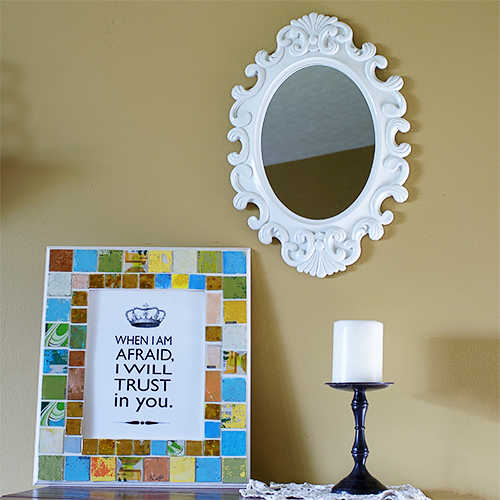
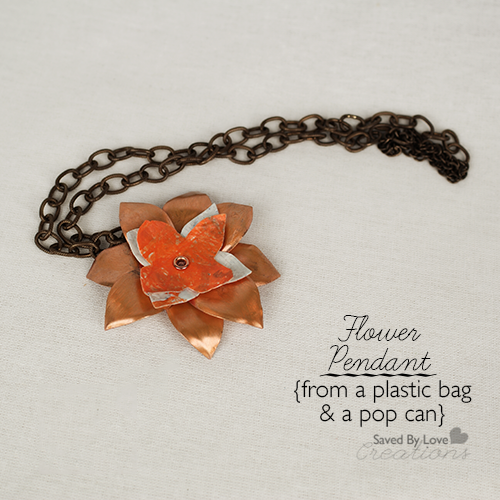
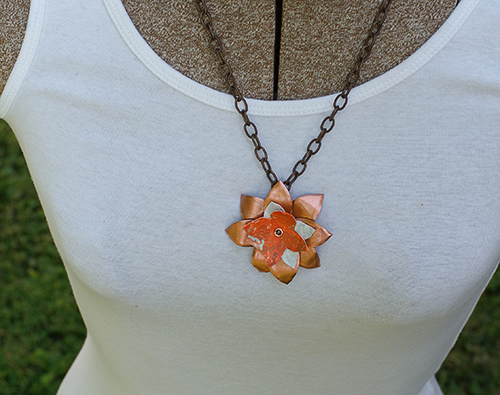
Is it just me, or do you all love paper to bits too? I switch mediums and techniques all the time, but paper is a constant. I don’t scrapbook, but you wouldn’t know it by looking at my studio. Piles and piles of decorative paper adorn the shelves, and don’t get me started on the stacks of magazines, newspapers and vintage sheet music. You don’t have to spend any money to make gorgeous jewelry and home decor if you go the recycled paper route. Check out some of my favorite diy paper projects, and share with me some of yours!


Make Mixed Media Mod Podge Necklaces

[pinit]
DIY Mixed Media Mod Podge Necklaces from Michael's, featured by @savedbyloves[pinit]

I found these cool new pendant blanks by Mod Podge at Michael’s a couple of weeks ago, and have been waiting for some inspiration (and time) to create with them.  This Mod Podge® Antique Urban Pendant Necklace Tutorial at Michaels.com is just the nudge I needed.

Have you created with these pendant blanks and papers?  If so, do share.

For more jewelry ideas, visit our Paper Jewlery Projects Roundup:

DIY Wood Pallet Dog Feeder

Dog-Feeding-Station-from-Wood-Pallet copy

Today I am sharing with you a quick and easy reclaimed pallet wood dog feeding station.  You can make this piece in an afternoon and for little to no cost.  The only thing I didn’t have on hand and had to purchase were the bowls, which I found for $2 each at WalMart.

DIY Wood Pallet Projects

I started with a piece of wood I got from a friend that was wide enough for the diameter of the bowls.  My bowls are 9 inches in diameter, the wood 11.5.  You see casters pictured, but I decided not to use them.

DIY pet projects

I eyeballed this whole deal by Just placing the bowls upside down, evenly spaced on the board, then tracing them with a pencil.  I drilled a hole inside each circle to insert the jigsaw blade, then cut to the circle outline and all the way around it to create the hole for the bowls.

DogFeedingStation3

Using wood from pallets I had broken down previously, I cut the sides and front/back to size.

DIY Reclaimed Wood Project #upcycle

I used a small support as pictured, and attached with wood glue and nails (see below), holding square with corner clamp.

@RYOBIpowertools air nailer

@RYOBIpowertools air nailer

This Ryobi AirStrike has my heart.  Cordless, lightweight, powerful, it really doesn’t get any more convenient.

Sanding distressed piece

After it was all constructed I sanded with 80 then 120 grit paper.

CeCe Caldwell Chalk Paint Project

I used CeCe Caldwell Chalk & Clay Paint to finish.  First I painted Vintage White Chalk & Clay Paint then coated Clear Wax followed by Aging Cream Dark.

DIY Dog Feeding Station from #woodpallets #reclaimed #upcycle #chalkboardpaint

Want more DIY pet projects?  Check out our 50+!!

Silhouette Gallery Wall & Other Vintage Home Decor Inspritation

[pinit]
Amazing DIY Home Decor; silhouette gallery wall, vintage collage, painted stairs and more @savedbyloves
[pinit]

Last week I shared with you a hand painted distressed sign tutorial I wrote after documenting the creative process of a new friend, Pam from Little Red Porch.  When I met her, I also met Hope, a soldering queen with one of my favorite homes in the world.  In the near future you will get some video action that will make you a soldered jewelry master.  For now, I am going to show you a glimpse of Hope’s infinite kick awesome DIY decor projects.

DIY Painted Harlequin Stairs

How about these harlequin patterned stairs with Joshua 24:15 painted on them?  Are you with me?  Check out this How to Paint Harlequin Pattern Tutorial from Home Depot.  For the Text, just use letter stencils or vinyl cut outs with your die cut machine.  Done.

How to Make a Gallery Wall @savedbyloves

Let’s move onto this eye catching gallery wall exclusively featuring black silhouettes.   I love it!  I haven’t tackled a gallery wall yet.  It intimidates me, to be honest, but this one I can dig.  I was so taken in by all the vintage farmhouse loveliness, that it wasn’t until editing this photo that I even noticed the black ornamental wood piece topping the doorway on the right of the image.  That would be super simple to make from some plywood, a little black paint and a scroll or jig saw.  Simple accent, check.

Vintage Collage wall art

I spent a good chunk of the day with Hope, and eventually made my way into the bathroom.  Upon entering, I made an about face and ran back to her studio for my camera.  Love this room!

Vintage bathroom decor ideas

So inspiring!  This little vignette makes me want to raid my lace and buttons for some mixed media fun.

Make a vintage tray chalkboard @savedbyloves #chalkboardpaint

This is a pretty simple concept.  Just paint an old tray with chalkboard paint and tie a ribbon on the handle to display.

Creative craft room storage

I was going to save the studio for the soldering post, and I still am for the most part.  Here is a teaser.  You will see the rest later.  It is all this fabulous.  To.  Die.  For.

50+ DIY Scripture/Inspirational Projects to Make

[pinit]

50+ #diy scripture art and inspirational decor tutorials you can make @savedbyloves

[pinit]

I have always loved scripture verse and inspirational art, which is what today’s round-up contains. Having words that feed my soul displayed on the walls or dangling as a charm from my necklace helps keep me centered when life pulls in all of its directions. I am excited to share with you 50+ of my favorite DIY scripture art and inspiration projects. If you have a project that fits, send me a link so I can add it to the collection!


DIY Rustic Hand Painted Signs from Reclaimed Wood

[pinit]
How to make a handpainted rustic sign from #reclaimedwood @savedbyloves
[pinit]

I was recently blessed to meet Pam, a local talent with a passion for hand painting rustic, inspirational signs.  I have noticed her signs fly off of the shelf (or porch, more accurately).  At the venue where we met, every sign I thought needed to come home with me was on hold, waiting for it’s lucky recipient.  Pam is a busy mom, wife and small business woman who found the time to invite my husband and I into her lovely farmhouse for a day.  As a result I get to bring you this detailed tutorial showing you how to make your own hand painted, distressed wood signs.  Pam has an abundant supply of reclaimed wood and a rocking wood shop at her disposal, but you can make these without all of that.  The best news is I have had several of you ask about die cut machines and how to make stencils for your signs without one.  Pam does this with a cheap text editor on her computer, and a regular printer with black and white ink.  Let’s get started!

How to make distressed wood signs by Little Red Porch @savedbyloves

CLICK HERE TO CONTINUE TO TUTORIAL

DIY Storage Boxes from Recycled Pallets

DIY Numbered shipping pallet crates

Wanna make cool DIY storage boxes from old shipping pallets?  That is what you will find here.  This project came about because I have never really loved my tapered bookshelf and decided it was time to make it lovable.  I found these DIY storage crates from pallets at Ana White, and came up with a plan to make small, medium and large ones to custom fit to my shelves.  During the process of getting the numbers on there, I found a cool, accidental image transfer to wood technique.  I finished the three boxes over 2 days, including letting stain sit overnight.  Keep reading to see how.

reclaimed wood storage boxes

SUPPLIES:

Wood from shipping pallets – (There are 1000 ways to break down pallets.  I use a pry bar and circular saw.  Google it to find videos.)

Kreg jig and screws (My wood was .75 inches thick so I used 1.25 inch Kreg screws)

1×12 board for bottoms of crates

Wood Glue

Clamps

Mod Podge (I used Antique Mod Podge)

Wood Stain and Conditioner or preferred finish

Scrapbooking Attitude or materials for your preferred transfer technique

TUTORIAL:

How to make a storage box from recycled wood pallets

Based on my 3 shelf sizes, I decided to make three boxes sized as follows: 12×12.5 inch, 13×12.5 inch and 14×12.5 inch.  To do this, I cut 6 sides from pallets, each 11 inches for the box sides.  I cut a front and box in 12, 13 and 14 inches for each box.  The bottom of the box I cut from 1×12 board to 1.5 inches shorter than the front/back pieces of each box (to account for the width of the sides).  See all the pieces above.

Use Kreg Jig Pocket holes to join pallet wood

Here you can see that I drilled pocket holes on each edge of the inner surface of the side boards for each box (to see how to use Kreg Jig and join wood with it, go to my Pallet Sign Tutorial)

Drill pocket holes in the bottom of the box

Drill pocket holes in the bottom of the box for attaching it to the front, back and side box boards as pictured.

PalletCrates7

Start by attaching side to bottom using holes you drilled in bottom.

How to screw in kreg screws in tight space

PalletCrates12

Here it is with all the boards attached.  I used wood glue in addition to the screws.  I always do.  I learned that from Ana.

Sand before wood conditioner

I sanded with 80 then 120 grit paper.

How to use Minwax Wood Conditioner

Clean away debris from sanding with damp lint free towel, then apply wood conditioner.  Let sit 15 min, wipe away excess.

Stain wood after wood conditioner

I stained with Minwax Classic Gray Wood Stain.  I did an extremely quick and dirty finishing job on these since the wood is rustic and uneven anyway.  That is one of the many things I love about pallet wood projects.  I get to move quick and messy fits right in with the look.

How to image transfer onto wood

I used these free cool vintage numbers from The Graphics Fairy.   To get them filled in, I just pulled them into Photoshop and painted the open spaces black.  I flipped them backwards and printed them onto Scrapbooking Attitude, an image transfer product you can read all about in my Image Transfer Halloween DIY using the product.

How to use Scrapbooking Attitude for Image Transfer onto Wood

Cut out around number. Set aside and go to next step.

Apply Mod Podge to area for image transfer

Apply a thin layer of Mod Podge where the image will be placed.

How to transfer images onto wood

Peel film away from backing and place image, ink side down, onto the surface.  Smooth out any wrinkles and press into Mod Podge/wood with fingers.

How to make a wood pallet storage box

O.k.  Here is where the happy accident starts.  You can see the transfer film where you cut out the number and the clear “paper” around it.  At this point I would just mod podge over everything, hoping that hid the edge of the film to an acceptable degree.  What happened here was I realized I accidentally put the 2 on the largest box, where I really wanted the three.  So, I tried to remove it, and the film came away leaving the ink behind!  Yay!  I did sanded it off the box so I could put the 3 on there, but removed the film for the rest of the numbers.  I love how it looks!

remove film, leaving ink behind for the image transfer

PalletCrates24

Here you can see me removing the film, and the ink staying behind!

Seal with Antique Mod Podge

Brush a coat of Mod Podge over the entire surface, and the entire box to seal.  I used Antique for an aged effect.  Let dry and you are done!

DIY wood pallet storage boxes

DIY storage from wood pallets

So, they are awesome, am I right?

Wanna make everything under the sun from wood pallets?

Check out our 50+ Wood Pallet Project Round-up!

We also have 50+ Image Transfer Projects to inspire your creativity!

Mosaic Frame From Recycled Gift Cards + Free Printable

[pinit]
How to Make a recycled gift card Mosaic frame, + cool free Psalm 56:3 scripture verse printable from @savedbyloves

[pinit]

Hi Saved By Lovies!  Today I am sharing with you a fun project you can make for next to nothing using recycled gift cards/credit cards.  It has all my favorite components, and if I know you at all, yours too.  It is a great upcycled craft project, lending to a unique piece of home decor that will leave your friends saying “You made that from what?”.  Oh yeah, and since I created a printable to go inside of my new frame, you get that too.

Are you ready?  Let’s do this.

Recycled gift card mosaic picture frame tutorial #upcycled #recycledcrafts

Supplies:

Sizzix home decor project #Sizzix #recycled

Old Gift/Credit Cards (I have had everyone under the sun keeping these for me for months and months)

I used my Sizzix machine and the Squares #3 Die (which is on sale over there for $8.79), but you can use cut squares from your credit cards with hefty scissors, like Tonic Studios Tim Holts Scissors

Craft Glue like Crafter’s Pick, which I use for just about everything.  It is non toxic, strong as can be and is great for metal, paper and more

Frame to mosaic

Acrylic paint for tiles if you don’t want to use them as they are (I used Tim Holtz Distress Paint because I am head over heels in love with it)

Free Scripture verse Printable Psalm 56:3

If you want to use the printable I created from Psalm 56:3, just right click the above thumbnail and the full res version will magically appear.  Save it and have it printed your preferred way, or print from your computer.

This verse is coming up all over the place for me, and I use it whenever life hits to remind me that I am held.  I created the printable in Photoshop specifically for this frame, so I went simple black and white since the credit cards have lots of color.  I used Gill Sans, one of my go to fonts.  The lovely crown and design element at the bottom come from Karen at The Graphics Fairy.  What would I do without her library of images??!

Find them at the following links to use in your own creations:

Free Vintage Crown Graphic

Free Ornamental Graphic Separators

TUTORIAL:

CreditCardFrame2

Cut and paint squares from gift cards into the size you want for your mosaic surface.  I used the small and next up size from the Sizzix Square Die.

How to Mosaic a Frame

Lay out your “tiles” to get the design you want before you begin gluing.  Trust me.  Do that.

How to glue on Mosaic Tiles

Once your tiles are dry, adhere them to the surface of your frame using craft glue.  I put some craft glue in a cupcake wrapper and applied it to my tiles with a scrap piece of plastic.  You can use a popsicle stick, paintbrush or whatever.  Use a thin layer of glue so that if you move your nudge your tiles to get the spacing you want, you won’t have bleeding out from the edges.

How to make upcycled home decor; DIY mosaic picture frame from recycled credit cards

Let the glue dry so the tiles are secure and add a photo, mirror, or even leave empty as a design element all in itself!

Upcycled gift card home decor; How to Make a Faux Mosaic Picture frame

If you like this project, check out the 20+ Gift Card Projects to Make at Totally Green Crafts

20 Ways to Upcycle Gift Cards

DIY Recycled Can & Plastic Bag Flower Pendant

[pinit]
Make #upcycledjewelry from #recycledaluminumcans &#plasticBagCraft @savedbyloves

 [pinit]

Recycled crafts are a favorite of mine, especially upcycled jewelry.  Today’s project brings these together in flower pendant made from recycled aluminum cans and plastic bags.  It’s true.  I used a combination of techniques I have shown you in the past; dissecting aluminum cans and fusing plastic bags, both to be die cut with my Sizzix.  This project is fast, simple, eco friendly, and pretty awesome.

SUPPLIES:

Sizzix Die Cut Machine

Flower Layers #2 Die

Soda can

Metal snips

Chain for stringing pendant

Hole punch or hammer and nail to punch hole

Eylet and Eylet setter – I use Crop-a-dile

Paint for petals or you can use the color of the can – I used Vintaj Patina Antiqued Copper

Plastic Bags

Copy paper

Iron

Ironing board

2 pairs of chain nose pliers

Aluminum Can Crafts #recycledcrafts #upcycledjewelry Pendant tutorial

TUTORIAL:

The following video shows how to prepare the can and die cut the flower petals.  You will use the Flower layers die instead of the rose die in the video.

*If you don’t have a Sizzix, you can still cut the can with paper punches like I showed you in this

As you can see in the pendant photo, you need 2 of the larger petal layer cut from aluminum cans.  Paint them if you are going to.  It would look cool with a fun color/patterned can too!  If you are painting them, use alcohol inks, Vintaj patina or spray paint for metal.  Acrylic paint won’t stay put.

Now to cut prepare the plastic bags for cutting with the Sizzix, you need to fuse them as I showed you in this Recycled Plastic Bag Bracelet Tutorial

Die cut the two smaller flowers from your fused plastic bag material.

Now you are ready to layer your petals.  Hole punch the center of all 4 layers then, arrange them in a staggered fashion and insert and set eyelet.

Shape the aluminum petals with round nose pliers or a bamboo stick for dimension.  The plastic you can just fold into position with your fingers.  It won’t bend and hold shapes like the aluminum, but you can cup it some.

CHECK OUT 50+ MORE ALUMINUM CAN CRAFTS WHILE YOU ARE AT IT:

Aluminum can crafts

DIY Things to Make for Pets and Pet Lovers

Over 50 Projects to Make for Pets and their Owners
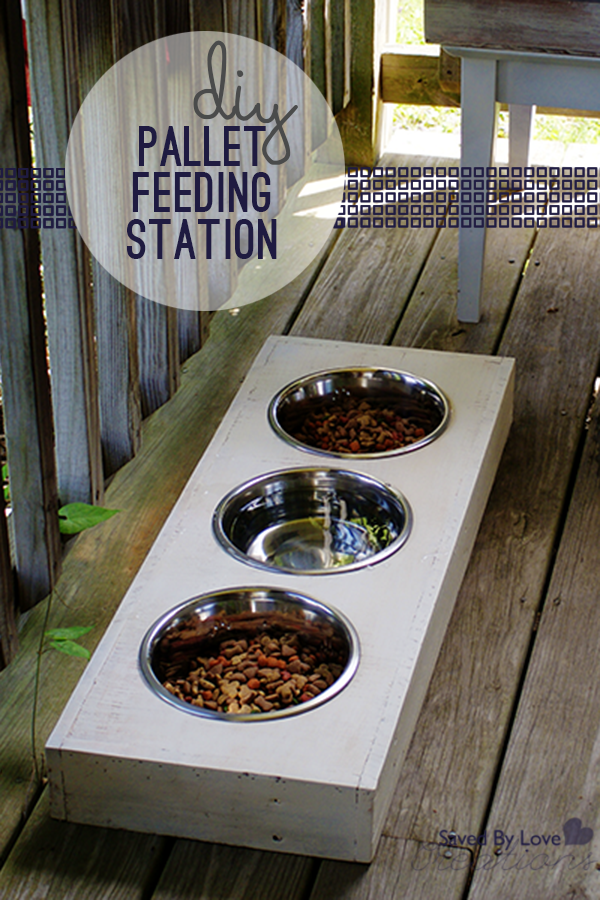
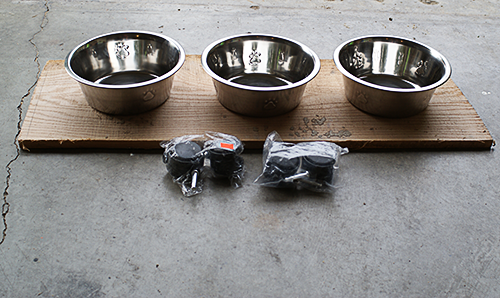
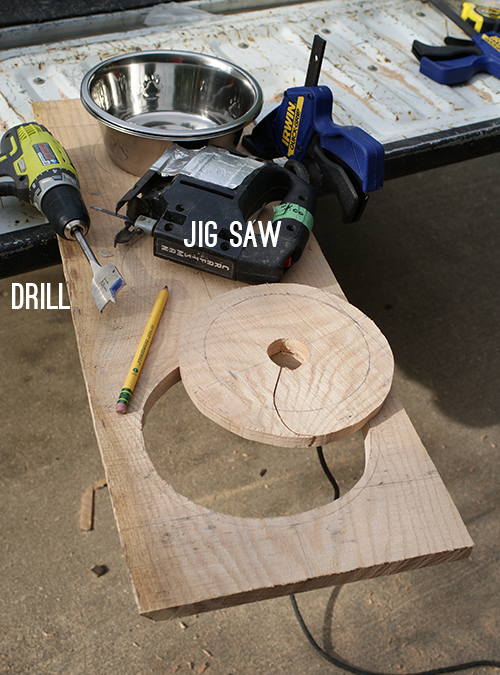
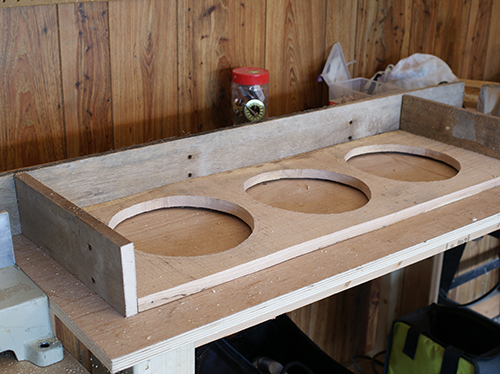
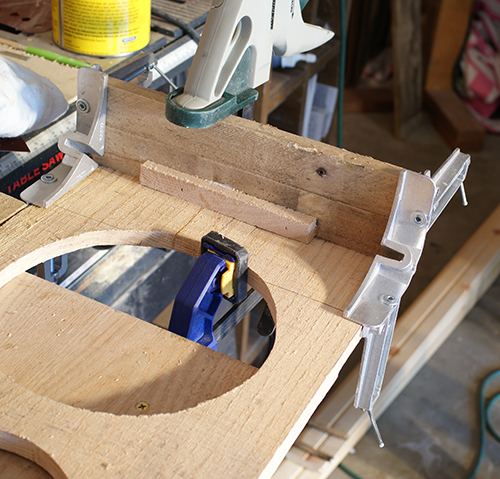
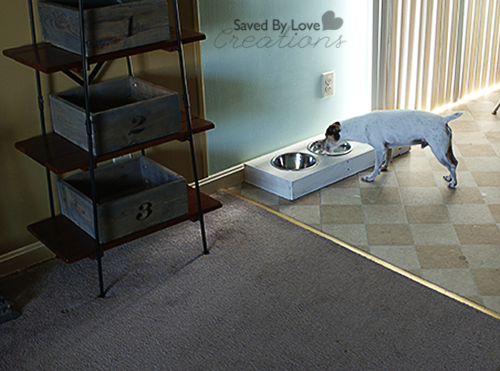
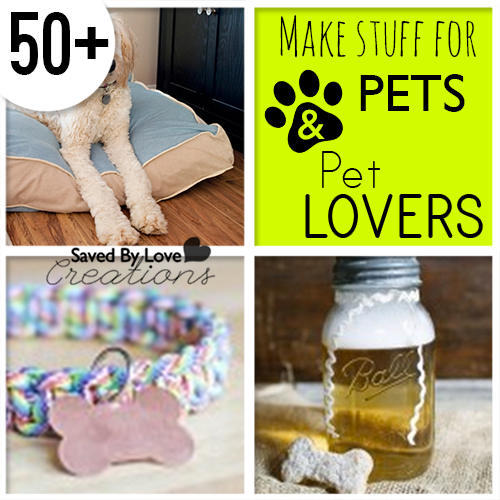
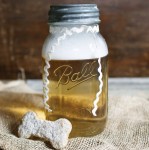
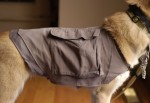
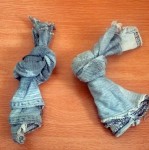
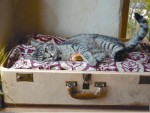
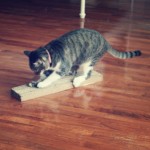
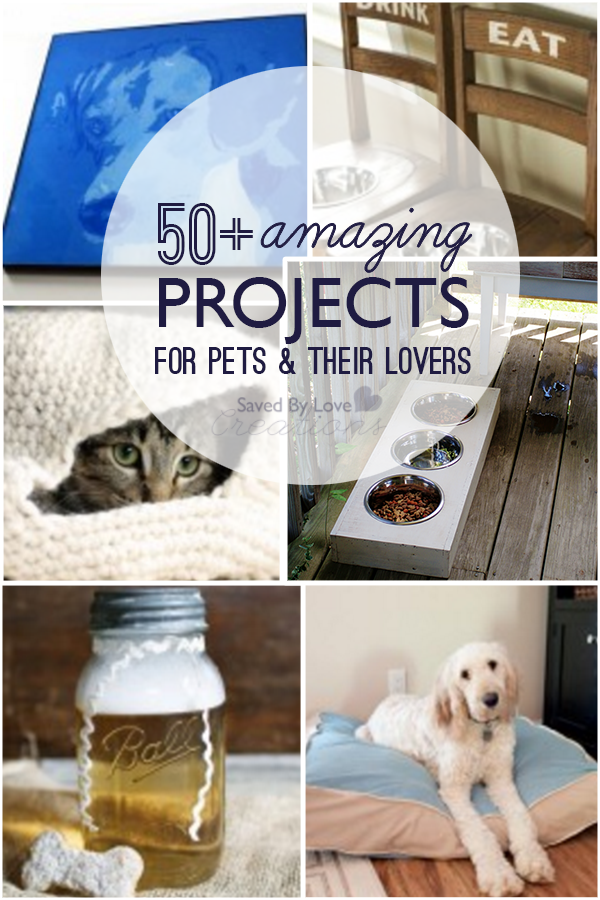
The dog days of summer are here, and mine furbabies are taking them in full force. Today’s round-up is all about how to make stuff for pets and DIY gifts for pet lovers. You will see lots of repurposed dog dish ideas, pet toys and treats you can whip up, repurposed pet beds, DIY art for pet lovers and much more.  Many of the ideas are way cheaper than buying pre-made, using recycled materials to create.  Go love your pet and feel good about it!

Privacy Policy