Archives for March 2013

Repurpose Fan Blades to Dragonflies

#DIY #Repurpose fan blades to Dragonflies @savedbyloves

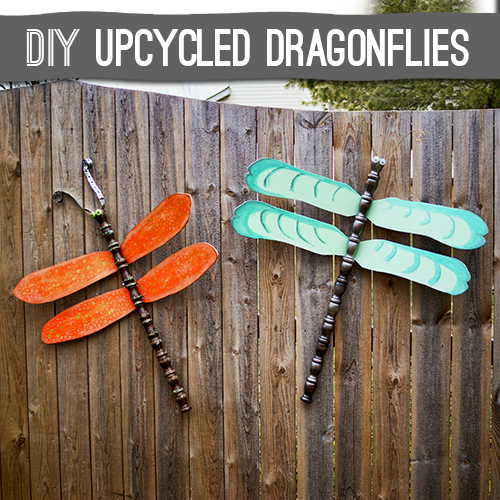
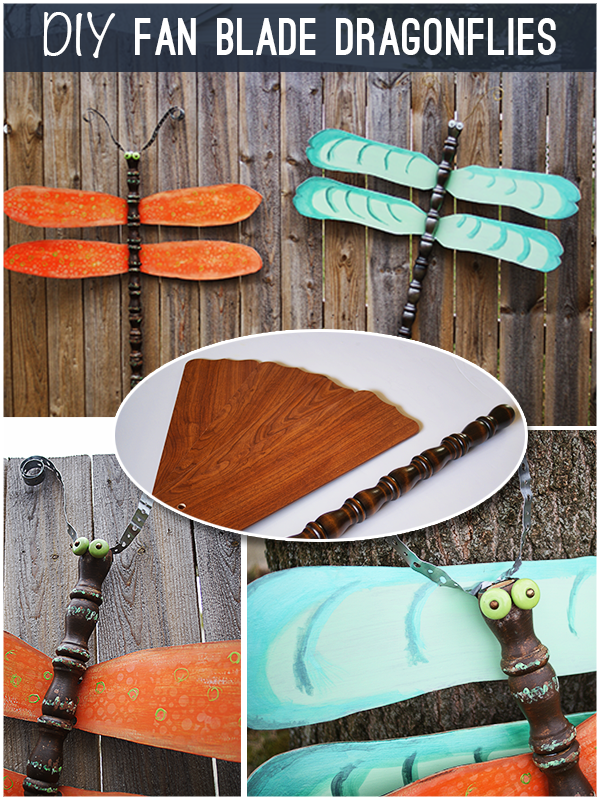
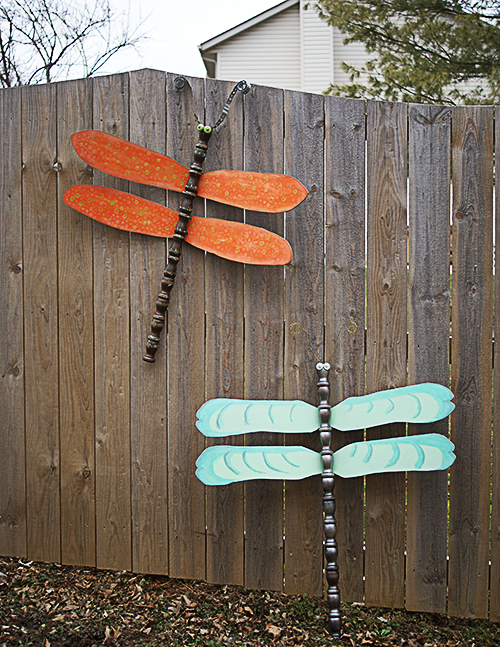
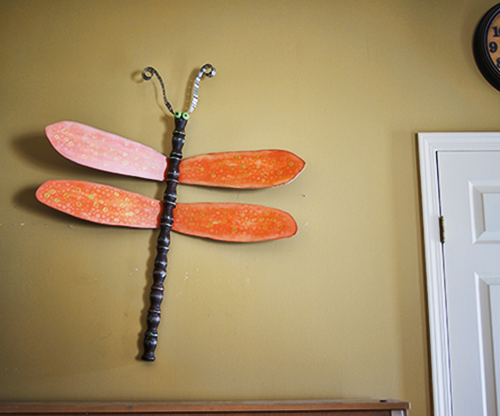
Since the first time I saw Lucy’s fan blade/table leg dragonflies, I have been dying to make my own.  Today, I will show you how I used ceiling fan blades and spindles for this fun, cheap, and easy to create upcycled decor project.

[pinit]

Make #upcycled dragonflies from fan blades #tutorial @savedbyloves

[pinit]

SUPPLIES:

Dragonflies8

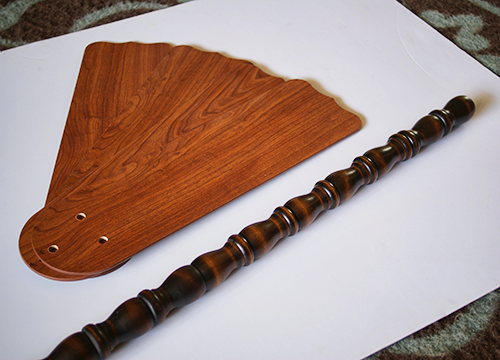
Fan blades (I found some at Goodwill and Habitat Restore for just a few dollars)

Table leg or spindles for body (I found a box of these at Habitat Restore and snatched them up, knowing I would find a use for them)

Sandpaper

Lint free cloth

2 hinges per dragonfly

Hardware for eyes and antennae

Paint in colors desired for wings and body

DIY #upcycledDecor

  TUTORIAL:

How to repurpose fan blades

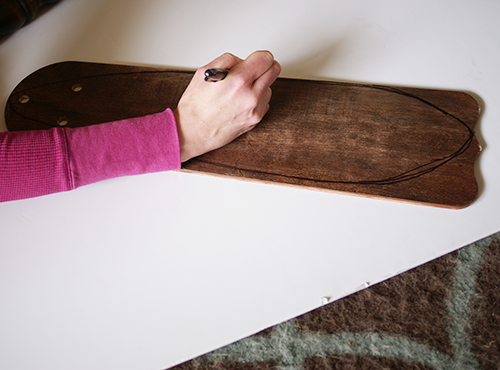
Lightly sand your fan blades and body (table leg, spindles or whatever you find).  Use a permanent marker to draw the shape you want on your wings.


Scroll Saw DIY project

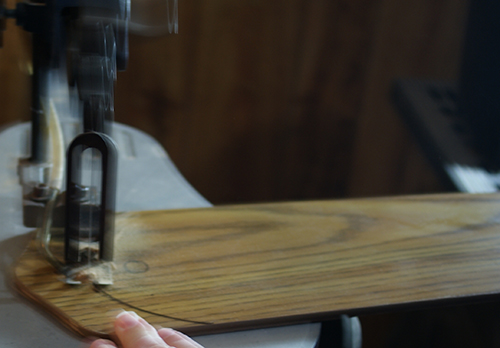
Cut along line with scroll saw or jig saw.  Clamp 2 or more fan blades together to cut more than one wing at a time if you want them all exactly the same.


#Recycledcrafts, upcycle project idea

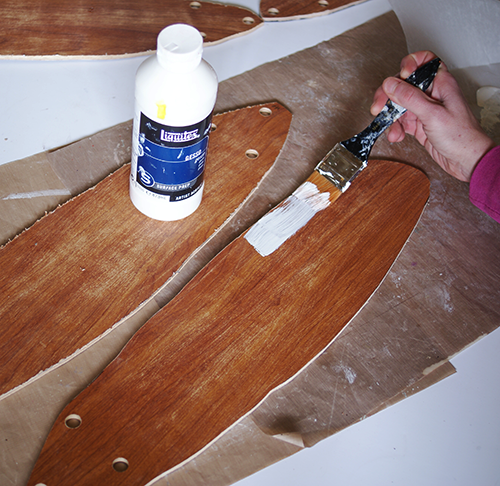
Wipe the debris and dust away from blades with damp cloth.  Let dry and apply coat of gesso or primer.


Martha Stewart Craft Paint project

After gesso dried, I painted Martha Stewart Craft Paint satin finish, color Carrot.

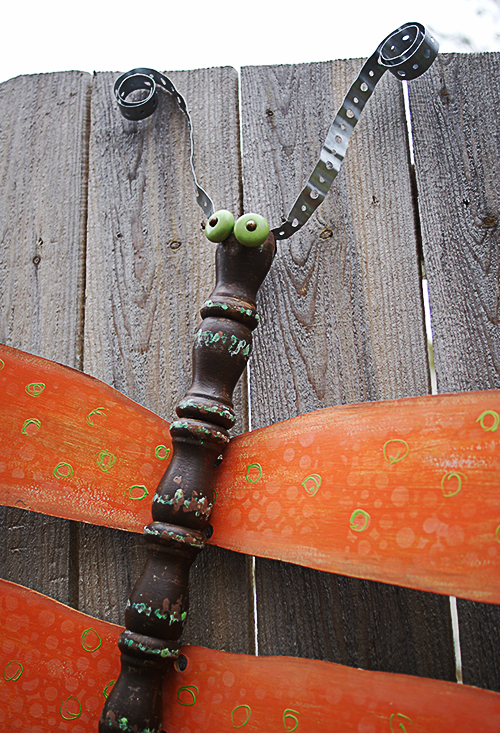
I painted haphazardly to let the gesso show through on purpose.  This dragonfly was going for a distressed look.


Color Box pigment ink

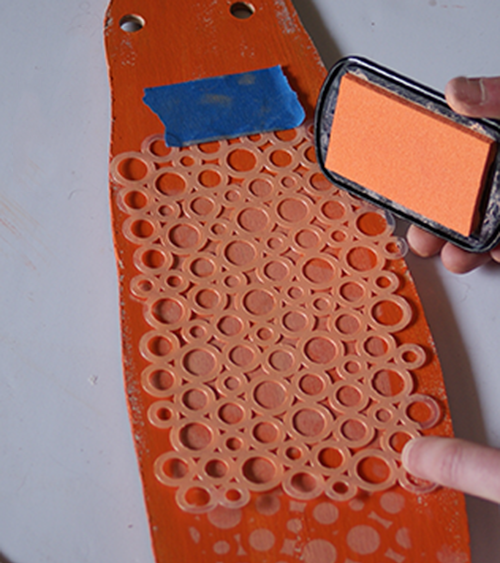
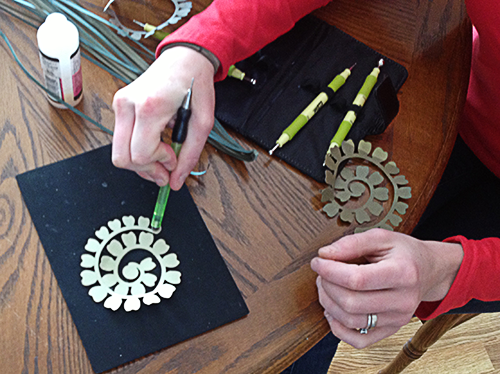
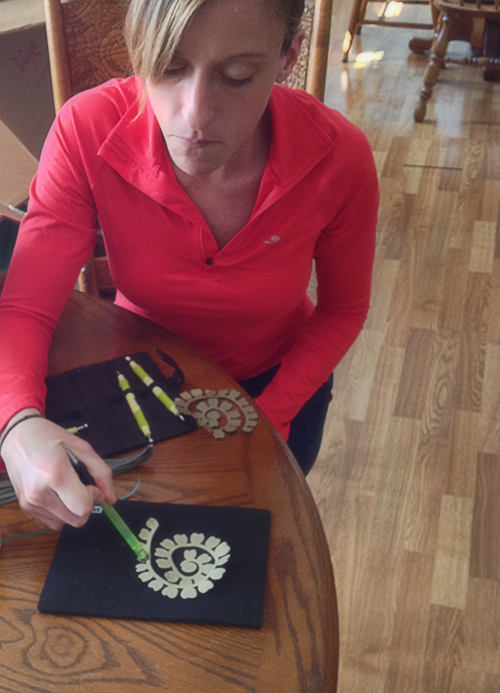
Using Color Box pigment ink, color sweet melon, I stamped over The Crafter’s Workshop Cosmic Bubbles template to create the design on the wings.

I went around the wing edges with the sweet melon ink pad and blended the stamped design into the edges with my finger.

I used my heat tool to dry the pigment ink, then sealed the wings with Mod Podge Clear acrylic sealer.


DIY upcycle crafts

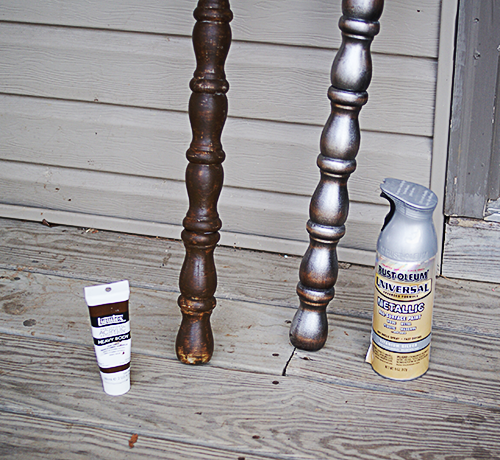
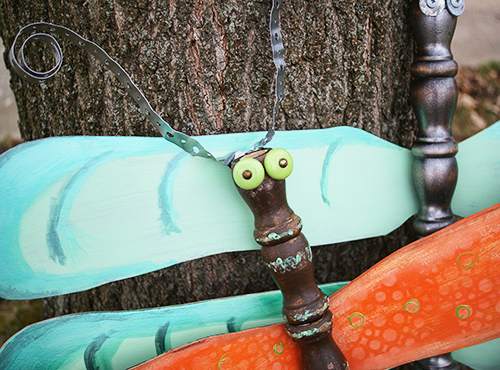
I used Liquitex heavy body acrylic paint in raw umber for the base
coat on one body, dry brushing lime green acrylic paint and aqua acrylic paint randomly for  a distressed feel.   The other body was sprayed with Rustoleum in metallic silver.


Make #upcycled dragonflies from fan blades #tutorial @savedbyloves2

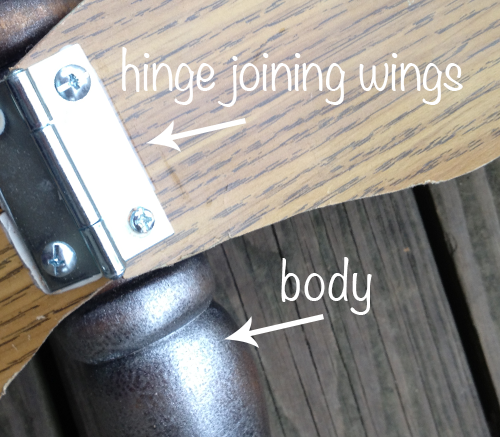
I used a hinge to join the wings to each other, and to the body.


Dragonflies4

Make #upcycled dragonflies from fan blades #tutorial @savedbyloves


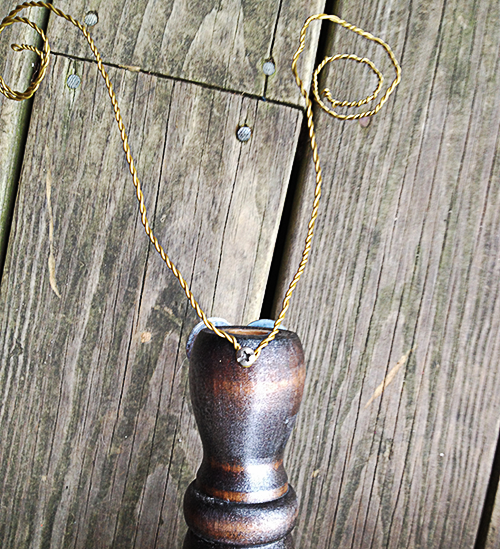
 The eyes are drawer pulls on the orange dragonfly, and washers with screws on the blue one.  Leftover antenna strap from my hubby’s stash and craft wire were used for the antennae.


DIY #outdoordecor repurposed dragonflies


 Hang them inside or outside!

#Upcycle #repurpose

What do you think?  Do you have any fan blade repurpose ideas?

Glow Paint Rocks

#DIY illuminated pathway with rocks and glow paint, @savedloves

[pinit]

If you are looking to create an amazing outdoor space, this illuminated pathway spotted at Sublime Decor is a perfect starting point.  They painted rocks with Rustoleum Glow in the Dark brush on paint.  The sun charges them up during the day so that they shine at night.  How cool, and easy!

Crochet Ombre Coasters

#Crochet Ombre Coasters by WInk, found at Craft Tuts+, @savedbyloves[pinit]

Are you ready to add a quick, gorgeous splash of color to your home decor, and welcome in the spring?  These ombre crochet coasters are just the project.  Wink shares the easy crochet pattern at Craft Tuts+.  I am in the middle of a crochet chevron blanket I started like 8 thousand years ago, and just can’t bring myself to finish.  It is going to take so long.  That is why I love quick, gratifying projects like this.  Sometimes crochet home accessories can look hokey, but these I would proudly display.  Pick your favorite color in various shades and join the ombre craze!

More Ombre, you asked?  Sure…

50+ #OmbreCrafts to make from @savedbyloves

Make Cool Upcycled Zipper Bracelets

Make #Upcycled Zipper bracelets 5 ways at Brit + Co, featured @savedbyloves

[pinit]

Did you know there are at several ways to upcycle old zippers into chic, eco-friendly bracelets?  It is true.  Brit + Co shows you how in 5 Ways to Turn Zippers into Awesome Arm Candy.  The black and gold above is my favorite.  Head over for the rest.  This is the perfect project for a quick, inexpensive gift or accessory for your own wardrobe.

For plenty more DIY bracelets, see SBLC’s bracelet tutorials, and our 50+ bracelet roundup!

50+ Candy Wrapper Crafts

[pinit]


Over 50 Candy Wrapper Crafts to make #DIY from @savedbyloves
[pinit]

This week’s 50+ is all about candy wrapper crafts.  There are tons of things to make from them.  Just in time for those Easter candy wrappers, get ready to create luminaries, vases, decoupage, jewelry and more!


Knock Off Craft Store Easter Wreath

[pinit]#Easter Wreath #DIY from @savedbyloves

[pinit]

I saw this wreath a Joann’s a few weeks ago and decided I could make one.  Had I thought it through, I may have just bought theirs with a coupon, but where is the challenge in that?  I used a 16 inch grapevine wreath that I picked up along the way somewhere, some moss I believe I got at the dollar store, and speckled eggs from Joann’s.  My trusty glue gun holds it all together.  I kinda love it.

The inspiration:

Joann's Easter Egg Wreath

My Knock Off:

#Easter Wreath #DIY from @savedbyloves

Don’t forget to check out our 75 Easter Projects Roundup:

75 Easter Crafts to Make @savedbyloves

Make Adorable Ear Cuffs

DIY Earcuffs from wire

Wire work has always intrigued me.  There are so many things you can create with it.  Check out these cute earcuffs from wire at essasfrescurites.com.

Spring Printable Chevron Bunting

Chevron Printable #SpringDecor #Garland @savedbyloves

Are you as anxious for warm weather to arrive as I am?  It is time to update that winter decor to bring in the spring!  Someone needs to tell the snow that its time is up around here.  I went for some quick, easy printable chevron garland this year.  I found the perfect gray and yellow chevron printable bunting flags from Detail Oriented Diva!

I just uploaded them to Snapfish and ordered them for 1 hour pickup at my local Walmart.  The cost was $15.  I got 5 8×10 prints.  In retrospect, I should have just thrown them on a flashdrive and had them printed at my local Office Depot or Staples on cardstock for about half that price, but there is always next time.

How to Make #Easter #Bunting

This is what the prints looked like.  I just cut them out with a straight edge and craft knife.

Printable Easter Garland

Detail Oriented Diva shows you how to use bias tape and sew your bunting.  I went for jute twine and white tiny clothespins.  Super lazy, it’s true, but I love the look.  I also like that I can change the distance between the flags to fit whatever space I am using the bunting to decorate.

How to decorate for spring

What do you think?  Have you started decorating for spring yet?

For more garland and bunting ideas, check out our roundup!

Over 50 bunting and garland projects to make


50+ Things to Make From Your Photos

50 Plus Things to Make with Photos

Today I am sharing with you over 50 ways to craft with your special photos. There are projects from home decor to jewelry and more. What better gift idea than a custom photo handmade treasure? If you have photo crafts that I missed, leave a comment with the link!


Paper Flower Topiaries With Sizzix

[pinit]

Make #Sizzix paper flower topiaries for #Spring @savedbyloves

[pinit]

Make #Sizzix paper flower topiaries for #Spring @savedbyloves[pinit]

3D flower dies from Sizzix are some of my favorite die cuts to use.  I was thrilled to find a new die this weekend while at Michaels.  These fun green and yellow spring topiaries are my first project using them.  This project is simple, but I won’t lie, it is not quick.  I had a little help from my sister and husband, who shaped petals for me as I rolled the flowers and pinned them to the topiary shape.

SUPPLIES:

Sizzix Sizzlits Die – Flower, Rose 3-D

Cardstock in your favorite colors

Glossy Accents

Straight Pins

Topiary Form (got mine at Walmart recently; you could use a stryofoam sphere and dowel rod)

Pot (Got mine at the dollar store last year)

Green moss or other filler

Stylus with large ball or other rounded end (like a pen or sharpie)

Foam pad or mouse pad

Tutorial:

Cut several, I mean way more than you think you’ll need, 3d rose shapes using the Sizzlits die linked above.  I used Coordinations paper in several shades of yellows and greens.  With the Sizzlits dies, you can only cut one piece of cardstock at a time, so get cozy.  I have done a similar project here with the Sizzix Originals 3D rose die, which cuts through several layers of cardstock at a time.  I really wanted to use this shape die though, so I just cut one shape at a time.

Shape the petals with a rounded end stylus ball, or whatever you have on hand that works.  I figured out I really liked the shape of the flower if I pushed in the 7 outer petals of the spiral, then flipped it over and pushed in the remaining petals.  I roll the flower into shape so that the outer petals of the spiral (which become the center petals of the 3D flower) curl inward towards the center like in a real rose.  The remaining flowers bloom outward like a blossoming rose.  I don’t have detailed pics of this, so I hope that makes sense.

This pic shows me starting on the outer petals of the spiral (central petals in final rose).

Shaping paper flower petals

To shape them I just press hard in the center, and draw tiny circles with my stylus ball.  The flower petal “cups”.  I do this for the first 7 petals, then turn the spiral over and do the same thing on the remaining petals.

Make #Sizzix paper flower topiaries for #Spring @savedbyloves

Roll the flower from the outer petals to the center, keeping the bottom strip at the base of the petals aligned.  When you get to the end, glue the tab you see at the center to the base of your flower.  I like to use Glossy Accents for this since it dries so fast and holds great with paper to paper.

Once I had 10 flowers made, I pinned them to the topiary with a straight pen through the center and continued this way until the spheres were full.

Make #Sizzix paper flower topiaries for #Spring @savedbyloves

Make #Sizzix paper flower topiaries for #Spring @savedbyloves

Privacy Policy