
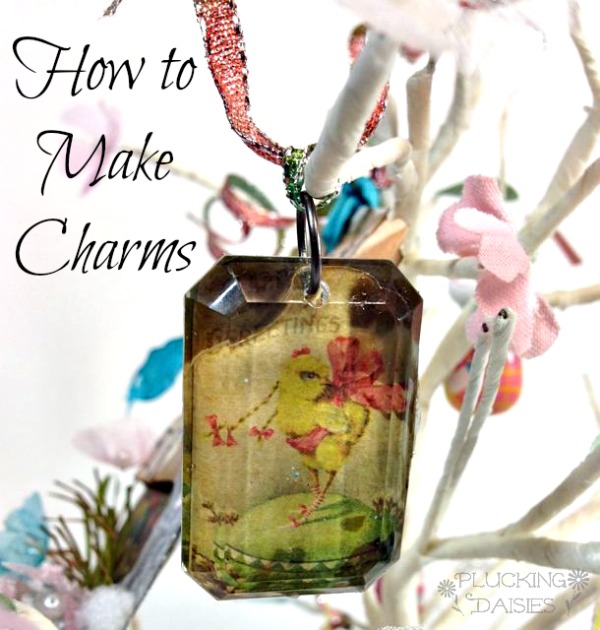
Happy spring time SBLC friends! Amy here from Plucking Daisies to share with you how to make some sweet springtime charms. These charms are super easy to make and use for a variety of crafty ventures! You can use them for custom jewelry pieces, ornaments or even wine charms for your Easter Brunch or spring celebrations!
I used my charms to decorate an Easter Bunny Tree. They are a lovely addition to my spring table decor and oh so charming!

How to make Charms
You can make your own charms for adornments, jewelry, gifts and pretty much anything you can dream up. Grab your favorite images and prepare to be “charmed”!
Supplies:
Tim Holtz Idea-ology Facets or Fragments
Glossy Accents
Images or Photos (copies NOT originals)
Ribbon or Chain
Alcohol Ink
Ranger Foil Tape Sheets
Adhering Images to Charms
You can select any image you like to use when making your charms, a favorite photo (color copy), old greeting cards, a childs artwork…the possibilities are truly endless! For my charms I used these delightful vintage Easter Images from Tim Holtz Seasonal Paper Stash.
STEP 1: Apply Glossy Accents to the back of your charm and press down onto image.
STEP 2: Flip paper over and use a credit card or craft scraper to press out any air bubbles.

STEP 3: Allow to dry for several hours then trim off excess paper.
Create Metal Backing for Charms
To finish and complete the look of your custom charms you can easily create a metal backing with Ranger foil tape sheets. Not only will the foil tape enhance the look of your charms, it will also smooth any rough edges and ensure your image stays put.
STEP 1: Ink a sheet of Ranger Foil Tape with Alcohol Ink. I used: Shell Pink – Salmon – Citrus – Aqua

STEP 2: Emboss Alcohol Inked foil tape with Sizzix Embossing Folder. *I used Sizzix Dots and Flowers set A2

STEP 3: Peel away the backing of your embossed foil tape and press cut out charms onto it. Cut around the charm leaving a slight edge all the way around. Fold edges over onto charm to secure your image.
Hanging Charms
Now that your charms are complete you will need to hang them. Whether you will be using them for jewelry, gift wrap or decor you can customize how you hang them just as easily as you made them!
STEP 1: Add Jump Rings
STEP 2: Reapply Alcohol ink to blending tool and stamp (DON’T swipe) onto Metallic ribbon.

Use your stamped ribbon to create pendants, ornaments or “Charming” gift toppers!
 I hope you enjoyed this little lesson in Charm making and will take what you learned to make some “Charming” gifts, jewelry and decor! Thanks for having me back at SBLC! Until next time…
Have a Charming Day!
Amy*
