Archives for February 2013

Faux Pallet Easter Canvas DIY

[pinit]

Make Faux Wood Pallet Art #Easter @savedbyloves

[pinit]

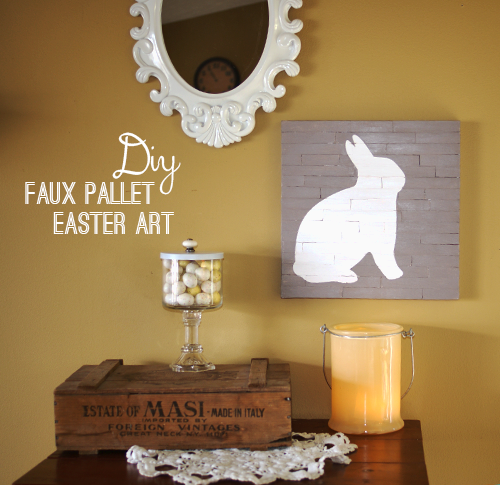
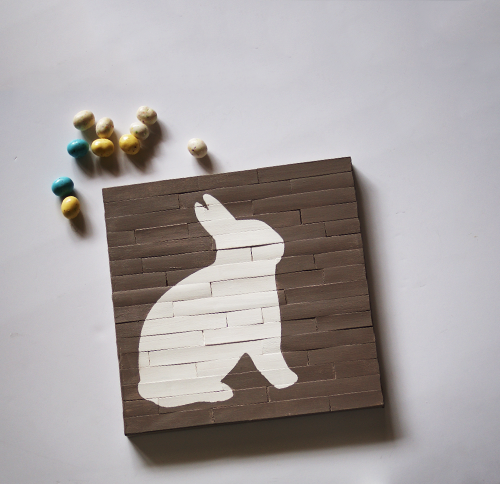
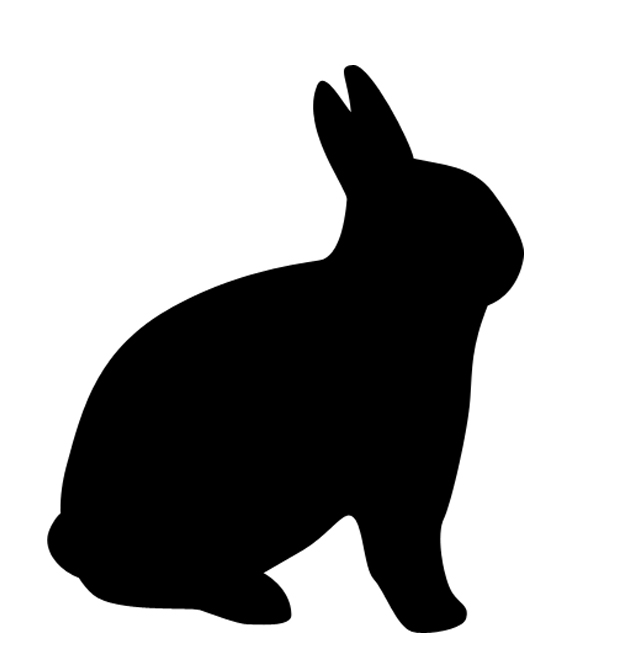
Today’s project is a fun, simple Easter decor DIY.  Use jumbo popsicle sticks  and an old canvas to create faux wood pallet bunny silhouette wall art.  The inspiration for this project came from Laura at The Shed Blog, and her Mini Pallet Art tutorial.  I loved her end result so much that it is now on my wall (an endearing story I shared with you here).

Make Faux Wood Pallet Art #Easter @savedbyloves

SUPPLIES:

Jumbo Craft Sticks

Fabri-Tac craft glue

An old canvas (can be used; grab one for cheap at a garage sale or thrift store)

Bunny Silhouette

Die cut machine or printer and scissors

Clear contact paper or vinyl for die cut machine

White Gesso

Sponge brush

Acrylic paint in choice of colors

TUTORIAL:

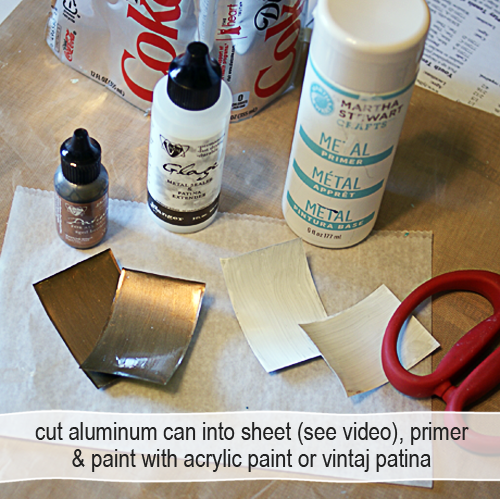
Head to Laura’s post for a detailed description.  Here is a photo montage of what I did.  She has some great tips for removing the paint between the craft sticks.

Easter decor tutorial Faux Wood Pallet canvas @savedbyloves

What do you think?  I love it and it is super inexpensive to create.  Won’t take you very long either.  This is a great project for each holiday.  Just swap out the silhouette for the current theme and make cool art for the whole year round.

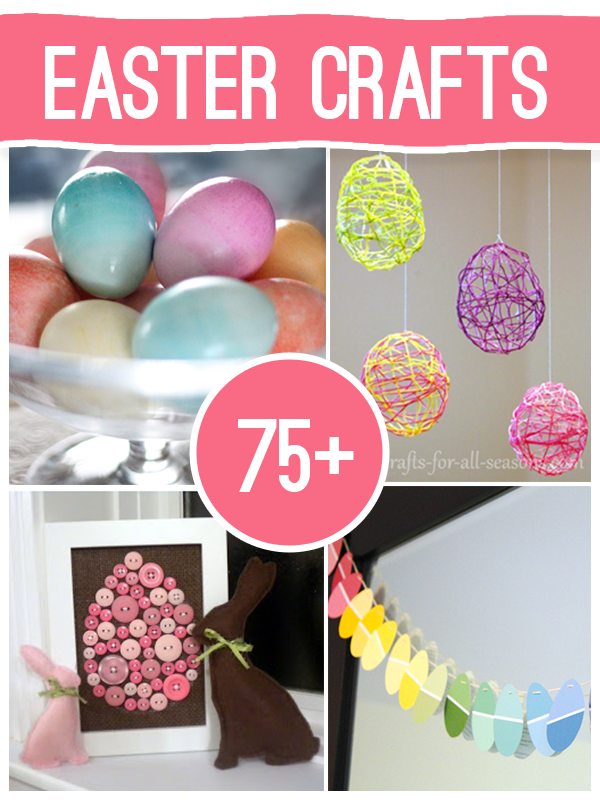
Don’t forget to check out our 75 Easter Projects Roundup:

75 Easter Crafts to Make @savedbyloves

DIY Pendant From Aluminum Can

[pinit]How to make an aluminum can embossed chevron pendant #Upcycle #DIY #Jewelry @savedbyloves

[pinit]

I gave a teaser of this pendant on my Facebook fan page awhile back, and asked you to guess what I used to make it.  There were several guesses, and one of them was right.  It is an aluminum can.  The process was pretty simple.  I used Vintaj Patina metal paints and a chevron embossing folder in my Sizzix.   Use any image or photo for your custom, eco-friendly pendant.   This post shows you how…

How to make an aluminum can embossed chevron pendant #Upcycle #DIY #Jewelry @savedbyloves

I showed you how to cut aluminum cans in this video:

Use a heart paper punch to punch a heart in the middle of what will be the front of your pendant, then emboss front and back triangle with chevron or desired embossing folder:

AluminumCanResinHeartPendant2

how to emboss metal

I used aged bronze Vintaj paint, then aqua over that, and sanded to give a distressed look.  Seal with Vintaj Glaze.

For the image, I printed it on cardstock with laserjet, hand doodled with Pitt Pen and added Tim Holtz word sticker with Glossy Accents.  I sealed the entire image with Mod Podge and sandwiched it between front and back pendant rectangle.  Then I used my metal punch to place holes in top on both sides and the center of all 3 layers (hammer and nail would work too).

The middle hole is for the jump ring to attach the pendant to the chain.  Using the side holes, I riveted the pieces together like this video from Beadaholique shows:

That is it!
How to make an aluminum can embossed chevron pendant #Upcycle #DIY #Jewelry @savedbyloves

While you are here, don’t forget to check out our Aluminum can craft roundup:

AluminumCan50plus copy

50+ Ways to Repurpose Utensils

50+ Ways to Repurpose Silverware Utensils @savedbyloves #Upcycle

Did you know there are tons of ways to repurpose forks, knives and spoons?  I had no idea until putting this list together, which consists of everything from jewelry to home decor and more.  If you have a utensil repurpose that didn’t find its way onto the round-up, just leave a comment with the link.

Here are few of my faves, then the complete 50+!

[pinit]

50+ Ways to Repurpose Silverware Utensils @savedbyloves #Upcycle[pinit]


Upcycled Baby Food Jar Planter

Upcycled Baby Food Jar Planter by Make Life Lovely, featured @savedbyloves

This is not what I had planned to share with you today, but when I saw this upcycled baby jar planter at Make Life Lovely, I just couldn’t help it!  This is on my to do list for the summer.  It is a super simple project.  Head to the link above to get the step by step photo tutorial!

Want more jar upcycle ideas?  Check out our 75 mason jar decor ideas:

75 Mason Jar Craft; The original roundup from @savedbyloves

Harlequin Bracelet DIY


[pinit]Harlequin Bracelet with Mod Podge DIY by My Poppet, featured @savedbyloves

[pinit]

My Poppet has shared a great DIY harlequin bracelet tutorial, using Mod Podge and a few other supplies.  No special skills needed, and you can have your very own handmade arm bling.  If there is anything I love as much as bracelets, it may be harlequin!  Head over for the how to.

Thrifty Stashy SNAP! Swap

[pinit]SNAP! 2013 Swap for attendees @savedbyloves @snapconf @pluckindaisy

[pinit]

My friend Amy at Plucking Daisies  and I are so excited to be attending SNAP! this year, that we have come up with a way for us all to have some fun and get to kn0w each other before the April event.  If you are attending, this post is for you.  Just sign up in the link list below to participate.  Participate in what, you ask?  A chance to get to know, create with and promote one another before the big event.

WHAT:

Each participant will be randomly paired with another SNAP attendee.  Pairs will be announced  March 1st, so make sure you sign up below by then.

When you find out who your partner is, shoot them an email and let them know what your favorite crafting supplies are, and what you look for when you go junkin’, and your mailing address.

Raid your stash for anything you may want to send your new buddy, and head to the thrift store with them in mind.  Spend a max of $15 on junk, box it up with what you may have found in your stash, and mail to your partner no later than March 8th.

When you get your box of take pictures, create and share on your blog.  You can do a tutorial or whatever you like, and make sure to mention and link to the blogger who sent you your box.  Everyone will receive code for the linky to include at the end of their posts.  That way we are promoting each other both by linking to our partner, and by a link list of everyone’s final posts!

Link to your blog homepage, and include your name and email!


Old Socks to Fingerless Gloves

old Socks To fingerless Gloves @savedbyloves

Have your worn your favorite socks to the point of holes and you are just not ready to part with them?  Why not turn them into fingerless gloves, with this simple DIY?  You will have your own unique custom gloves for next to nothing, and you will have saved your holy socks from being tossed in a landfill!

Upcycle old socks to fingerless gloves in this EASY diy @savedbyloves

You will need:

Fabric scissors or rotary cutter and mat

old socks

sewing machine

chalk pencil

Tutorial:

Cut off socks above ankles at length you want your gloves.

Turn Socks inside out.

Sew three “Vs” on raw edge for 4 fingers (see photo).

Cut between stitched V’s to create fingers.

Put on glove and mark where thumb is.

Cut 1/2 inch slit for thumb.

Wear!

[pinit]

Turn old socks to Easy fingerless gloves @savedbyloves

[pinit]

{if you don’t want frayed edges, whipstich them}

Over 50 Projects to Make With Grungeboard

[pinit] 50+ Grungeboard Projects to Make @savedbyloves

[pinit]

If you have never used Grungeboard, the best way I can describe it is chipboard that you can abuse, twist, sand and color for some amazing effects.  I have used it in several jewelry projects as it is so flexible and durable, and can be cut with my sizzix dies.  I searched out some fantastic projects using this eco friendly material from Tim Holtz.

Check out he describes it in this quick video…

50+ Projects Using Grungeboard


Make Fabric Scrap Bracelets

[pinit]

Easy DIY Scrap Fabric Bracelets

[pinit]

Today I am excited to share a simple scrap fabric project that leaves you with a gorgeous braided bracelet.  If you can braid and glue, you can make this!  I used leftover scraps and a white tea towel which I sprayed with Dylusions ink.  The great thing about these bracelets is you can use any fabric and go crazy with colors to fit your style.  T-shirts, old sheets, vintage hankies, lace, ribbons  would work great.  Make several for gifts.  They work up quickly and easily!

Let’s get started…

ScrapFabricBracelet1

SUPPLIES:

Fabric scraps

Fabric scissors or rotary cutter and mat

End caps or wire and cones (see link in tutorial for what to do if you don’t have end caps)

Industrial strength glue (pictured in tutorial is Fabri-Tac, which did not hold, so I ended up using E6000 which holds about anything to anything but is stinky)

Jewelry findings: Jump rings and toggle clasps

Sewing thread

Easy Scrap Fabric Bracelet DIY from @savedbyloves #DIY #Jewelry #Upcycle

TUTORIAL:

Cut fabric into strips about 10 inches long and 1-3 inches wide (depending on how thick your fabric is and how chunky you want your bracelet).

Using three strips per bracelet  :Gather the strips and tie knot at one end with 15 inches of thread, leaving an inch tail of the fabric strands.

Wrap thread around several times at the top of the braid and double knot, then trim excess thread. (For a detailed photo tutorial of this part, see my kumihimo tutorial)

Braid the three strands until bracelet is about one inch shorter than you want the finished piece to be.

Wrap thread around 10-15 times like you did at the top, then knot and trim excess thread.

Put a dab of glue on the thread for added security and cut off each end of fabric braid right up to the thread. (NOTE:  if you want to use wire and cone beads instead of end caps, see the kumihimo tutorial I mentioned previously).

Put glue in end caps and insert each end of braided strand into an end cap.

Attach toggle clasp with jump rings.  You can add charms if you like.

The End!

ScrapFabricBracelet4

Make Instagram Photo Blocks

Make DIY Instagram Photo Blocks at Intimate Weddings, featured by @savedbylovesI am loving these tiny Instagram photo blocks, shared at Intimate Weddings.  The project is similar to scrabble tile pendants that have been so popular over the last several years.  They are super easy to make, and could be used to create custom photo pendants and embellishments for cards, decor and art!

Privacy Policy