Archives for October 2012

Black Licorice Wreath DIY

Make a #HalloweenDIY Wreath from Licorice and paint chips @savedbyloves

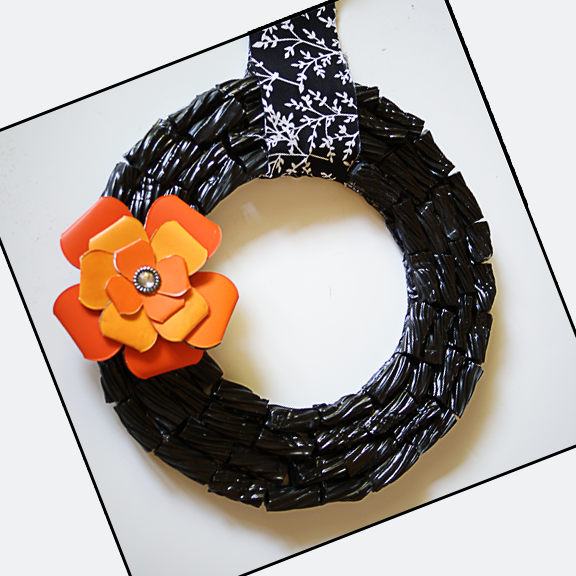
This project began as an idea I had to create a Halloween wreath from black jelly beans.  I couldn’t find any of those, and ust when I was about to abandon the plan, I spotted these little black licorice bites at the dollar store.  The rest of the story is pretty self explanatory.  I cut a wreath form from cardboard like I showed you in this fall wreath tutorial.

Make a #HalloweenDIY Wreath from Licorice and paint chips @savedbyloves

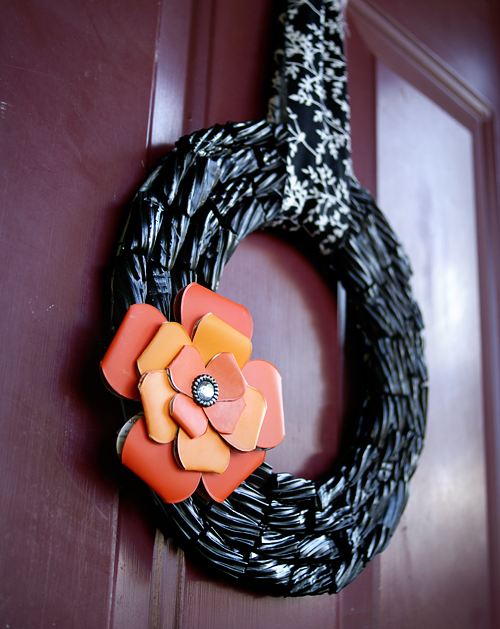
To adhere the licorice, I began, admittedly, with a hot glue gun.  Um…no.  That was not my smartest moment.  As you can imagine, the glue melted the candy, and no adherence occurred.  I then tried tacky glue, which also reacted with the candy and didn’t stick.  Finally, I went for super glue.  That did the trick!

Make a #HalloweenDIY #Wreath from Licorice and paint chips @savedbyloves

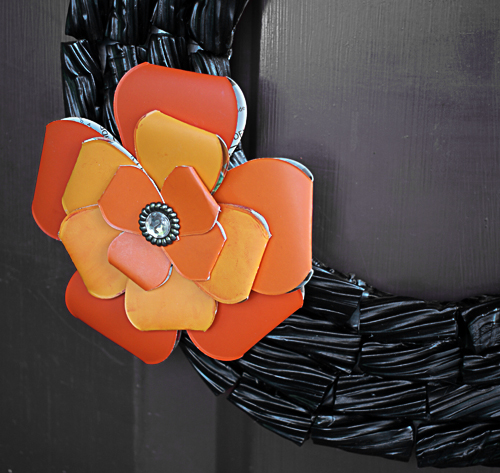
The flower I made from orange paint chips, using the Sizzix Create a Bow Die.  I used super glue to adhere it to the wreath.  The hanging mechanism is a fabric scrap I had left over from another project.

Make a #HalloweenDIY #Wreath from Licorice and paint chips @savedbyloves

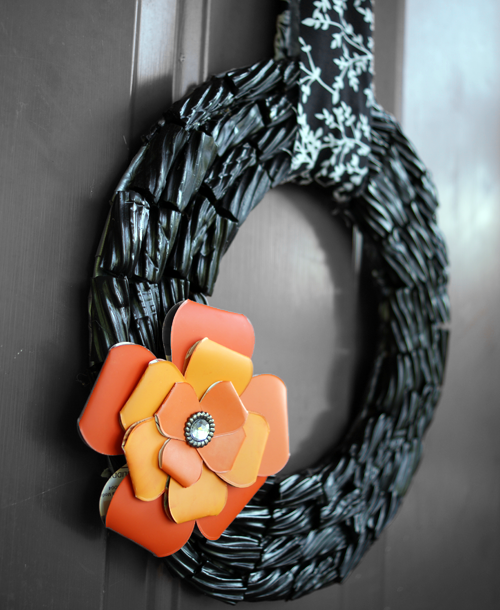
I’m happy with my wreath, and at $4 total, it’s completely affordable.  What do you think?  Are there black jelly beans where you live?  I think those would have been easier to glue.

How to Make an Altered Pendant

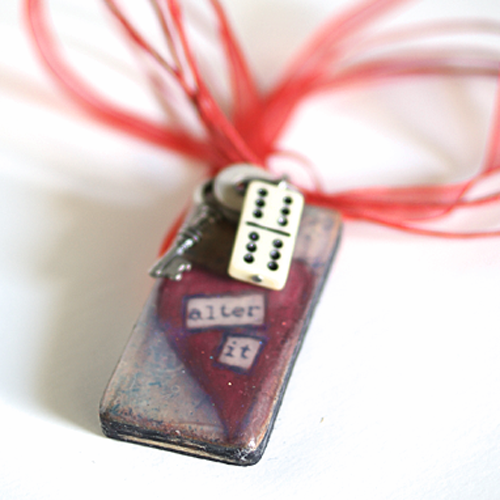
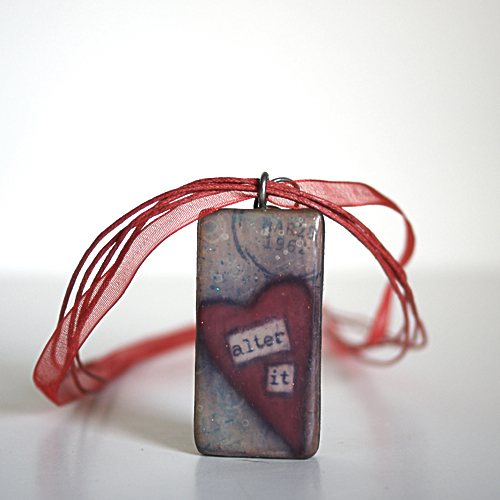
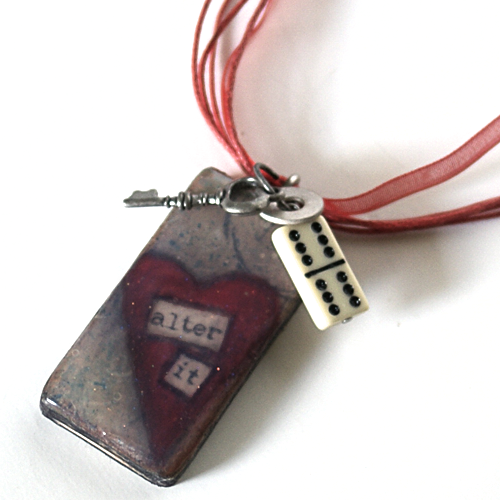
#Altered art pendant tutorial @savedbyloves #Jewelry #Handmade

This is another scroll saw project.  I cut a domino sized rectangle from 1/4 inch plywood as my pendant base.  I love altered dominoes, but they are often quite thick/chunky, and have embossed surfaces on both sides.  This makes it hard to adhere paper without having bumpy lumpiness.  Using 1/4 inch plywood solves these issues, and is super cheap.
SUPPLIES:

1/4 inch plywood rectangle 2×1 inches

Matte gel medium

150 grit sand paper

Small, detail paint brushes

Paper towels

Stamps of your choice

Stazon Jet Black

Glimmer Mist Turquoise Blue

Scrapbook paper 2×1 inches

Acrylic paint

Charcoal pencil

Mod Podge Dimensional Magic Glitter Silver

Tim Holtz Chitchat Stickers

Charms

Small Eye Hook or glue on bail

Necklace cording

#Altered art pendant tutorial @savedbyloves #Jewelry #Handmade

TUTORIAL:

  • Paint plywood rectangle with black acrylic paint and let dry
  • Adhere scrapbook paper with print of your choice to pendant base with matte gel medium (I traced my wooden rectangle onto paper scrap and cut out to fit)
  • Let dry completely (about 30 min) and sand edges to smooth and blend paper into wood (this took away some of the black paint on the sides, which is what I wanted since I was going for a distressed look)
  • Stamp as background paper as desired with black ink and spray with glimmer mist.  Let dry.
  • Draw heart with charcoal pencil and paint with red acrylic wash (mix small amount of red acrylic paint with a few drops of water and paint heart so that paper print still shows through – you may need to dab with paper towel)
  • Apply thin, even coat of matte gel medium and let dry 30 min (you can hurry this along with a heat tool)
  • Apply chitchat word stickers (i used “Alter it”) and outline with soft charcoal pencil.
  • Apply layer of matte gel and let dry
  • Outline heart with charcoal pencil and blend for shadowing with Qtip or blending nibs
  • Coat with matte gel a final time
  • Once dry, screw small eye hook in top for hanging mechanism, or glue on a bail
  • Apply Dimensional Magic Silver Glitter – For a domed look, apply thin, even layer and let dry for a couple of hours.  Then apply doming layer.  Let sit for 24 hours.
  • Add charms and string as desired


How to Make Bunting, Banners, Pennants & Garland

50 plus Banner, Garland, Pennant and Bunting Projects to make by @savedbyloves
This week’s roundup will give you plenty of holiday decor inspiration, with over 50 of the best garland, bunting, pennant, banner projects out there.  I remember when I first started making this kind of decor, and how confused I was about what to call my final piece.  Now I am not much more educated on the terminology, and I just use the words interchangeably!  Whether you use garland or bunting or pennant or banner, you will find some great ideas here.


Grungy Target Knock Off Printable & Display Tutorial


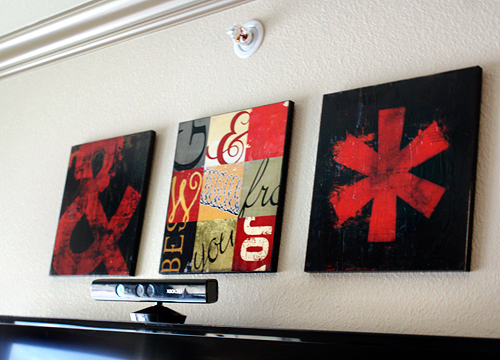
Grunge Wall Art Printable and DIY

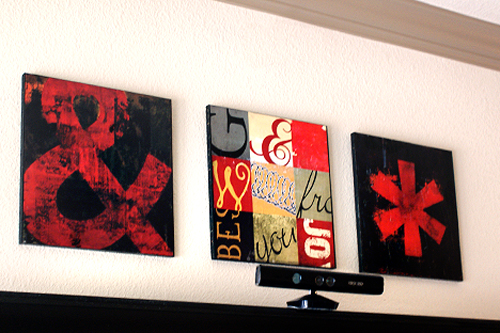
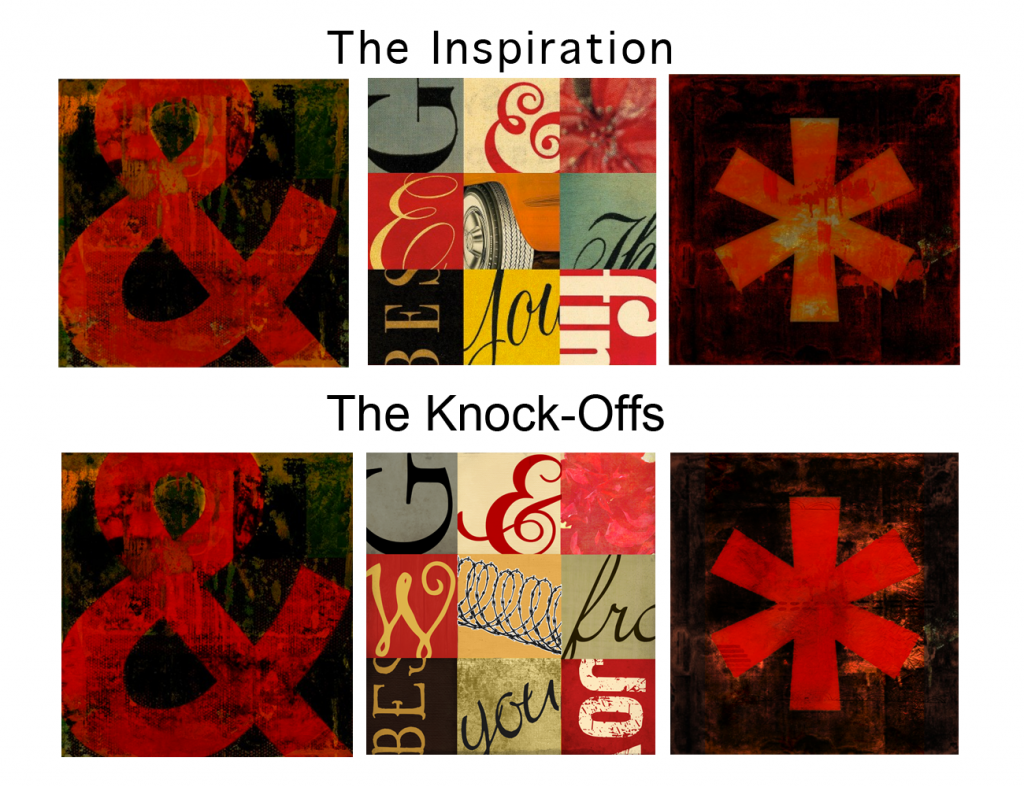
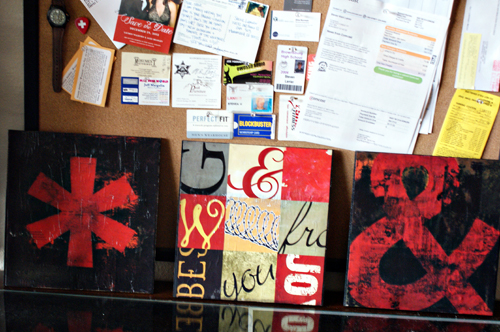
I recently had the opportunity to make a wall art trio while in Colorado visiting my stepson.  He commissioned me to create art from three salvaged particle board shelves to adorn the bare walls of his new apartment.  Graphic design and repurposing… I jumped at the chance.  After picking his brain to get an idea of the look he was going for, we got online and landed on three Target prints for the inspiration.  I opened Photoshop and got busy creating my version of his favorites:

Grunge Wall Art Tutorial and Free Printable

 You can recreate this set yourself for way cheap.  Here is how!

Target Inspired Grunge Art Printable and DIY Wall Art "Canvas" Tutorial

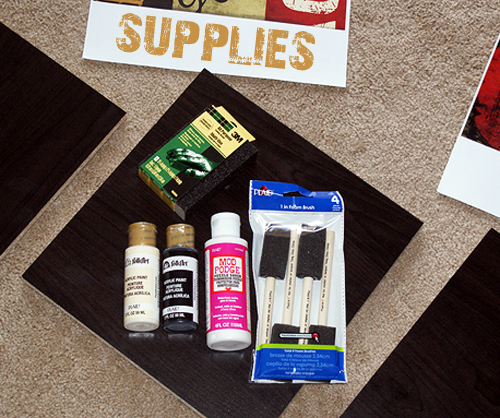
Supplies:

  • The graphics – right click each link to open the full resolution version and save to your computer.  Transfer to a flash drive and go to your local Staples, Office Max or other printer to have them printed on regular copy paper.  Office Depot and Office Max charge around $0.80 per 11×17 color copy, and Staples is a little more at just over $1.  You are looking at around $3 total for the prints.  The image size for each print is 11 x 11.5 inches since that is what the shelf size for mounting is.  If you want to resize or crop to a different aspect ratio, just pull the graphics into your favorite photo editor and have at it.  You should be able to resize to 12×12 inches without losing picture quality, but I wouldn’t go much bigger than that.


Ampersand

Asterisk
Collage


  • Mod Podge in finish of choice
  • 1 inch foam brush
  • Scrap wood (same size as your prints)
  • Black acrylic paint
  • Hanging Mechanism – We used Velcro brand removable picture hangers since they are damage free
  • Scissors
  • Sandpaper
  • Damp Cloth

Tutorial:

Grunge Printable Wal lArt DIY

Grunge Printable Wall Art Tutorial

Target inspired grunge wall art printable trio by printabledecor.net

Thank you for following along!  Visit me at Printable Decor for tons of, well, printable decor.  Be sure and submit your printables to be featured while you are there.


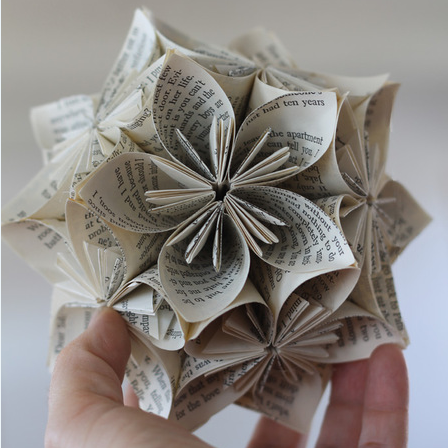
Book Page Origami Sphere

Book Page origami sphere featured @savedbyloves via Craft Foxes #PaperCrafts #Upcycle

There isn’t much I love more than paper crafting.  This project incorporates upcycling an old book.  It is doubly exciting.   It is a Kusudama sphere composed of 12 flowers that each contain 5 folded units.  There is a lot of folding that goes into this piece, so get comfy and head over to Crafty Foxes for the how to:  How to a Make Kusudama Sphere.

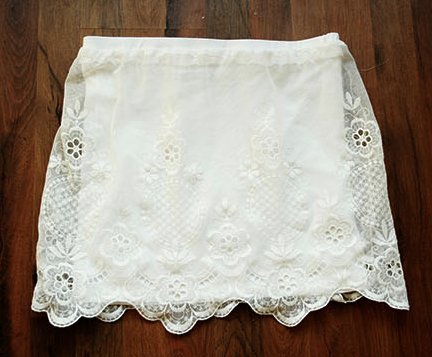
Make a Skirt from Lace Curtain

How to Make a Skirt from an Old Curtain by Wilma

I found this adorable skirt fashioned from thrifted lace curtains over at By Wilma.  What an adorable, vintage feel.  She makes it look super simple to create.  Even someone horrified of their sewing machine (myself included) could tackle this project!

David Tutera Coordinations

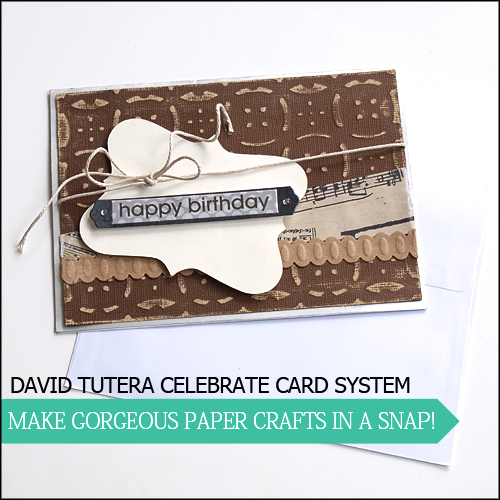
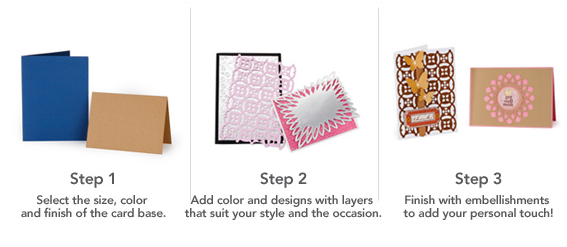
Have you seen the new line of David Tutera Paper Crafts yet?   If you don’t know, David Tutera is the host of My Fair Wedding.  He recently launched a line called Davide Tutera Celebrate, found exclusively at Joann Fabrics.  This is a simple card making system that lets you create beautiful handmade cards in 3 easy steps.

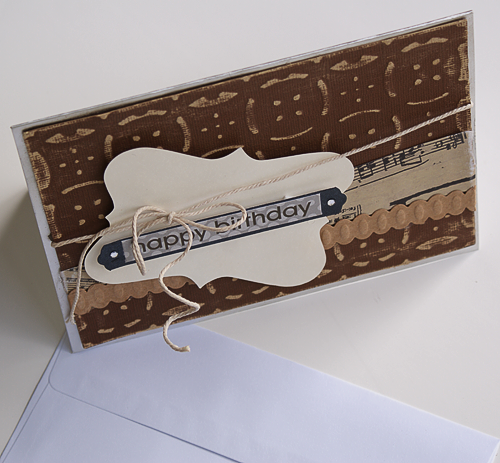
Happy Birthday Handmade Card David Tutera #TuteracelebrateThe day before my husband’s birthday, a box of supplies from the new line showed up at my doorstep.  I absolutely love the look of a nice handmade card, but rarely have the time it takes to make them.  This line of paper craft supplies allowed me to create a beautiful card in less than 10 minutes.  Husband was amazed, and had no idea I just threw it together!  All you need is the card base, a layer, embellishments and adhesive.  If you are using a sand-able embossed layer, you will need the Sand It Set as well.

Happy Birthday Handmade Card David Tutera #Tuteracelebrate

Here is how I made my card:

Happy Birthday Handmade Card David Tutera #Tuteracelebrate

You have a chance to win your own card making set…

*Three lucky winners will receive a $300 grand prize pack of supplies from
David Tutera’s Celebrate cardmaking line AND a personally signed book from David!
*20 additional winners will receive a $50 Celebrate prize pack.

For a chance to win, sign up at  http://pages.exacttarget.com/tutera-optin-blog/.  Good luck!

To learn more about the Celebrate line and Core’dinations, visit the Core You Tube page.
Also check out David Tutera Celebrate Facebook page and Twitter page!

DISCLOSURE:  I wrote this post as part of a paid campaign with David Tutera Celebrate and Blueprint Social. The opinions in this post are my own.

See what my crafty cohorts have created with this fantastic paper craft line!


Amazing Alcohol Ink Project Roundup

Things to make from alcohol inks from @pluckingDaisy

Alcohol inks have been a favorite medium of mine since first trying them a few years ago.  If you have never used these inks, get some and be amazed.  They come in an amazing array of colors, and are intended for use on non-porous surfaces like glass and metal.  I bring this up because my fabulous friend Amy at Plucking Daisies has rocked my world with this alcohol ink project round-up she has painstakingly assembled.  Grab some ink and explore this one of a kind list of the best projects incorporating this fun medium out there.

Make a Woven Belt Seat

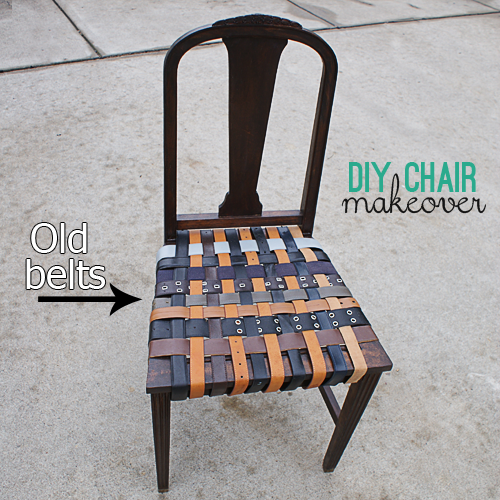
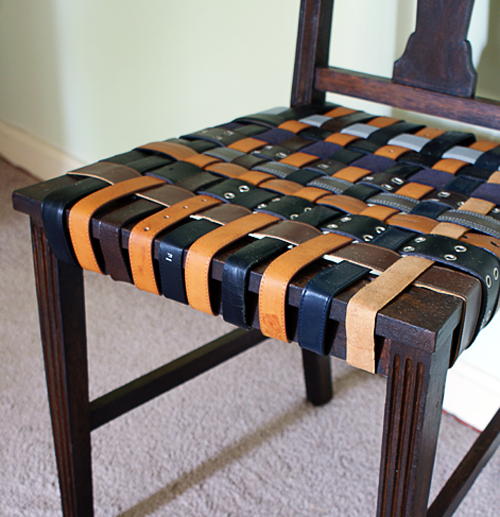
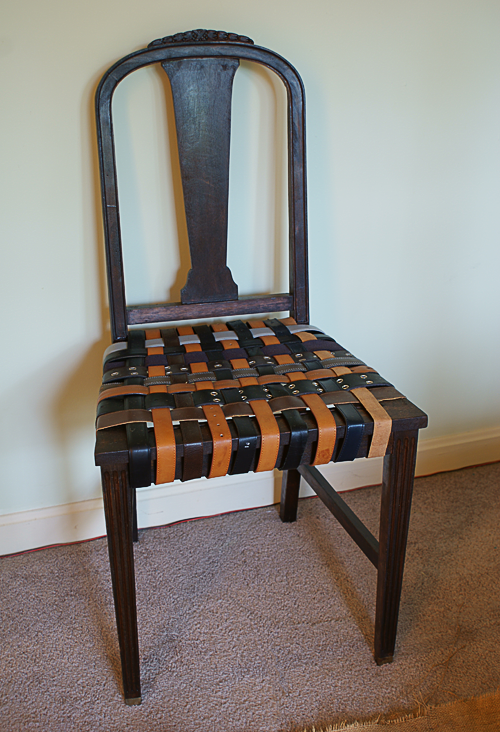
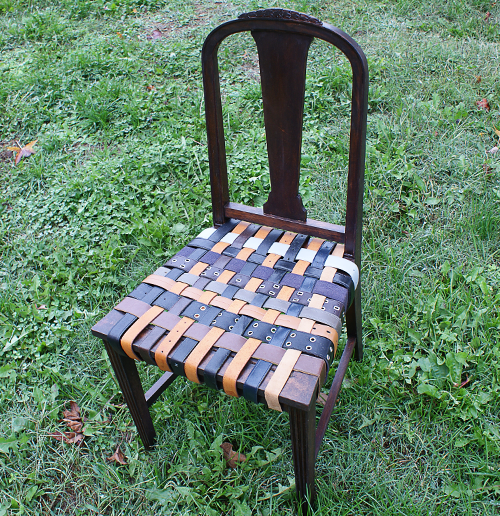
Reuse old belts for a chair makeover at @savedbyloves #repurpose #upcycle #DIY

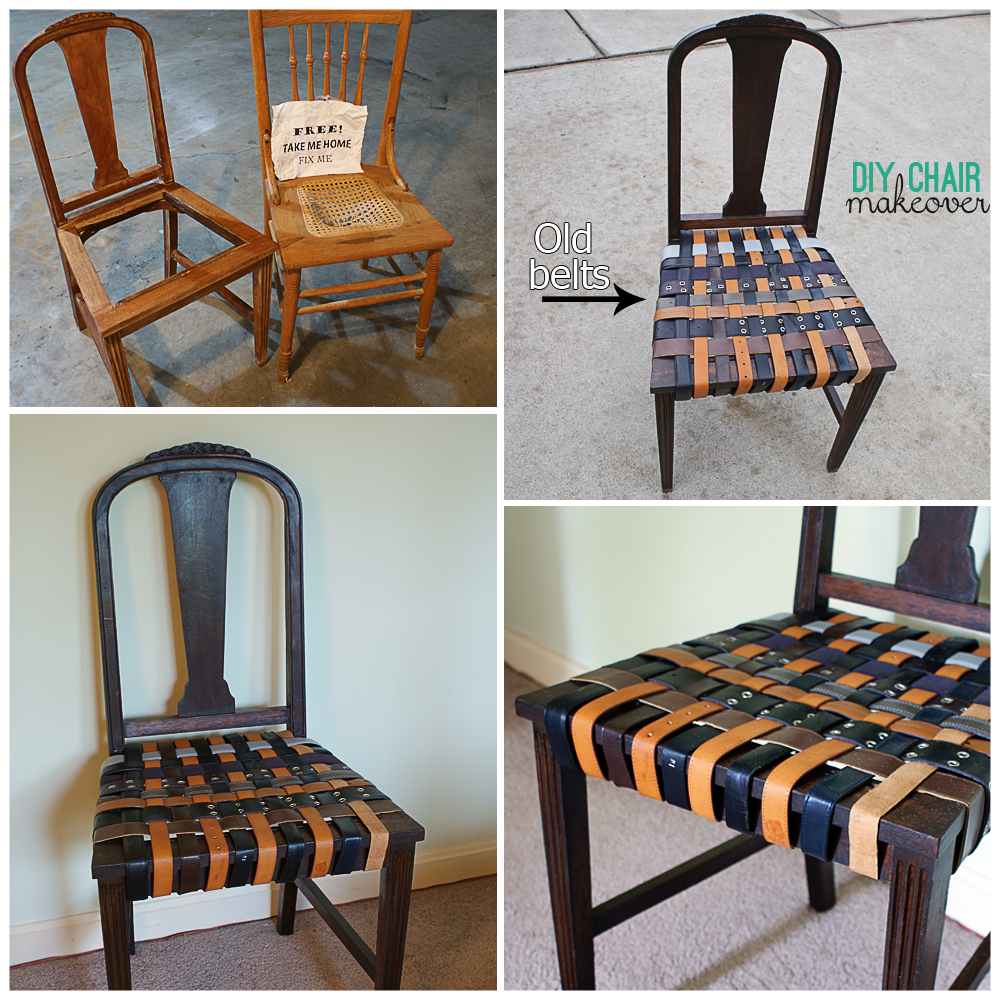
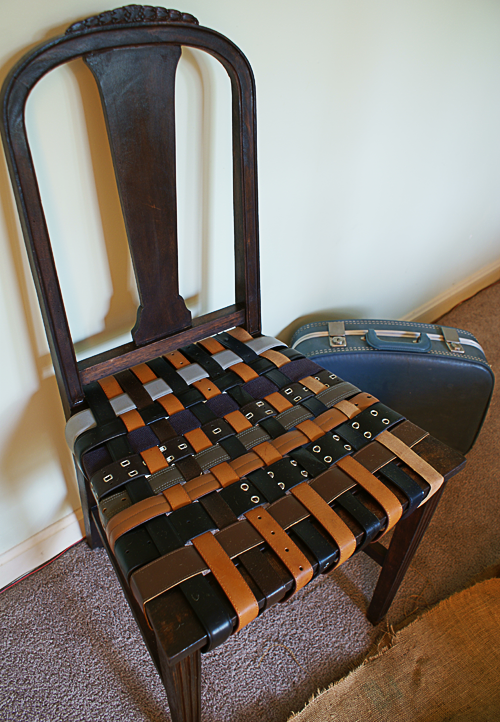
Just as I was finishing up last week’s 50+ Ways to reuse old belts, I walked upon a scene that is a DIY, trash-obsessed, upcycling blogger’s dream.  It was 2 chairs with a “take me” sign.  Immediately the woven belt covered chairs in the collection came to mind.  I snatched up my new finds and brought them straight home.  See how I refinished the one on the left, and made it a cute woven belt seat.

Reuse old belts for a chair makeover at @savedbyloves #repurpose #upcycle #DIY

To see 50+ Ways to Reuse Old Belts, click the thumbnail:

Reuse old belts for a chair makeover at @savedbyloves #repurpose #upcycle #DIY

SUPPLIES:

Old chair (FREE!!)

Painting or staining supplies

As I was applying the stain, I remembered why  I usually go with spray painting when I do a revamp.  Now that it is over, I am happy I refinished it.  I love the dark stain I used (Rustoleum Wood Stain in Kona)

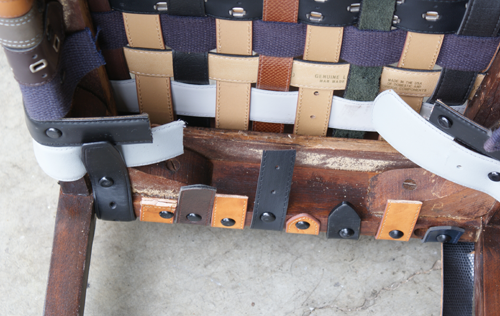
Furniture tacks -$1.30 per pack  of 25 at Lowe’s; You will need 2 per belt needed to cover your chair

Old Belts – I have gathered these from various thrift stores and garage sales along the way.  I used mostly leather, but there is one fabric belt thrown in there too,  At Goodwill, old belts are $0.99.  Go on a half price day and get them for $0.50.  I used 18 belts for this project.  that will vary with the size of your chair and the width of your belts.

Hammer

Scissors that will cut leather

TUTORIAL:

Reuse old belts for a chair makeover at @savedbyloves #repurpose #upcycle #DIY

I LOVE it!  It is sturdy as can be too.  The bottom is ugly, but who cares, right?

Reuse old belts for a chair makeover at @savedbyloves #repurpose #upcycle #DIY

You can make this chair, no problem.  If you want to avoid the whole staining mess, just sand and spray paint your chair in a fun color.

Reuse old belts for a chair makeover at @savedbyloves #repurpose #upcycle #DIY

Reuse old belts for a chair makeover at @savedbyloves #repurpose #upcycle #DIY

Reuse old belts for a chair makeover at @savedbyloves #repurpose #upcycle #DIY

Make a Halloween Bouquet

[pinit]

HalloweenBouquetCG

[pinit]

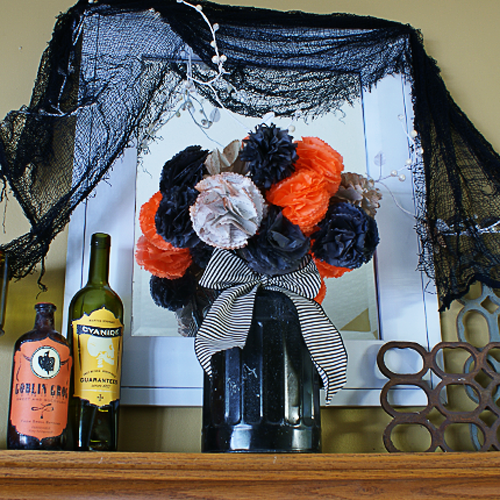
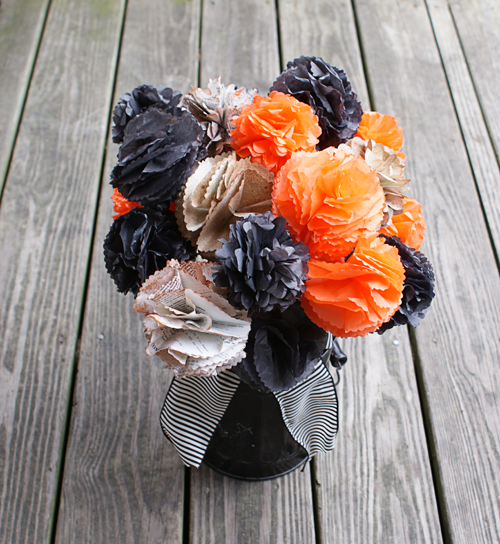
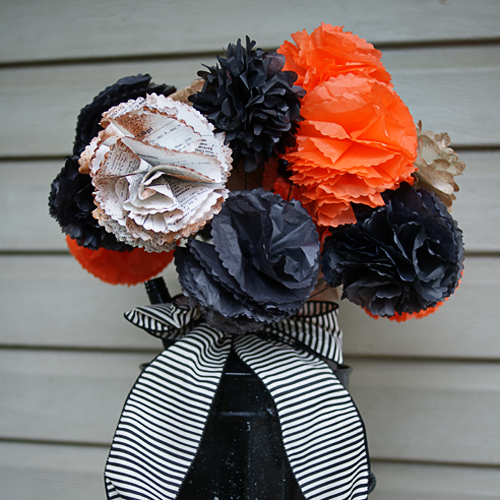
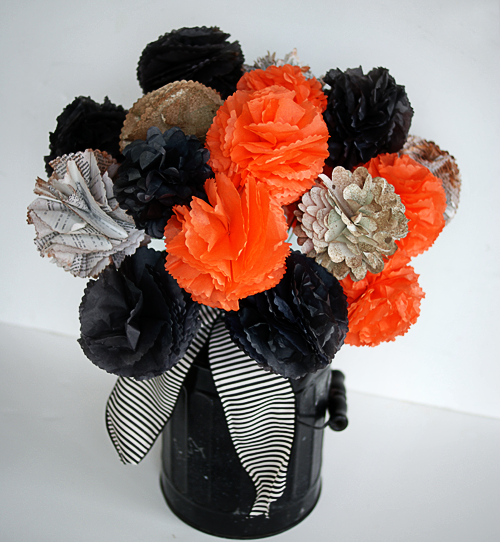
How to Make a Halloween Bouquet Tissue Paper Flowers Tutorial @savedbyloves #Sizzix

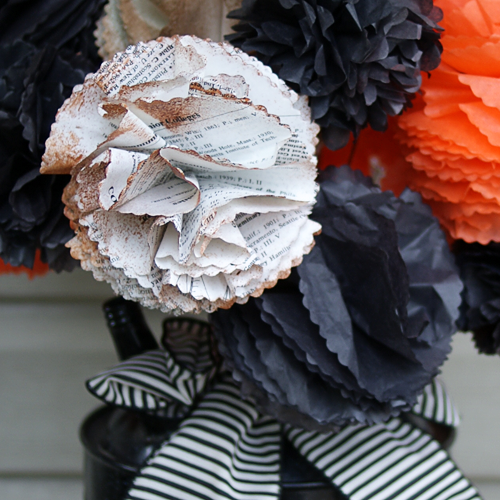
This project involves four of my favorite things; Sizzix, Halloween decor, paper flowers and upcycling!  Learn how to make these poofy pom-pom flowers from tissue paper and book pages.  I used Sizzix 3D flower #2 to cut my petals, but you can easily do this project with a scalloped circle paper punch, or with good ol’ scissors and a scalloped circle template.  Each “petal” is a scalloped circle folded in half and then in half again.

How to Make a Halloween Bouquet Tissue Paper Flowers Tutorial @savedbyloves #Sizzix

SUPPLIES:

Tissue paper in orange and black

Old book pages

Green floral wire

Sizzix 3D Flowers #2, or scallop circle punch, or scallop circle template and scissors

Vase or other container for your flowers

Ribbon

TUTORIAL:

Cut your circles using the Sizzix 3D Flowers #2 die.  Here is a quick video showing the die and the various flowers you can make.  For the bouquet shown here, I used both the large and small scallops for 2 different pom pom variations.

How to Make a Halloween Bouquet Tissue Paper Flowers Tutorial @savedbyloves #Sizzix


How to Make a Halloween Bouquet Tissue Paper Flowers Tutorial @savedbyloves #Sizzix

How to Make a Halloween Bouquet Tissue Paper Flowers Tutorial @savedbyloves #Sizzix

How to Make a Halloween Bouquet Tissue Paper Flowers Tutorial @savedbyloves #Sizzix

Privacy Policy