Archives for October 2012

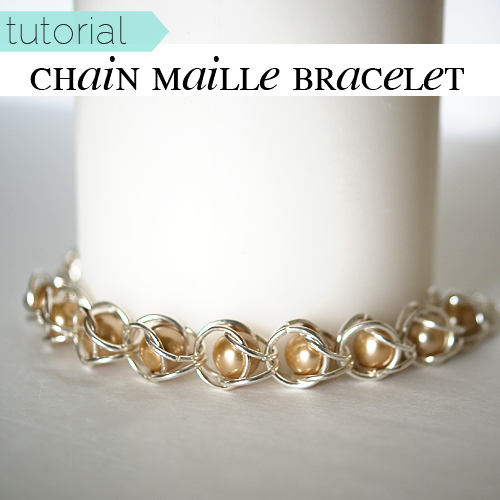
DIY Chain Maille Bracelets

[pinit]

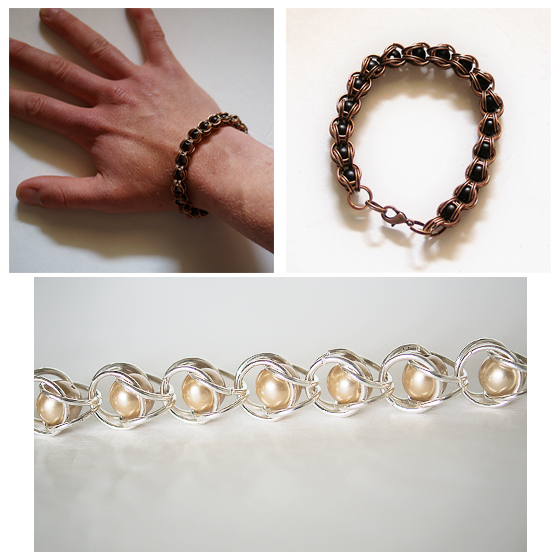
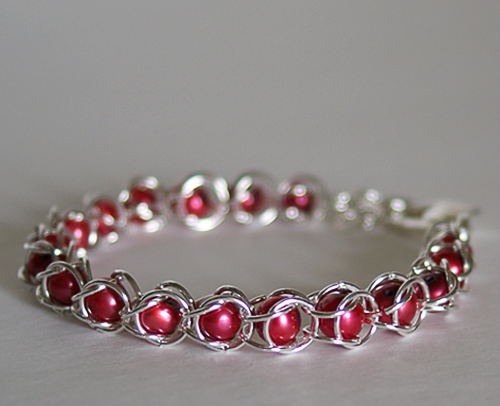
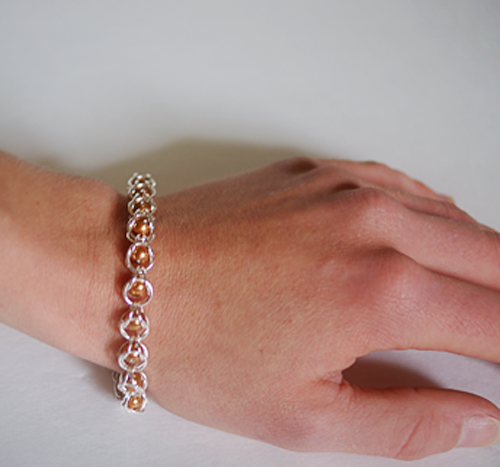
Recently I had Irina from Irina’s Cute Box here to share with you her gorgeous chain maille pearl bracelet tutorial.  My sister fell in love with it, so when we had a night together this weekend, we knew it was time to give this project a go.  They were super easy, and worked up fast.  We are both addicted, and we love our new bracelets.  I have a few designs in mind with some beads other than pearls, and sis wants to make one with glass beads next.

Chain Maille #Bracelet Tutorial at @savedbyloves

Irina’s tutorial linked above is super easy to follow.  I want to share with you a few tips I learned in the process of creating these beautiful bracelets.

SUPPLIES:

I used a 6mm pearls with 9mm jump rings and 8mm pearls with 11mm jump rings

Jewelry pliers

OR…

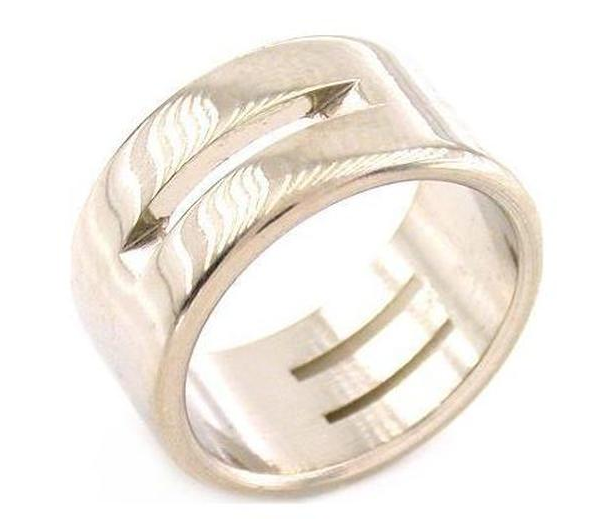
This handy dandy jeweler’s jump ring tool for easy opening and closing of jump rings:

I love this thing because you can put it on your finger and still have both hands available for the jewelry work, unlike using pliers to open and close the jump rings.  Well worth the $3.

TUTORIAL:

Chain Maille #Bracelet Tutorial at @savedbyloves

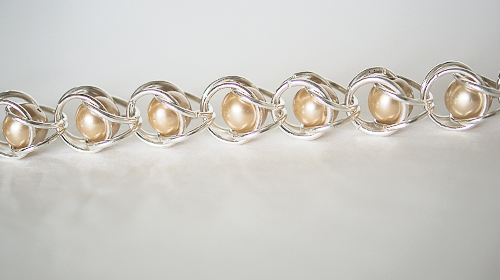
For more detailed description, see original chain maille bracelet tutorial post.  After your first “Nest”, make sure you add a jump ring at the bottom to keep the first pearl from popping out (shown in bottom picture).  I ended up adding 2 jump rings there since my beads were smaller in comparison to the jump rings than Irina’s.  Even with one, the bottom one popped out of its box.

Here is a variation using copper split rings and black glass beads:

The possibilities are endless.  Your imagination will go wild when you get into this project.  These would make great Christmas gifts.  They are stunning, inexpensive, simple and quick!

Chain Maille #Bracelet Tutorial at @savedbyloves

Chain Maille #Bracelet Tutorial at @savedbyloves

For more bracelet how to’s, be sure and visit the SBLC tutorial gallery, HERE.

Don’t forget about our 50+ bracelet roundup with the best DIY bracelet tutorials on the web, in one spot!

DIY Paint Chip Earrings

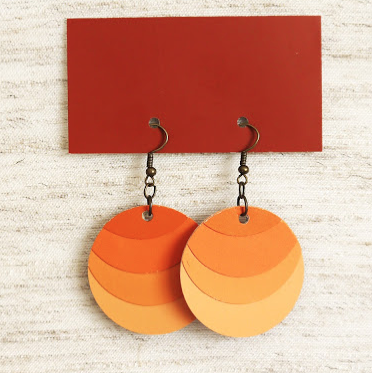
DIY Ombre Paint Chip Earrings by Minted Strawberry, featured @savedbyloves[pinit]

I am a little bit in total love with these ombre paint chip earrings spotted at Minted Strawberry.  They are eco friendly, my favorite color, and super easy to make.  Can’t wait to make these!

What are your favorite paint chip projects?  For tons more inspiration, check out our 50+ Paint Chip roundup;

Make a Book Page Halloween Banner

#HalloweenDIY Book Page Garland #DIY #recycled @savedbyloves

[pinit]

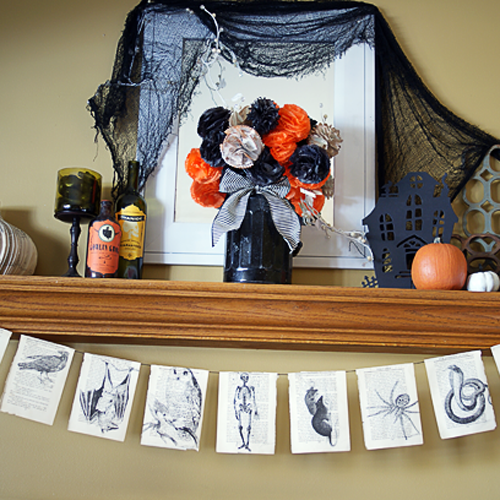
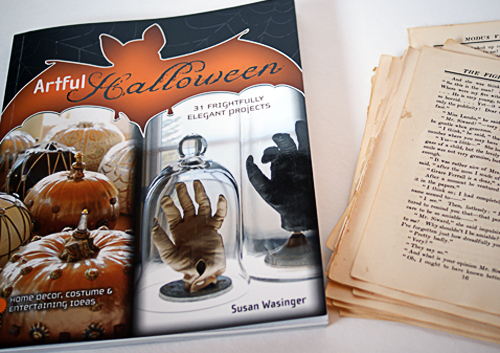
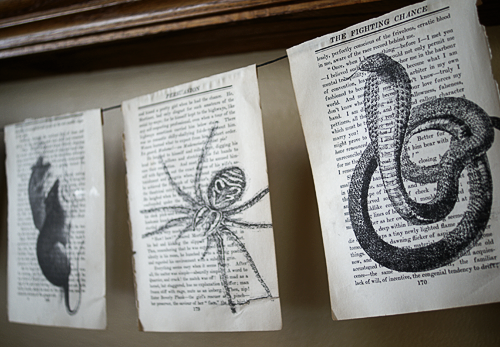
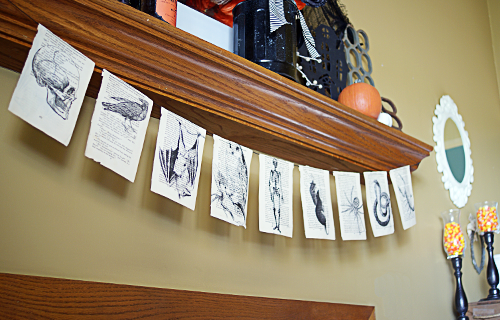
Halloween is my absolute favorite crafty time of year.  That is why I was delighted when I unexpectedly got the book, Artful Halloween by Susan Wasinger in the mail.  This publication is filled with 31 fantastic Halloween projects, detailed in step by step, easy to follow photo tutorials.  There is a wonderful section with 10 pumpkin decorating projects that will add a touch of elegance to your Halloween decor.  At $7.55, this book is a must have in your inspiration arsenal.  Here, you will see how I made this spooky book page garland, following Susan’s tips, using graphics included in the book as well as a couple from the beloved Graphics Fairy!

Halloween Book Page Garland from Artful Halloween

SUPPLIES:

Artful Halloween by Susan Wasinger

Glossy Accents or glue stick

Black string

Printer/Scanner

Creepy graphics from the book or Graphics Fairy Halloween Images

Old book pages

TUTORIAL:

I placed my pages about 1/2 inch apart on the string, per Susan’s suggestion.  You could spread them out for a sparser look, or to make the garland longer.  I used 9 pages to fit my fireplace mantel.  Susan recommends one foot of string one each end for hanging the garland.

#HalloweenDIY Book Page Garland #DIY #recycled @savedbyloves

I love my garland, and it is super simple, cheap, and fast to make.  I want to do like 30 more of the projects in that book.  You still have time to order it and get your Halloween decor on in style!

#HalloweenDIY Book Page Garland #DIY #recycled @savedbyloves

Make Kumihimo Braided Necklaces

KumihimoNecklace

How to make a Kumihimo Necklace Cord #jewelry #DIY @savedbyloves

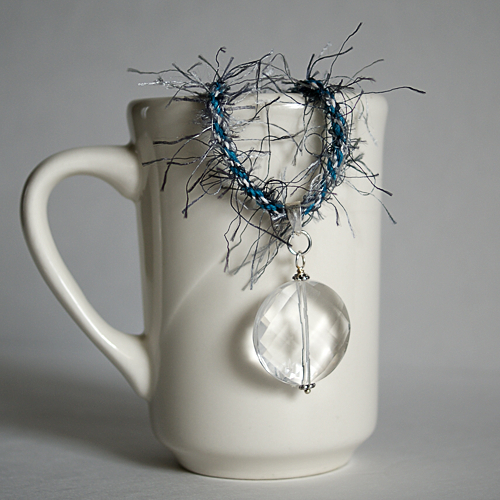
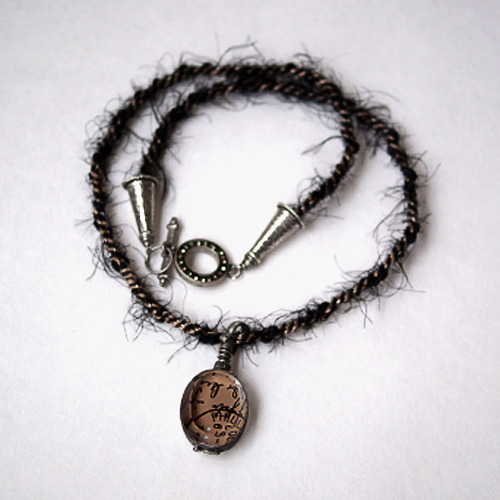
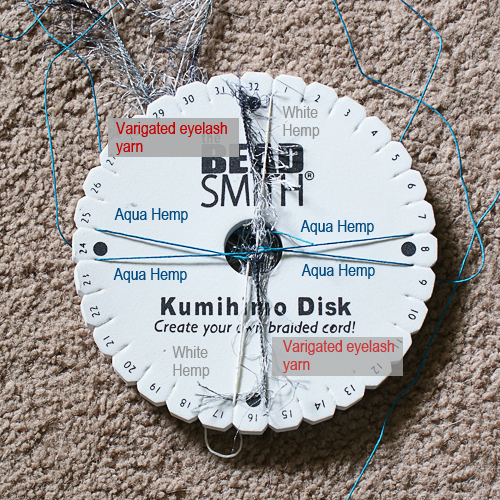
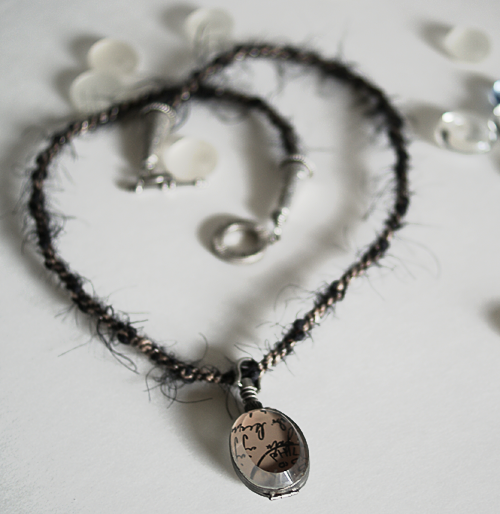
I showed you kumihimo bracelets awhile back.  Here, I used the same loom weaving technique to create the cording for these pendants.  You can pretty much use any fiber for your 8 strands, from hemp cord to fun yarn, which makes this a great stash buster project to help use up those yarn scraps.  This post shows how to create 2 different pendant cords, with a video on how to use the loom, and set up instructions for the cords pictured.

SUPPLIES:

Kumihimo 32 slot foam round loom

Metal cone beads

Metal cone beads

Jewelry Glue or super glue

20 gauge wire in finish to match toggle and cones

Wire cutters

 Flat nose pliers

Round nose pliers

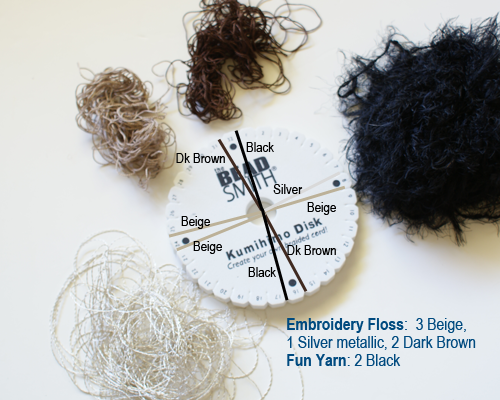
See pics for cording supplies and loom placement:

How to make a Kumihimo Necklace Cord #jewelry #DIY @savedbyloves

How to make a Kumihimo Necklace Cord #jewelry #DIY @savedbyloves

TUTORIAL:

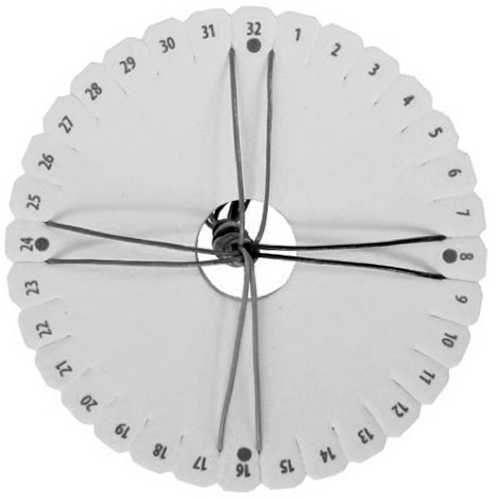
Gather your 8 strands and tie an overhand knot at one end.  Arrange the 8 strands on the loom as shown, with the knot in the hole in the middle.  I keep similar colors in pairs, but play with your string arrangement for different effects.  There are tons of online patterns for free as well.

How to make a friendship bracelet

This video explains how to weave.  Arrange cord as shown for your necklace.  For length of cord, multiply desired finished length by 2 and add 3 inches.

TO FINISH:

This is the finishing technique shown on a bracelet.  It is the same for the pendant necklace, except you slide the pendant on before adding the wire and cone to the second end,

Make Roses From Leaves

Make roses from leaves #sizzix #DIY #Fall @savedbyloves

Make roses from leaves #sizzix #DIY #Fall @savedbyloves

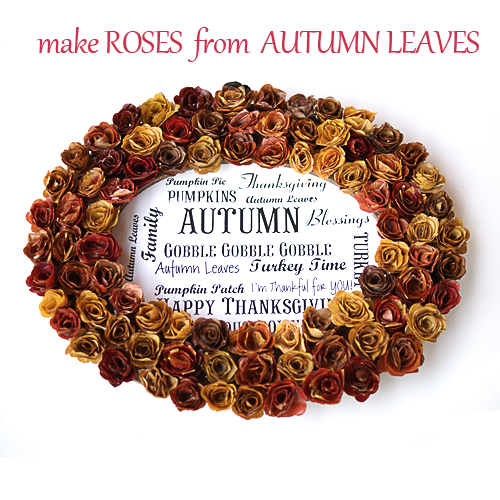
This project was awhile in the making, as there was some trial and error involved.  I have been dying to cut leaves with my Sizzix since they started changing into the warm autumn hues.  The part I couldn’t figure out about how to do this was preserving the leaves.  If I pressed them, they would be brittle and fall apart when I rolled them into the rose shape.  What to do?

Make roses from leaves #sizzix #DIY #Fall @savedbyloves

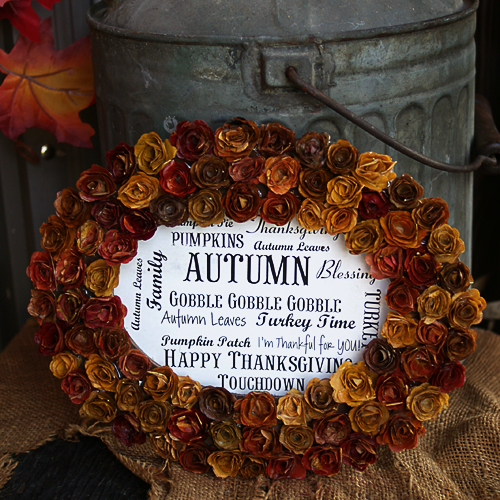
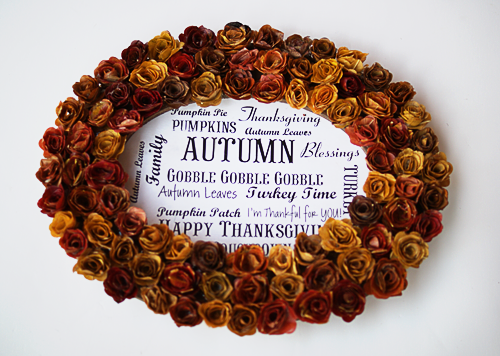
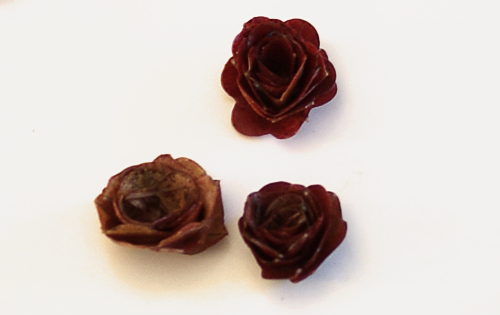
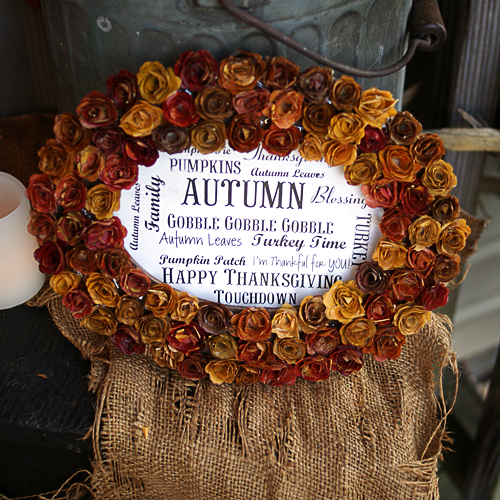
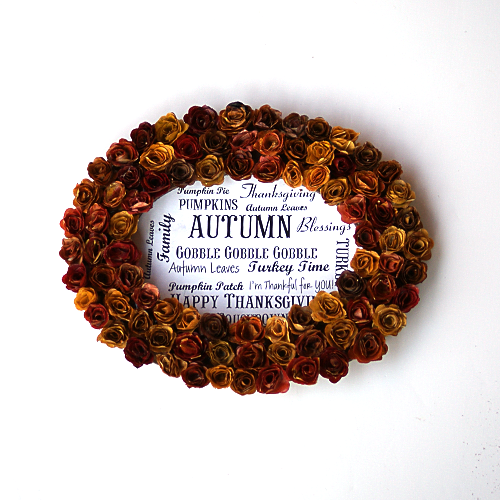
The solution turned out to be beeswax.  The idea came to me when I saw this post at Artsy Ants on preserving autumn leaves with beeswax.  I thought just maybe I could dip the leaves, then die cut and roll the spirals into the 3D rose.  There were some things to learn along the way, but in the end, it worked.  I used my roses to embellish an oval frame containing autumn themed subway art.   See how I did it…

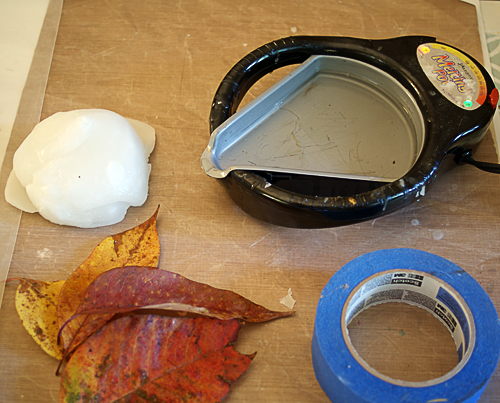
SUPPLIES:

Colorful Autumn leaves

Beeswax

Melting pot

Bamboo skewer or toothpick

Heat tool

Oval frame ($1 at Michaels)

Craft glue

Mod Podge rub on transfers Holidays/Seasons

Masking tape

Sizzix 3D rose die

Sizzix die cut machine (I used Vagabond here)

TUTORIAL:

Make roses from leaves #sizzix #DIY #Fall @savedbyloves

Melt beeswax in melting pot

Make roses from leaves #sizzix #DIY #Fall @savedbyloves

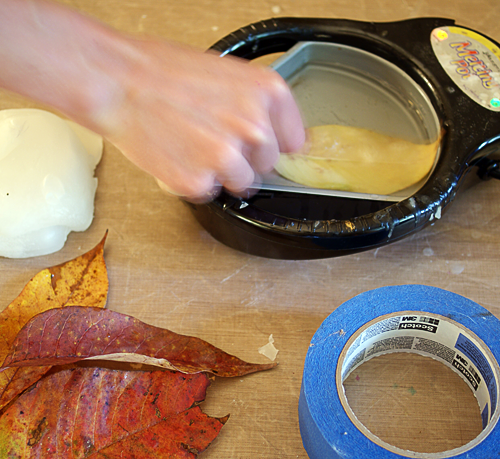
Dip leaf into melted beeswax and set on wax paper to cool for 30 seconds or so.  You can do several leaves at once, but you want to move on to the die cutting and rolling quickly, as the wax becomes brittle if it cools too much and you will be annoyed.  Seriously annoyed.  I would dip about 20 leaves and move on to die cutting right after that.

Make roses from leaves #sizzix #DIY #Fall @savedbyloves

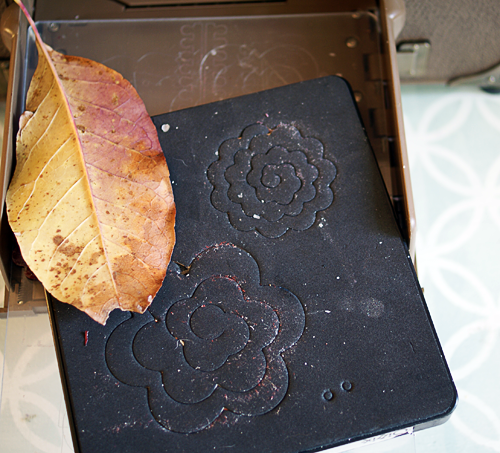
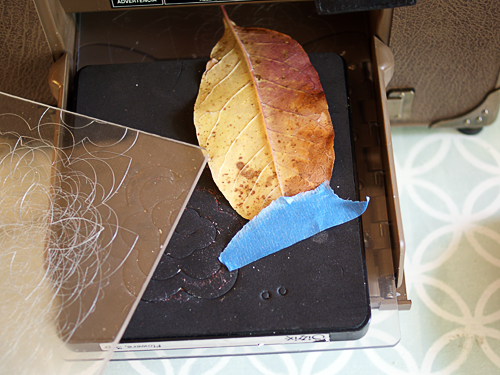
I used the smaller rose to cut my leaves, since most of them were too small to completely cover the large rose shape.  Place the wax coated leave over the shape and tape in place with masking tape so it doesn’t shift.  You can stack up to 4 coated leaves at a time to run through the machine.

Make roses from leaves #sizzix #DIY #Fall @savedbyloves

Make roses from leaves #sizzix #DIY #Fall @savedbyloves

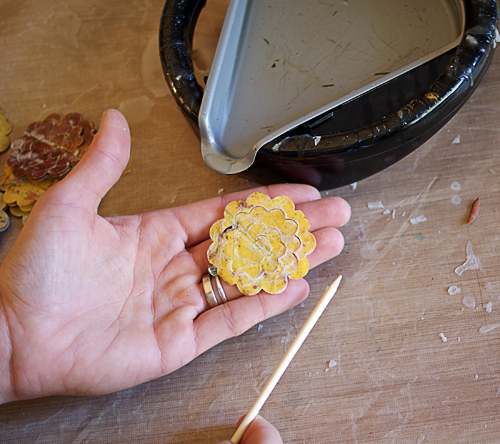
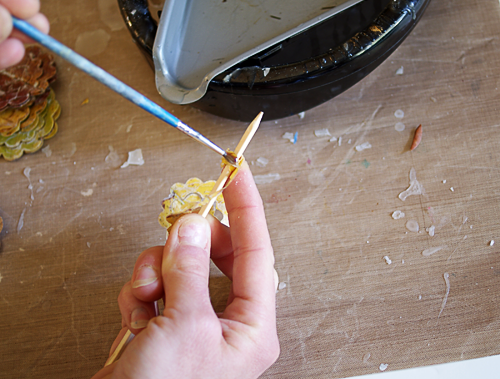
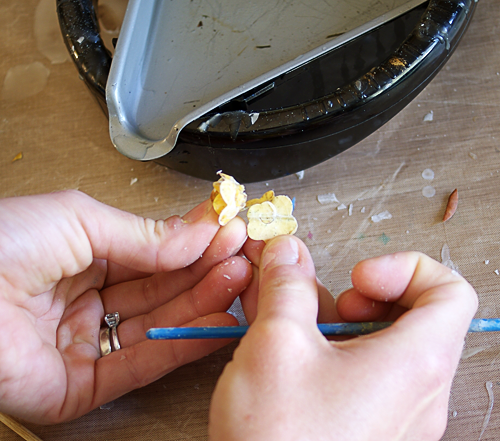
Use your bamboo skewer to roll the die cut leaf into the spiral rose.  I showed you this in the aluminum can rose video below.  The process is the same for the leaf rose.  Be careful, as they are fragile and will tear.  If you have a stack of the shapes because you cut 4 at once, carefully separate them and roll each shape.  Use a paintbrush to add beeswax as a glue at a couple of points throughout the spiral.

Make roses from leaves #sizzix #DIY #Fall @savedbyloves

This shows me painting on the beeswax as “glue”

Make roses from leaves #sizzix #DIY #Fall @savedbyloves

Glue the bottom tab to secure as shown in the video, using beeswax instead of glue.

Make roses from leaves #sizzix #DIY #Fall @savedbyloves

Make roses from leaves #sizzix #DIY #Fall @savedbyloves

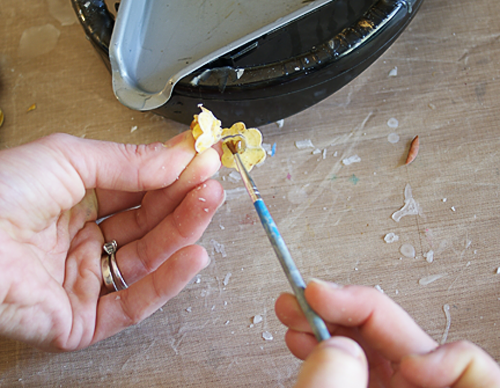
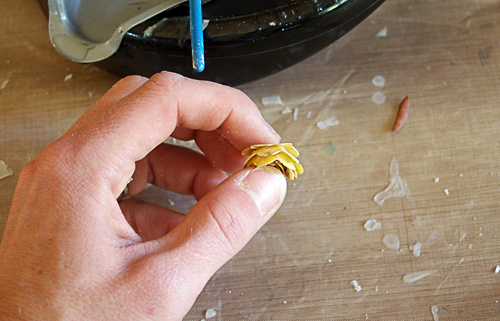
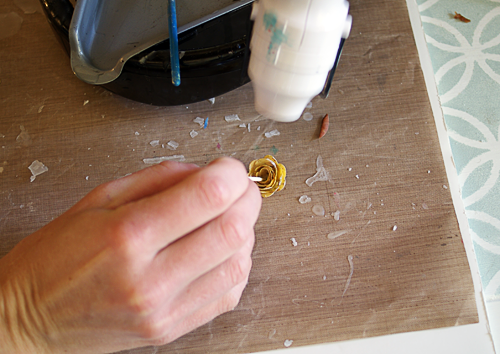
Once your leaf is formed, remelt the wax that cracked during the rolling process with the heat tool.  This makes sure the entire piece is sealed and gets rid of the cracks.  Hold rose in place with tooth pick while heating.

Make roses from leaves #sizzix #DIY #Fall @savedbyloves

Make roses from leaves #sizzix #DIY #Fall @savedbyloves

Use your leaf roses to embellish your next project.  I glued mine to an oval wood frame I found at Michael’s for $1.  I used Mod Podge fall themed rub on transfers to create subway art on cardstock to put inside the frame.  LOVE.

Make roses from leaves #sizzix #DIY #Fall @savedbyloves

Make roses from leaves #sizzix #DIY #Fall @savedbyloves

If you like this, you don’t want to miss our nature craft roundup!


50+ Ways to Reuse Old Sweaters

50plusOldSweaterProjects

Who knew that pile of old sweaters could be put to use in so many creative ways?  This week’s 50+ roundup brings plenty of inspiration for giving dead sweaters new life.  You will want to raid the closet, or the local thrift store after browsing these projects.

How about this J.Crew knock-off heart sweater by Ali at With an i.e.?  She knocked this project out of the park, and for far less than the $88 price tag on the J. Crew version.  What a simple and cute project for a Valentine’s Day outfit!  Fear not, sewing skills unnecessary.
J.Crew Knock off heart sweater

Need some boots to go with your new J.Crew inspired heart sweater?  Urban Threads has you covered with this old sweater to new boots tutorial.  Are you serious?  I never would have come up with this genius upcycle!
#Upcycle old sweater to boots and 50+ other projects to make from #recycled sweaters @savedbyloves #DIY

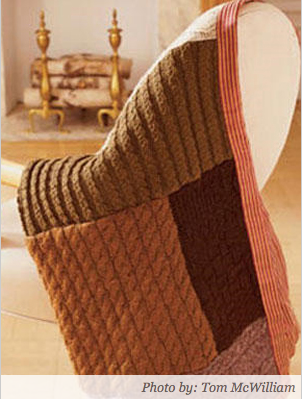
Now that you are all styled up, what about adding a splash of cozy to your home with this lovely throw made from recycled sweaters at Woman’s Day?  Go junkin’ for sweaters to coordinate with your home decor and you are all set.

Make a throw from #recycled sweaters, and 50+ more sweater upcycles @savedbyloves

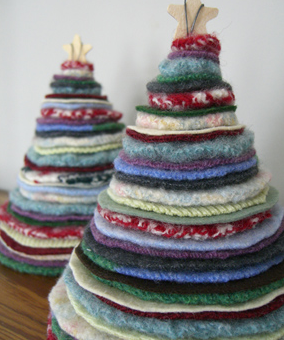
At The Long Thread, you will learn how to create a thrifted sweater Christmas tree.  This project is simple and puts those ugly Christmas sweaters you thought you would actually wear in front of people to great use!

DIY Christmas Tree from #recycled sweaters, and 50+ more things to make from old sweaters @savedbyloves

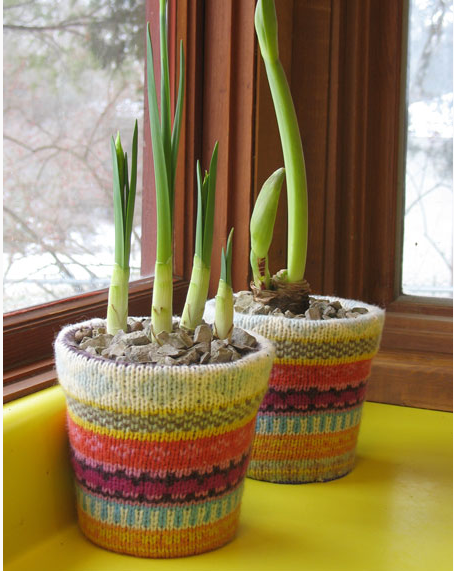
This sweater covered planter project at Duo Fiberworks is just what I need to give myself a break from the neon planters I made over the summer.  So simple, and when I am in the mood for neon again, I can just take off the covers.

#Upcycle old sweater to planter cover and 50+ other projects to make from #recycled sweaters @savedbyloves #DIY

These are just a few of my favorites.  Enjoy the full 50+ collection below:


Make a Pumpkin Witch

#HalloweenDIY #outdoor decor; make this easy, adorable pumpkin witch @savedbyloves

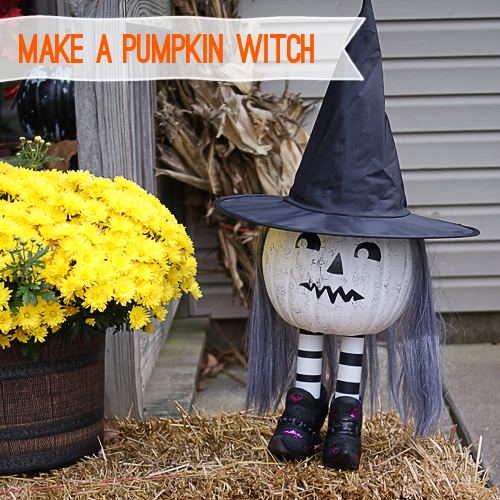
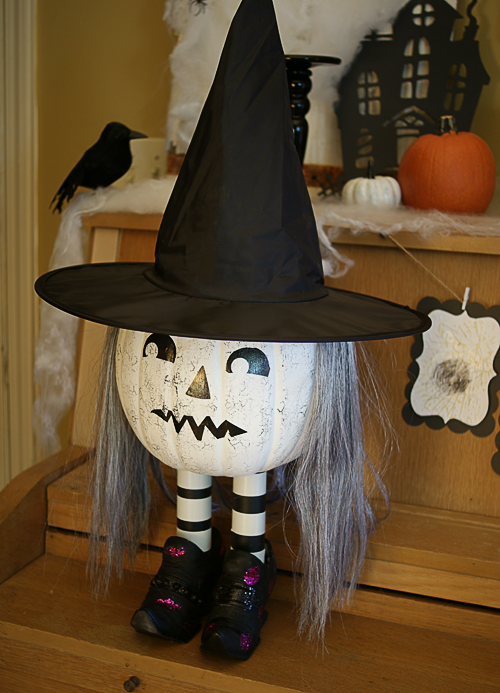
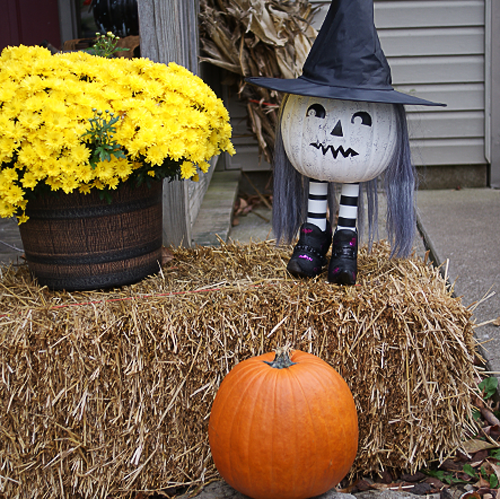
It is time for some outdoor Halloween decor fun.  Last year, I shared with you this harvest bomb.  We surprise decorated my stepdaughter’s house for fall.  We are at it again this year, which is where the pumpkin witch idea was born.  I kinda want to keep her, but that defeats the entire purpose, right?  Read on to see how to make your own!

#HalloweenDIY #outdoor decor; make this easy, adorable pumpkin witch @savedbyloves

SUPPLIES:

Witch Shoes – found on clearance at Michaels

Black vacuum attachment tube, or other tube to fit in shoes

White duct tape for stripes on black “legs”

E6000 industrial glue

Plastic pumpkin, medium size

Martha Stewart Pumpkin Transfers

Witch hat – purchased with hair attached at Walmart for $1.97

#HalloweenDIY #outdoor decor; make this easy, adorable pumpkin witch @savedbyloves

TUTORIAL:

#HalloweenDIY #outdoor decor; make this easy, adorable pumpkin witch @savedbyloves

Super easy!  I can’t wait to complete the Halloween/Harvest bomb and show you the full reveal.  I love her…

#HalloweenDIY #outdoor decor; make this easy, adorable pumpkin witch @savedbyloves

#HalloweenDIY #outdoor decor; make this easy, adorable pumpkin witch @savedbyloves

Plastic Bottle Kid Safe Trick or Treat Lantern

Make a kid safe plastic bottle #HalloweenDIY lantern for trick or treating by Supermom Moments, featured @savedbyloves

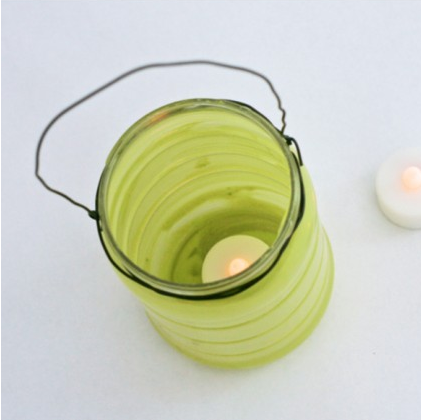
Bettijo at Supermom Moments teaches you how to create this cute, kid safe lantern for your kids to take trick or treating.  What a great way to keep the evening illuminated.  The idea came from mason jar lanterns, but uses plastic jars so the kids aren’t running around with glass.  Brilliant!

Make a Vase From a Pumpkin

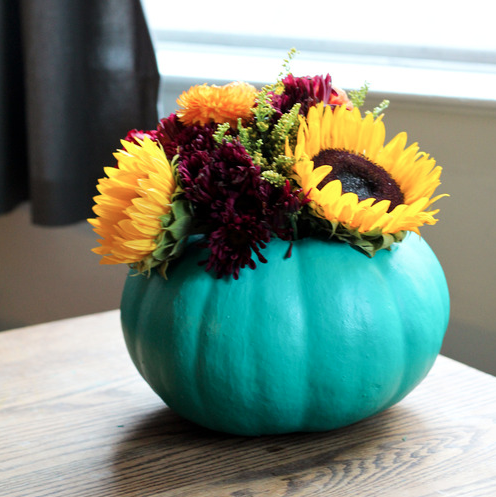
Make a vase from a pumpkin for your #FallDecor #centerpiece by 52 Weeks project, featured @savedbyloves

How fun is this pumpkin vase spied over at 52 Weeks Project?  According to the creator Rachel, the project can be done in an hour, dry time and all.  Head over to see how she created this gorgeous fall centerpiece.  I just so happened to have picked up a white pumpkin yesterday.  It is going to be upgraded from the porch to the kitchen table soon thanks to this inspiration!

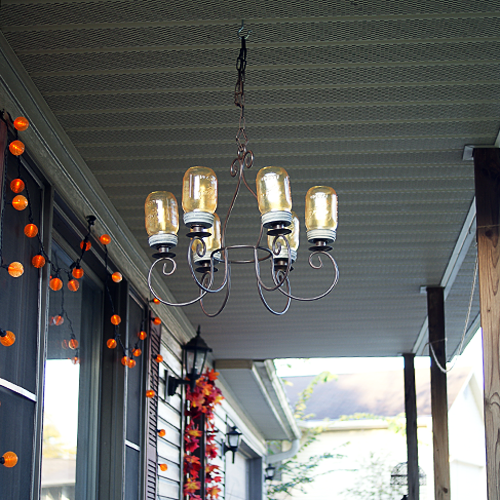
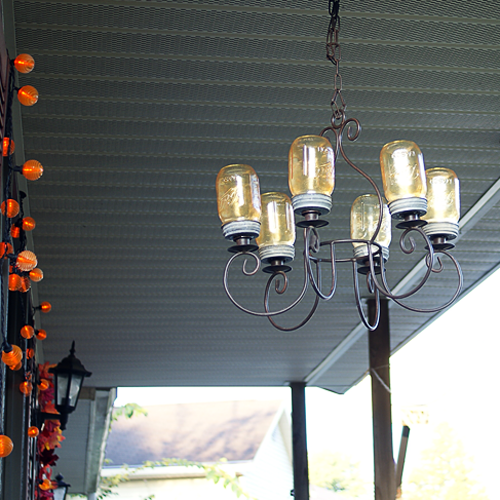
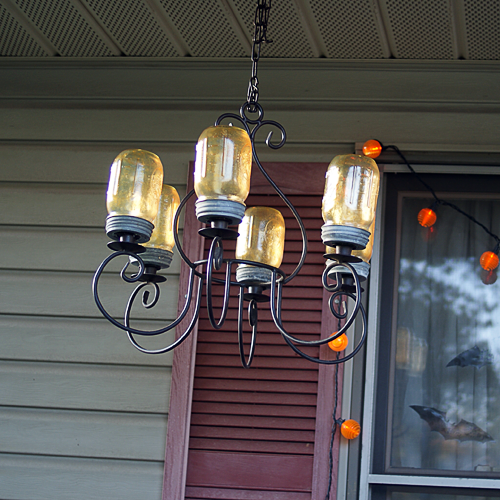
Mason Jar Chandelier DIY

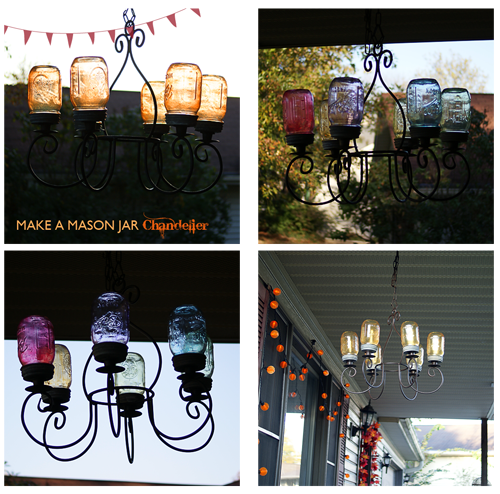
How to make a #MasonJar Chandelier #DIY #craft @savedbyloves

How to make a #MasonJar Chandelier #DIY #craft @savedbyloves

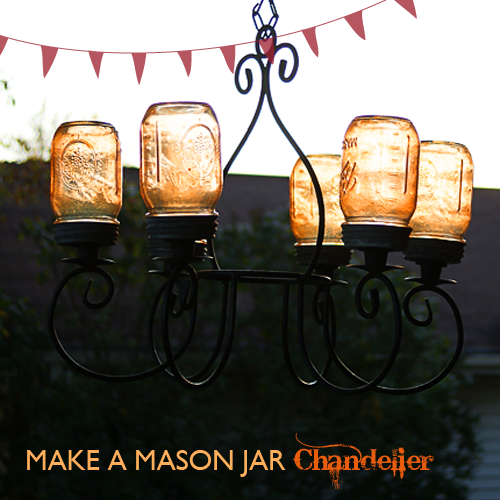
This project was super simple and cheap!  I scored the chandelier at a garage sale recently for $2.  As soon as I saw it, this fantastic mason jar chandelier from Beth at Home Stories A to Z came to mind.  You can get the mason jars for around $7 per case of 12.  I painted them with Deco Art glass stain.  Using E6000 industrial glue, I adhered the lids to the chandelier.  Now I can switch out the jars by unscrewing them from the lid, allowing for changes in my decor!

How to make a #MasonJar Chandelier #DIY #craft @savedbyloves

How to make a #MasonJar Chandelier #DIY #craft @savedbyloves

TUTORIAL:

How to make a #MasonJar Chandelier #DIY #craft @savedbyloves

I will be updating with night photos after placing LED votive candles in the jars for illumination!

How to make a #MasonJar Chandelier #DIY #craft @savedbyloves

What do y0u think?  Have you checked out the 50+ Mason Jar roundup?

Privacy Policy