It’s time for fall, and with that comes my favorite DIY decor projects. This round-up is full of ways to bring autumn into your decorating, from Halloween pumpkin crafts to Thanksgiving themed printables, and everything in between. I hope you enjoy beautifying your space with inspiration from these amazing projects!
Archives for September 2012
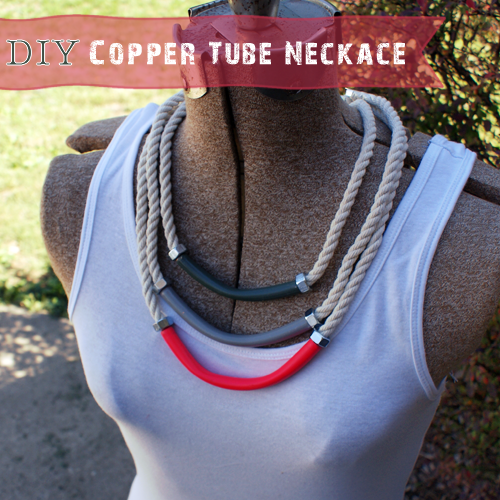
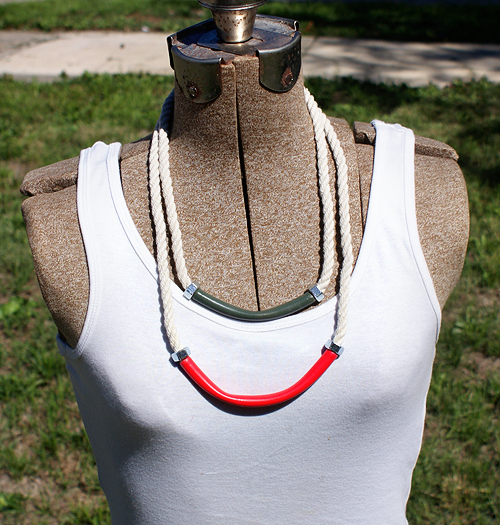
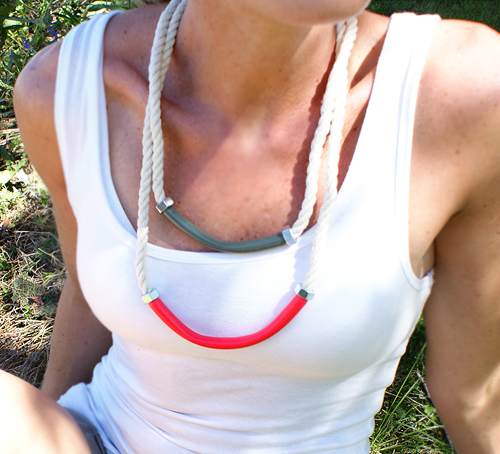
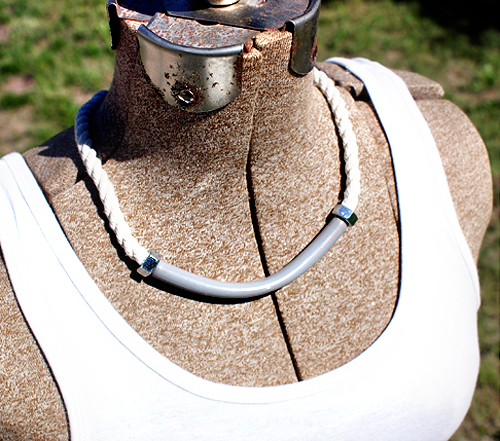
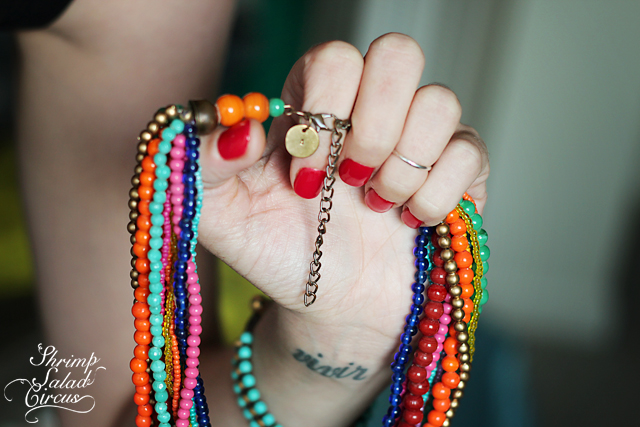
Easy DIY Copper Tube Rope Necklace
If you are looking for a beginner level, inexpensive, modern and versatile necklace to make, this copper tube necklace tutorial is just the project for you. With just a few supplies from the hardware store, you will have a trendy piece of jewelry that can be dressy or casual.
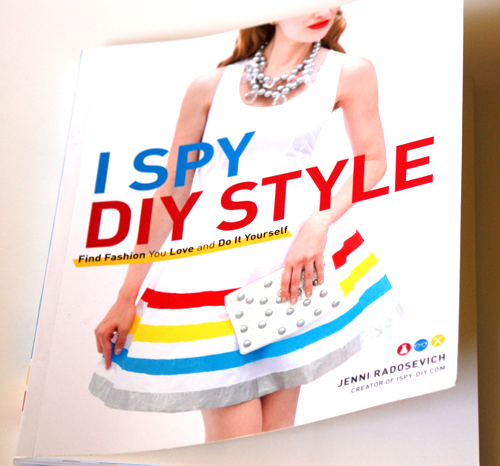
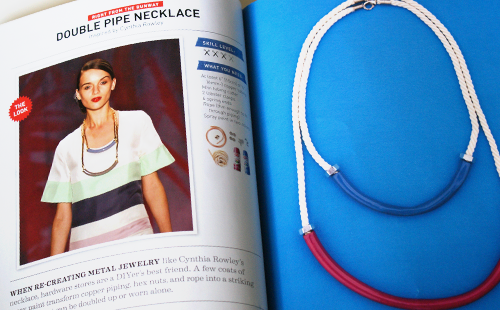
The inspiration for this project came from this awesome DIY project book:
I Spy DIY by Jenni Radosevich
My copper tube necklace varies from the tutorial in this book, but the outcome is similar. I love Krylon Dual for painting on, well anything, but especially metal. The coverage is great, and no primer is needed since it is built into the paint. Even with Krylon Flourescent, I didn’t use primer. The paint dries fast, so turning the tube over to paint the other side can be done in 15 minutes.
Lets get started!
SUPPLIES:
Scissors
1/4 inch inner diameter soft copper tubing
Tube Cutter
Braided Hemp Cord
Darice 10mm silver end connectors
4-6 mm Silver Jump rings (2 per necklace)
Super glue or E6000
Hex Nuts
Silver Toggle Clasp
Chain nose pliers
Krylon Dual in Camp Green, Classic Gray, and Krylon Flourescent pink
TUTORIAL:
I love these end connectors for round braided cord like in this project. I picked mine up at Joann’s, and they are linked above in the supply list.
This necklace can be worn single, double or triple! Just make sure to vary the length of the rope if you are wearing more than one at a time.
Disclaimer: I received Krylon Dual Spray paint to try for this project. If I hadn’t, I would have bought some and done the project, sharing exactly what I shared because I already love this paint. All opinions are honest and mine!
50+ Knock-off Designs to Make ROUND #2

Obsessed with Knock-off designs? If so, you are going to love our second 50+ round-up of all new copycat crafts to make. We tried to group these fantastic projects into jewelry, home decor, crafts. If your knock off was left out, and wasn’t included in round #1, let us know so we can add you! If you missed round #1, click the thumbnail below.
Mason Jar Lantern DIY
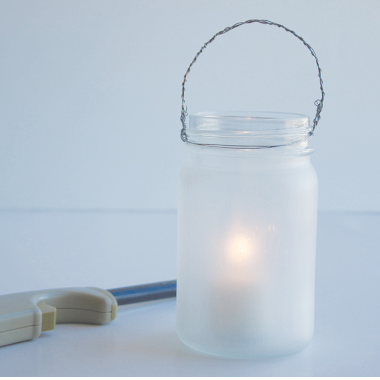
With the lovely September evenings, and a break from the sweltering summer heat, Danyelle at Make and Takes wanted to spruce up her outside space. She decided to add some lighting with this frosted mason jar lantern DIY. You can whip these up in no time, for little cost and big ambiance to enjoy the fall outdoors.
Take a look at out Mason Jar and Luminary round ups for more ideas.
Dollar Store Wrapped Bangle Bracelet
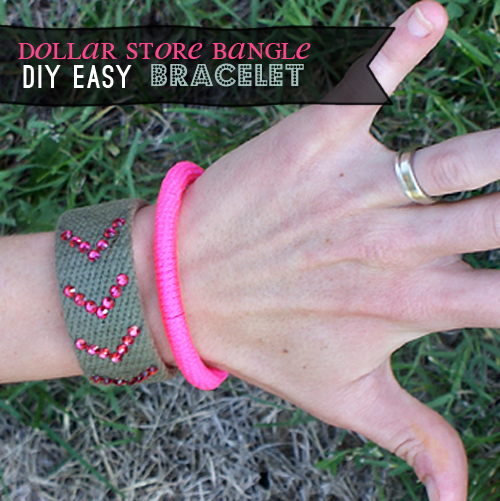
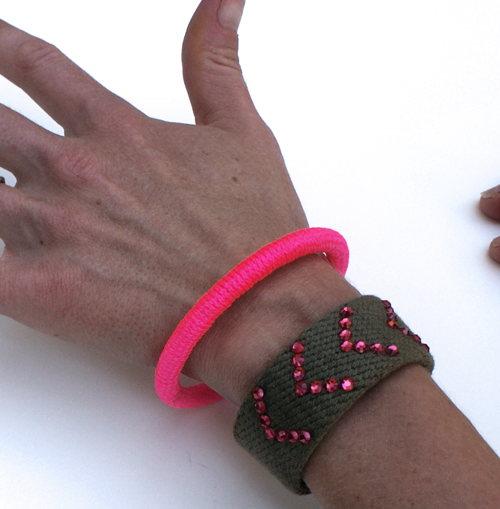
It has been a minute since I made a bracelet to share with you, so here is a neon bangle bracelet for you to make. This project is all of the things I love; easy, fast, dollar store craft (way cheap). I got the bangles at the Dollar Tree, 4 in a pack for $1. The pink neon cord is mason line from Lowe’s. Seriously, you will be wearing this bracelet 10 minutes after you start making it. Stack em’ together or with different bracelet styles, give them as handmade gifts to your friends, have a girls craft night and crank these pretties out like mad.
Supplies:
Dollar Tree Bangle Bracelets
Mason line in your favorite colors
Scissors
Crafter’s Pick or other strong glue
Tutorial:
Stay tuned to see how I made a loom and used it to weave the yellow bracelet!
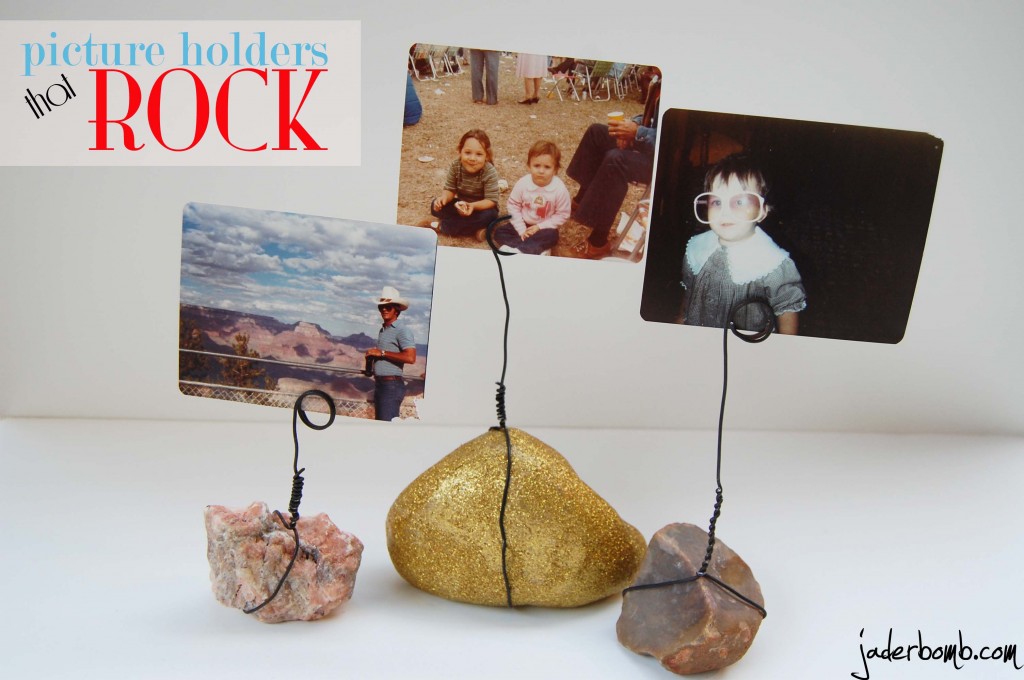
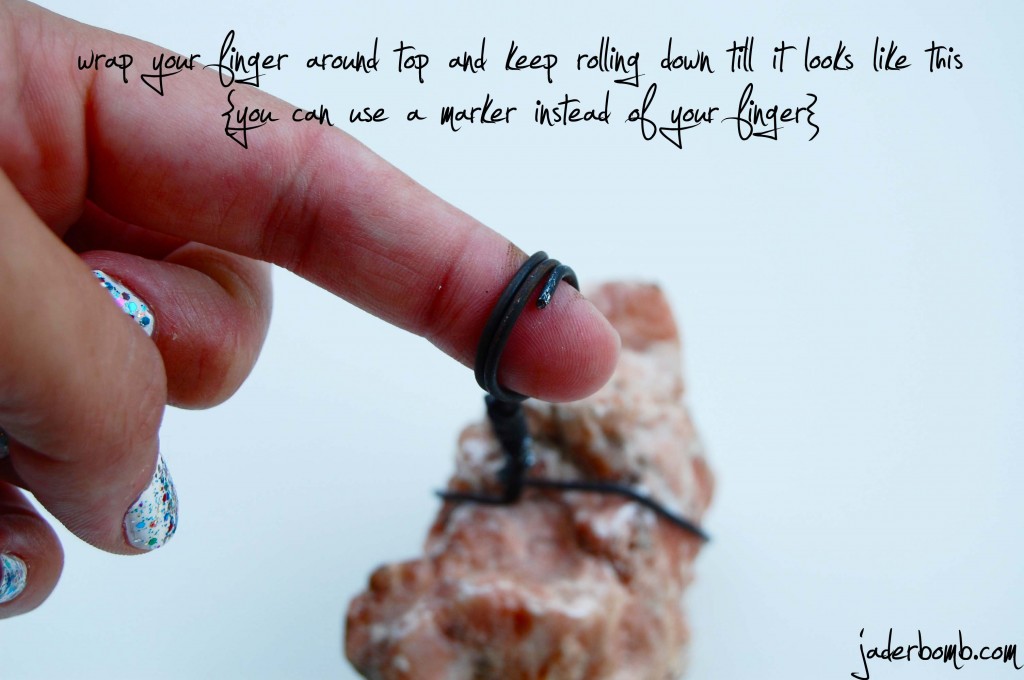
Guest Post: Rock Photo Displays
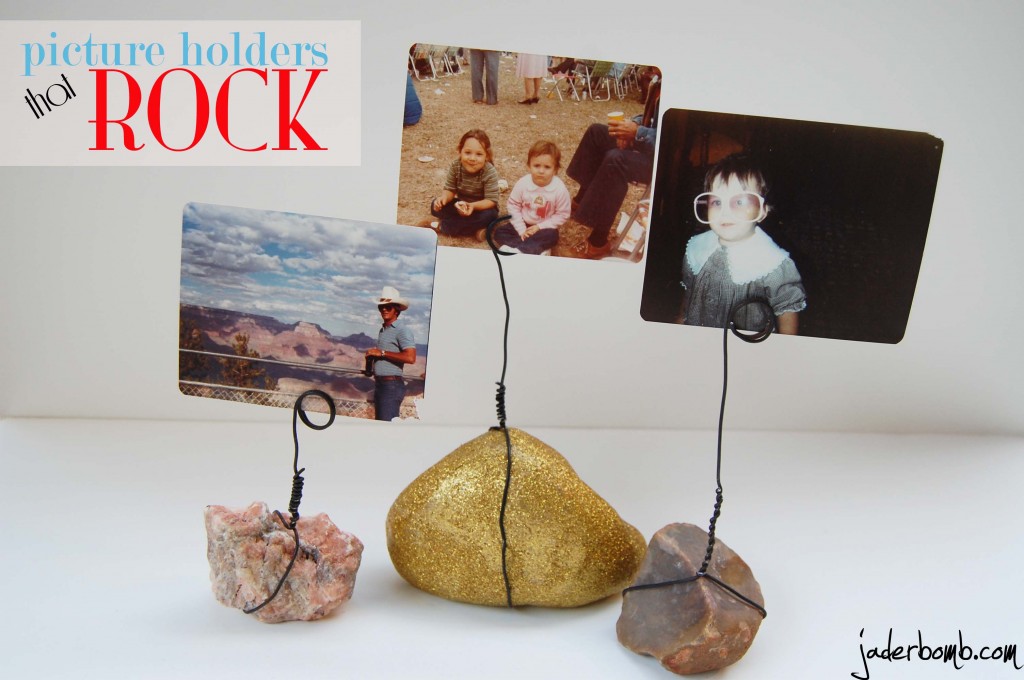
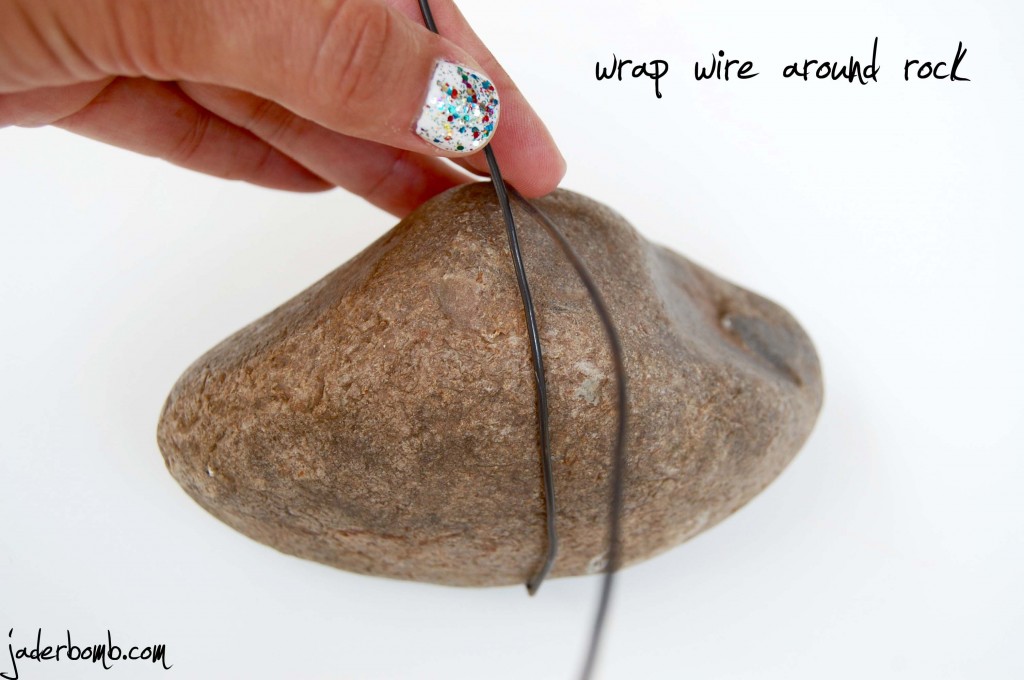
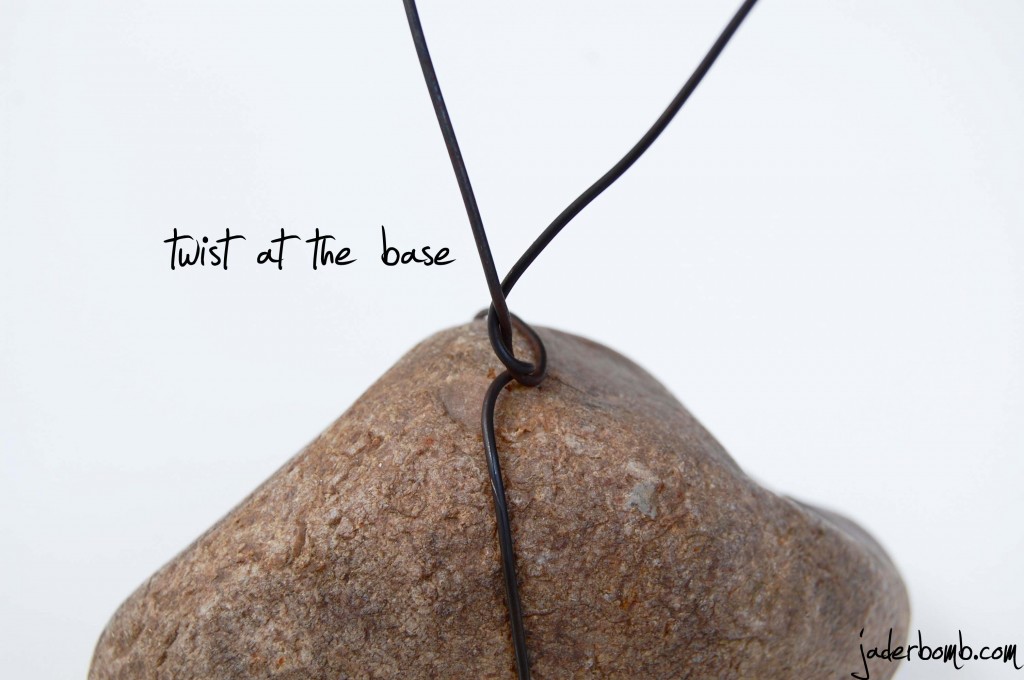
Today, JaderBomb is here to share a fantastic green crafty way for you to display your photos. She will guide you through the process of making a rock photo display using just a few supplies and lots of creativity. This project is great for gift ideas, and how about displaying Christmas cards? Visit this talented woman’s blog for some seriously awesome craft and DIY projects. Thanks for driving the bus today, JaderBomb!
Hi there! It’s JADERBOMB! Nice to meet cha!
I am so glad to be here today!
I hope you enjoy this fun tutorial.
INGREDIENTS:
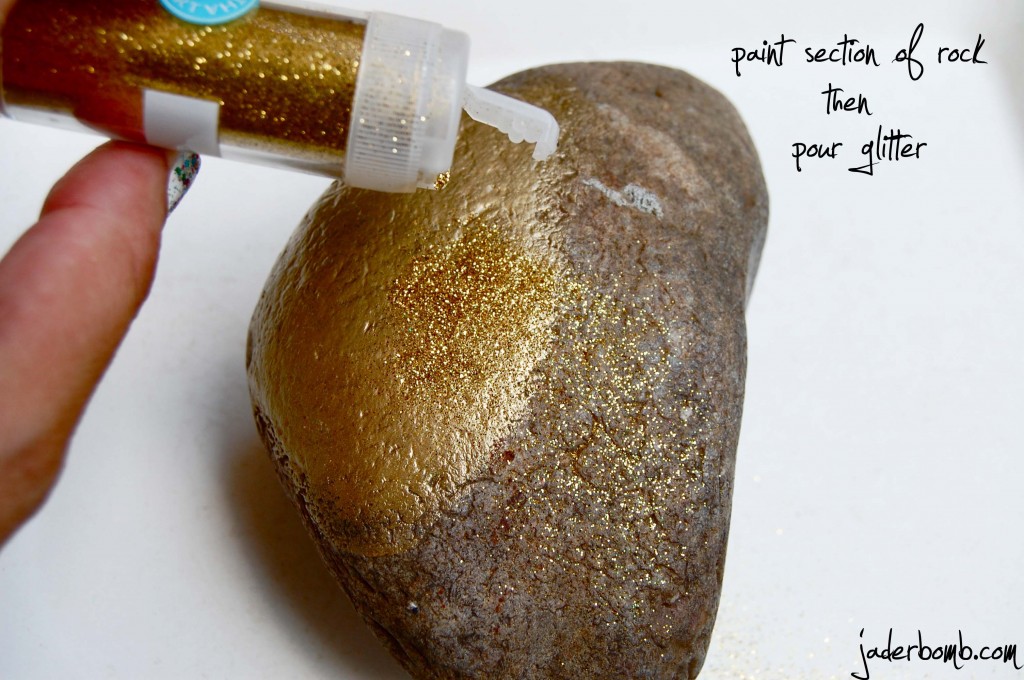
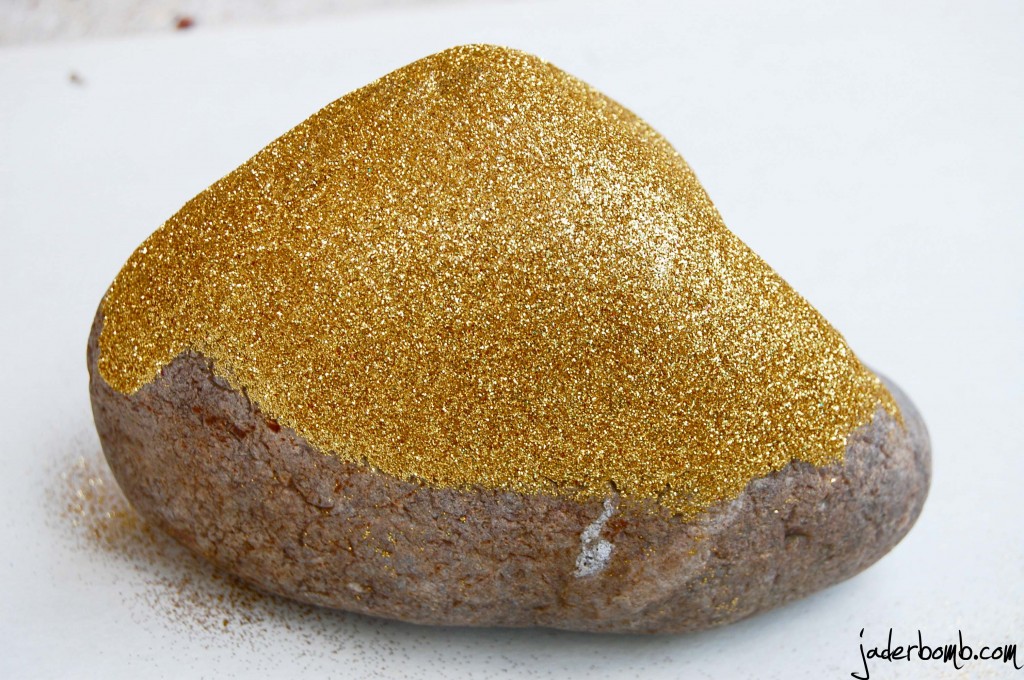
You know I am using my Martha Stewart glitter! It’s is by far my FAVORITE!!! I do a section then let it dry before I move on. You can glitter the whole thing at one time if you want to!
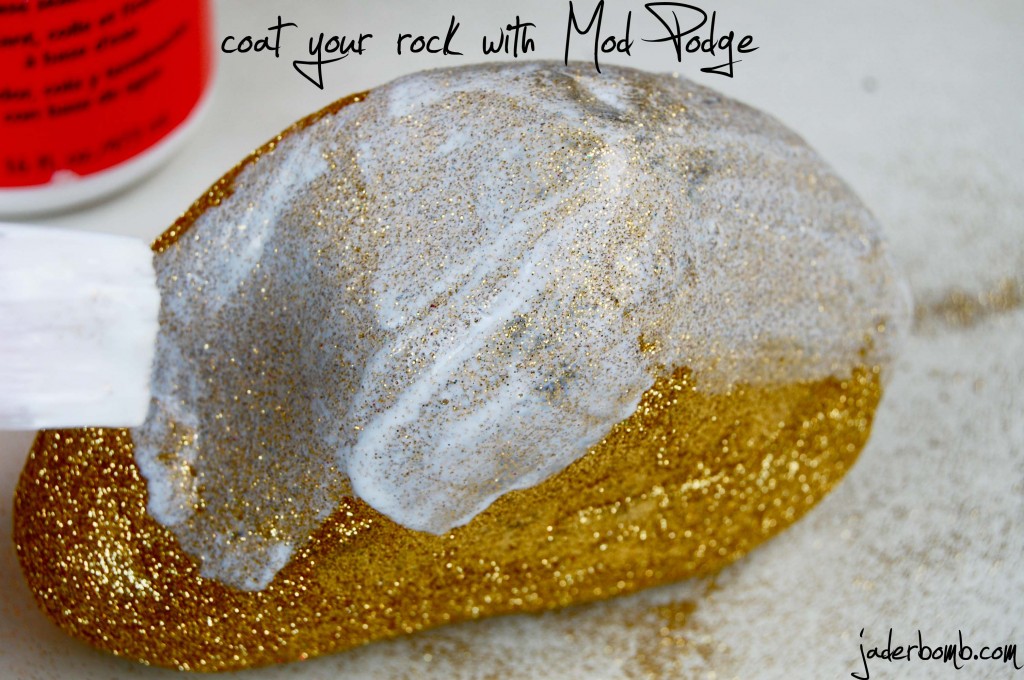
I LOVE MOD PODGE! My friend Amy’s new book just came out! Make sure to check it out! It has TON’S of amazing project’s in it. It’s called MOD PODGE ROCKS!
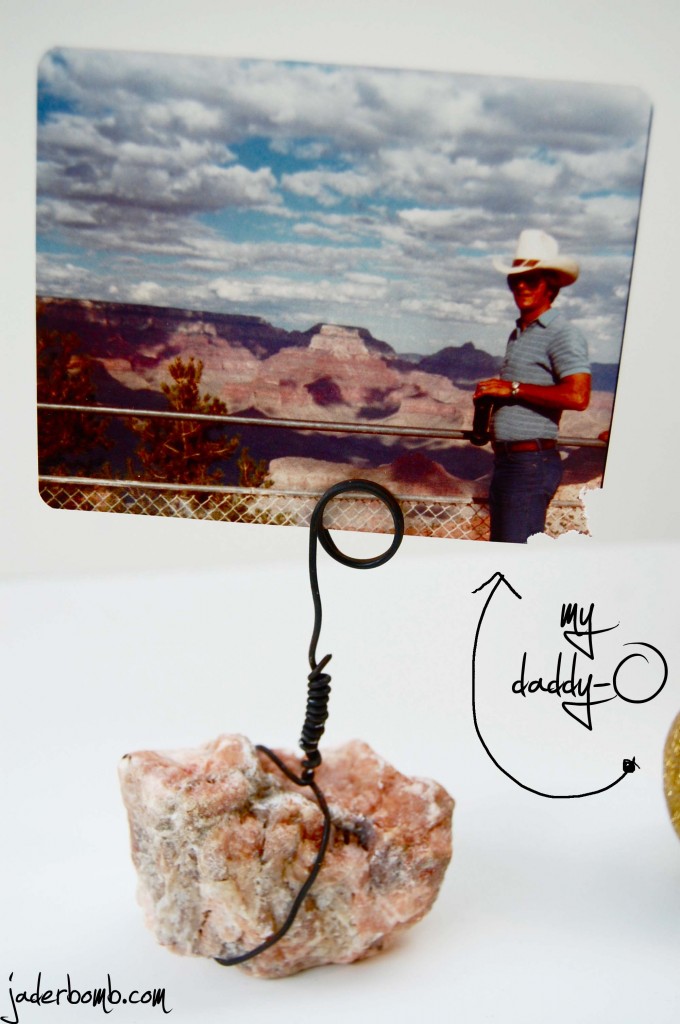
I love the simplicity of this.
Well, I hope you had fun hanging out with me today. Make sure you come by my website to see more fun and easy tutorials!
You can also find me here!
Custom Metal Initial Tag DIY
- Metal Disc – I used 10mm brass blanks.
- Metal Letter Stamp – I used 1.5mm.
- Metal Hole Punch
- Hammer
- Bench Block
- Black Acrylic Paint
- Jump Ring
- Necklace or Bracelet
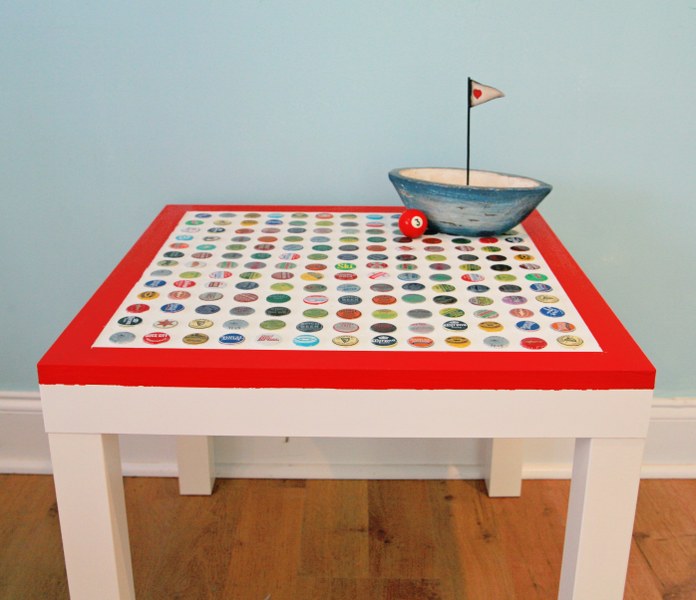
DIY Bottle Cap Ikea Table Revamp
Ashlee from My So Called Crafty Life is running things today here at SBLC. She has a fantastic Ikea table revamp to share that is inexpensive and super fun. This particular project is right up my alley, as I am about to purchase a mitre saw and get into some power tool projects. Don’t be intimidated. Ashlee walks you through it like a pro. Please help me welcome her, and give her lots of love. She may just be a monthly contributor here, which is great news. Her blog is uh-mazing! Thanks for sharing with us, Ashlee.


Today I have a really fun furniture re-do for you! I am going to show you how to take an old IKEA Lack side table and add a super funky and cute bottle cap top. This DIY is a blast to make! It was more labor intensive than most of my projects, but hey, it was so worth the time. The best thing about this redo is that it was pretty inexpensive. The table had at one time cost me a whole $8. Depending on whether you have bottle caps or have to buy them, the cost for the rest of the supplies was under $30. Making this table was the most fun I’ve had with a project in a while! So gather your supplies gals and let’s make a table!
Here’s What You Will Need:
*IKEA Lack Side Table
*169 or more bottle caps
*.75×1.5″ 8 Foot Piece of Pine Wood
*1/2″ Plywood
*Heavy Duty Construction Adhesive
*Liquid Nails
*Wood Glue
*Wood Putty or Plastic
*Trim Nailer and Nails
*Circular Saw
*Mitre Saw
*Paint
*Painters Tape
*Grout
*Grout float
*Bucket
*Sponge
*Screws
*Screwdriver


Step 1: Prep Table- Remove the legs from your table. Wipe down the top and make sure it doesn’t have any spots of gunk or dirt


Step 2: Cut Backer Board- First we’re going to cut the board the bottle caps are going to be glued down to. We want the board to be small enough to allow for the band of pine to go around it. The pine is 1.5″, so we’ll take a little over three inches off of the square measurement of the table and a little extra to give it some wiggle room. The table top is 22×22″ so we take off 3″, we’re left with 19″ and with wiggle room your board should be 18.875×18.875″ square. So, mark your measurements on your board with a straight edge and cut off excess with a circular saw. You can also ask the people at the hardware store to cut your plywood down in store if you need to.


Step 2: Glue Plywood- Mark the border of your plywood on your tabletop. Measure in and mark 1.5″ in all the way around the edge of the table top. Next, squirt a generous amount of construction adhesive onto the tabletop inside those markings. Then carefully glue down the plywood to the tabletop. Let glue set for a few minutes. Screw in a few long screws around the edges and in the middle for extra strength.


Step 3: Glue Bottlecaps- Working from the outside in, squirt dabs of liquid nails and place bottle caps onto dabs of the adhesive and squish down. It helps to lay out the outer band of bottle caps to give you a guide of how to place the other bottle caps to keep rows somewhat uniform. Let the glue set for a few days or at least 24 hours.


Step 4: Cut Pine for Band- Measure from outside edge to outside edge and cut four pieces with a 45 degree angle on a mitre saw. Be careful and try to be as precise as you can. The more precise a cut you have, the better your mitred corner will be.


Step 5: Assemble Band- Squirt a generous amount of glue onto the tabletop where the band piece will go. Smooth out glue with a shim or scrap piece of wood. Carefully glue band into place. Nail down band piece using your trim nailer. Then wipe off excess glue that has seeped out. Repeat with the other pieces until you have a beautiful band around your table top. Lightly sand and putty the nail holes if you like.


Step 5: Paint- Carefully tape off the sides of the tabletop with painters tape. Press firmly and rub your nail into the crease between the band and tabletop so you have a nice edge. Paint band in your desired color. Remove the painters tape while the paint is still wet. Let the paint dry and cure for at least a few hours. It is important to make sure your tape is really good and secure. I waited for a little while to paint after taping and did not repress my tape down, and my lines were not perfect.


Step 6: Grout: Re-assemble the table legs. Be sure to tape off your painted band before you grout. I used ready-made grout that we happened to have on hand, but mixing grout yourself is not hard to do, just follow the instructions on the package. Mix up your grout, then scoop some up on your float and slap it down onto the tabletop. Then carefully push it in and around diagonally around and between bottle caps. You then use the float on its side and smooth the top until you have the gout even and full across how you like it. Next, take a sponge and bucket of water. Dunk the sponge and then wring out most of the water. Wipe down on top and across the grout until the bottle caps are clear and visible and the grout is even like you like it. I have to say, I have used grout many times before with tile projects, and grouting bottle caps is not easy. It takes some care. My gout lines did not turn out picture perfect, but I’m happy with the results as this was my first time using bottle caps. Let grout set up for 24 hours, then go over top again with a damp sponge to remove any residue left by the grout. Remove your tape and wipe down band. And there you have it! You just finished an awesome table!


This table was such a fun project to make! I really love how it turned out! It makes a great addition to my living room, and I know I will enjoy it for years to come! A big “Thanks to Johnnie for the opportunity to guest post! You can see more of my projects on my blog My So Called Crafty Life Here. Stop on by and say Hi.
Happy Crafting Everyone!
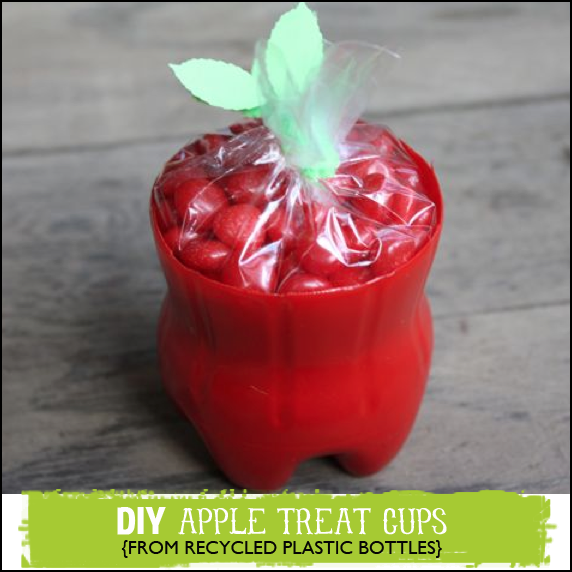
Upcycled Apple Treat Cups
Need a fall party favor or teacher gift for back to school? Today’s guest has you covered with these precious apple treat cups. Not only are they adorable, but they are eco-friendly, made from plastic bottles. Malia from Yesterday on Tuesday makes me happy. How did she know I love apples? If you are new to this talented creator of vintage lovelies, you are in for a treat. I could spend hours browsing her projects, and her recipes usually make me drool on my keyboard. Thanks for sharing with us, Malia!
Hi There, Saved By Love Friends! My name is Malia and I blog over at Yesterday on Tuesday, where I like to share craft projects, recipes, vintage finds and more.
Johnnie is one of my favorite bloggy pals so I was psyched when I got the opportunity to blognap SBL for a day while she’s on vacation.
I am a BIG crazy upcycler. It bugs me to see things go to waste so before I toss something in the recycling or trash I am always thinking… WHAT CAN I MAKE WITH THIS?
With school coming up, and apples in season, I had a hankering to make something apple-themed… so the idea of these apple treat cups was born. These would be cute for a back-to-school party or autumn gathering.
Supplies: 12 oz plastic drink bottles, red spray paint, a sharp knife or kitchen scissors, leaf punch, green cardstock, green pipe cleaner or twist ties, red candy, clear treat bags, glue or glue dots.
Punch 2 leaves per “apple” and set aside.
Find the seam on the bottle, stick the knife or scissors in and cut all the way around.
The plactic won’t be sharp but you can go around again with scissors to even it out.
Spray paint the “cups”
Don’t forget the bottoms!
It might take a few coats.
After they are all dry… it’s time for the fun part. Fill the treat bag up with red candy, use a snippet of pipe cleaner or twist tie to close it and secure the leaves on there with a drop of glue or a glue dot.
Any kind of small red candy will do!
Ta-Da! A cute Upcyled Apple Treat Cups. “Pick” one or two or three!
Thanks for letting me hang out with you today and thank you Johnnie, for having me.
I’d love to connect with you on my blog, Pinterest or Facebook.
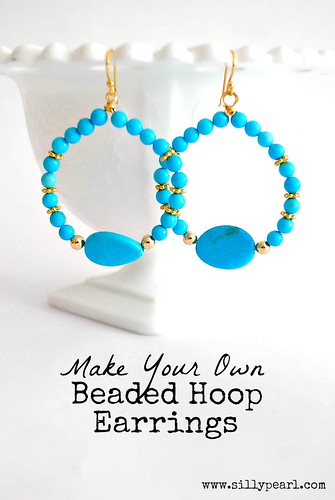
Guest Post: Beaded Hoop Earrings
Today I am thrilled to have Steph from The Silly Pearl here to share with you a fantastic beaded hoop earring tutorial. She is a multi-talented crafter for sure, but I especially love her jewelry tutorials. She was in the handmade bridal jewelry business before her twin girls came along, and her experience shines through her projects. Might I just add that I am all over these earrings. Thanks Steph!
Hello! My name is Steph from the blog The Silly Pearl, where I write about crafting, thrifting, cooking (and a teeny bit of gardening!), along with my 5 year old twin girls. Thank you so much to Johnnie for having me today on your blog. I was so honored when she asked me to guest post for her this week.
Hope you are having a great Labor Day weekend! Though ironically, my tutorial today doesn’t take much work at all! I’m going to show you how I made these Beaded Hoop Earrings.
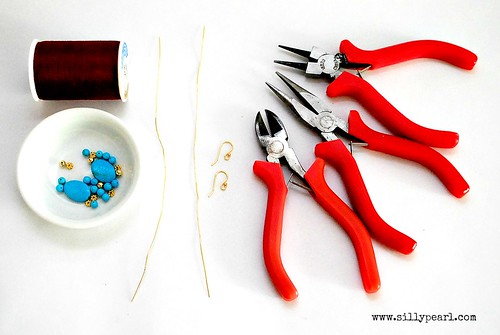
Here’s what you’ll need:
- An assortment of beads. This depends on the look you’re going for. I have a large focal bead in the middle, so I have two of those. Then I have three other types of beads, symmetrically strung on either side. I got all my beads at a local bead store, but you can find similar beads at Michaels or Jo-Ann.
- Two pieces of jewelry wire cut to 6 inches each. I used Beadalon 24-gauge round wire, available at Jo-Ann. I would not go any thinner than 26 gauge or thicker than 22 gauge (too thin…it might break with wear, and too thick…too hard to work with).
- Something cylindrical in shape, like a spool. This will be your template for bending the wire into a round shape. The finished diameter of the earrings is about 1.5 inches, so if you want bigger/smaller, then use a bigger/smaller template.
- A pair of ear wires. I purchased these from Michaels as well.
- Jewelry making tools: Flat nose pliers, Round nose pliers, and Wire cutters.
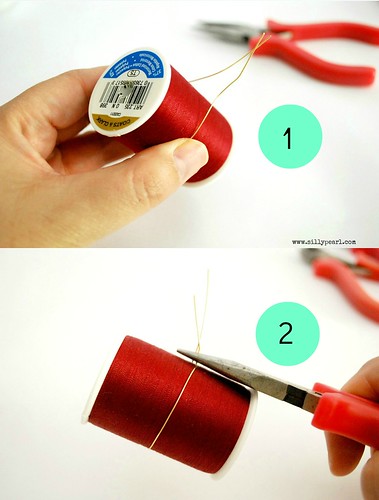
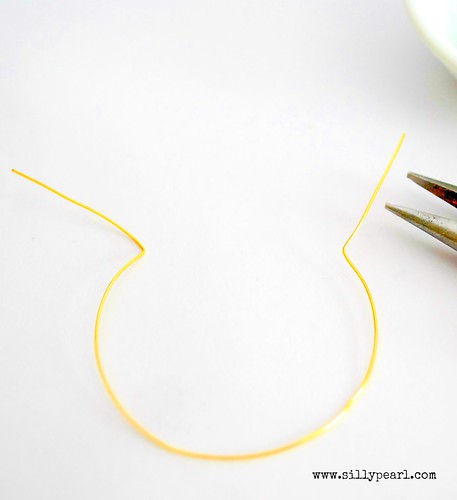
1. Wrap one piece of wire around the spool, so that there is an equal amount of length sticking out, if that makes sense. Then 2. Pinch the wire together so it’s the same circumference as the spool. You’ll be left with a little less than 1 inch of both the ends.
So when you remove the wire from the spool, it will look like this, with two kinks in the wire.
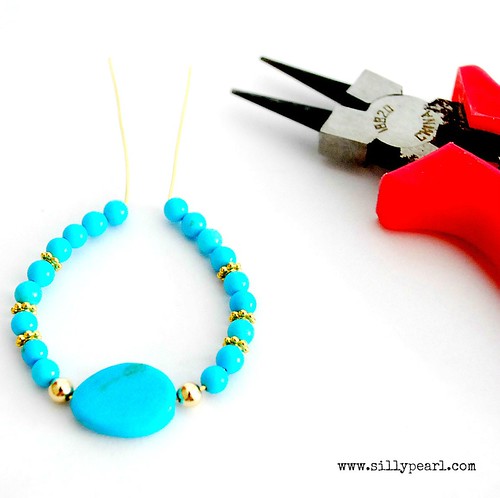
3. Now you’re ready to start threading on the beads. Use your fingers to gently straighten one of the kinks, enough to allow the beads to thread on. If you’re using a focal bead in the middle, thread that on first. Then 4. Thread on the small beads on one side of the focal bead, until there are enough beads to reach the kink. Next, 5. Repeat the same pattern on the other side, again straightening out the kink a little bit so you are able to thread on the beads.
So when you have all your beads threaded on, it will look like this. For the next few steps, get your round-nose pliers ready…now I’ll teach you how to wire wrap, but you’ll be wrapping both those end strands (instead of just one strand as usual). To see a better tutorial on wire wrapping than I could ever do, visit BeadStyle Magazine’s wire wrapping tutorial, or check out the last few pages of every paper issue.
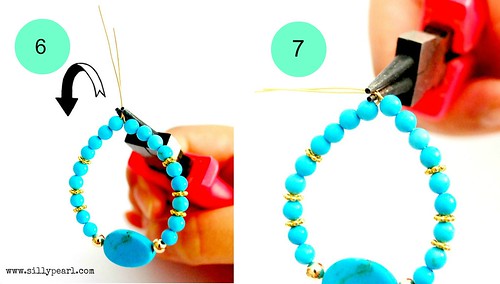
6. Grasp both strands with the round-nose pliers. Then 7. Twist your wrist to one side, bending both wires at 90 degrees.
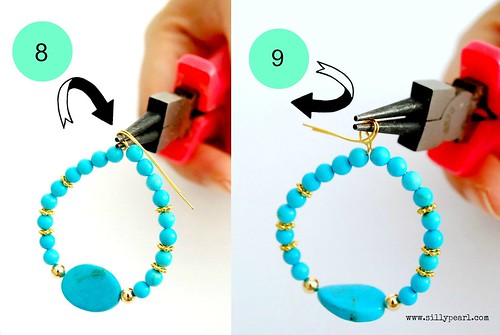
8. Using your fingers, grab both the ends, and loop it around the top of the round-nose pliers. Then, 9. Wrap the wire under the round-nose pliers, remove your pliers from the loop, and insert only the bottom point of the round-nose pliers into the loop.
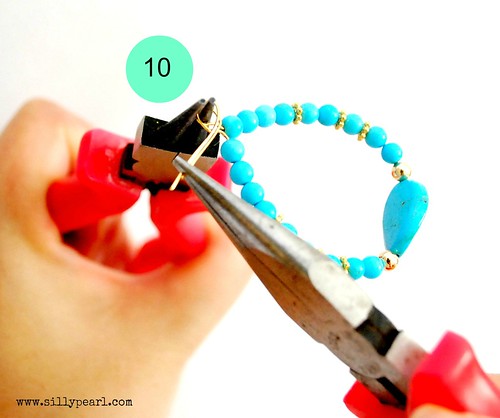
10. Now we’ll start wrapping the ends around the base of the loop to secure the loop. Grasp both ends with flat-nose pliers while you still have the round-nose pliers inside the loop, as described in step 9.
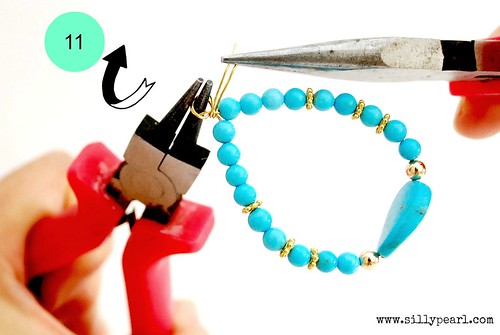
11. Wrap the wire around the base of the loop (there should be a teeny length of vertical wire at the base of the loop, where you formed the kinks earlier, which is where the wire will wrap around).
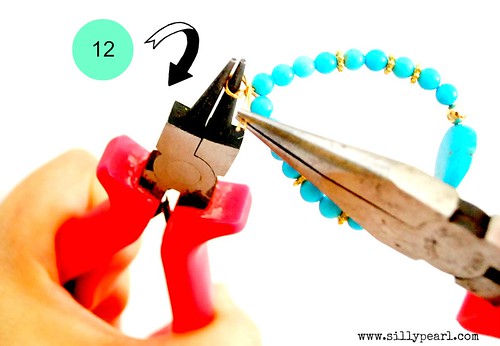
12. Keep wrapping a few more times until…
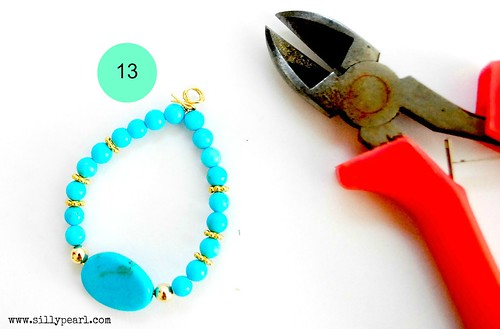
13. You are left with a short length of the wire ends. Next you’ll use your wire cutters…
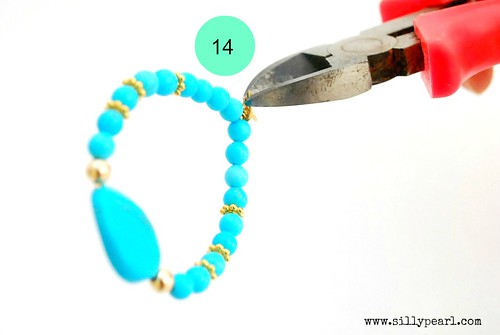
14. …to cut off these ends as close to the base of the loop (i.e. where your wrapped wire is) as possible, without snipping anything else!
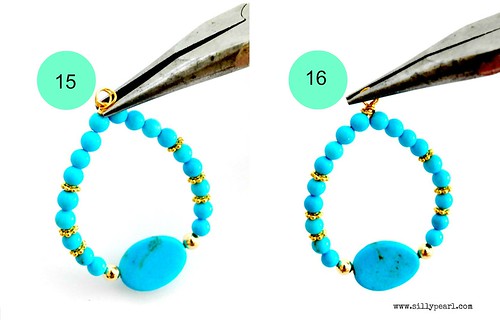
15. Then use your flat-nose pliers to flatten and tuck in those ends so you don’t have anything scratchy or pointy sticking out. 16. You can also use the flat-nose pliers to neaten-up the loops, which you want to try to make as uniform as possible but it doesn’t always happen! It’s ok…it looks rustic, right?
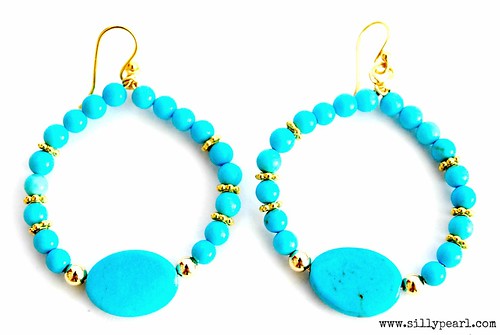
16. Finally, take your earring wires. On the left in the picture below is a closed one. Usually with ear wires, you can open the loop to slide on your finished piece. Slide open the loop with your flat-nose pliers, like you would open a jump ring (see the BeadStyle Magazine link above for another tutorial on how to open jump rings with a sliding motion, which you would also use to open the earring wire loop).
Repeat for the 2nd earring, and you’re done.
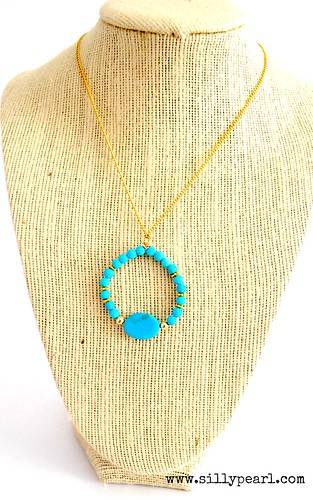
You could also make a pendant…instead of using earwires, just thread a chain through the loop.
If you enjoyed this tutorial, I hope you’ll stop by my blog, The Silly Pearl, for more! I not only make jewelry, but enjoy almost every other type of craft.
Again, thank you so much Johnnie for having me on your lovely blog today!
-Steph-

