Archives for March 2012

50+ Ombre DIY Projects

Ombre DIY

What the heck is “Ombre”, anyway?  That is what I thought when I first heard the term used in reference to design.  As best I can deduce, it comes from the Latin word for “shaded”, and refers to a color gradient.  I thought it had to be monochromatic, but it turns out that “ombre” is used to describe all kinds of gradients.  The important thing to know is that it is in, whether it be hair, nails, or shower curtains.  You cannot go wrong with ombre

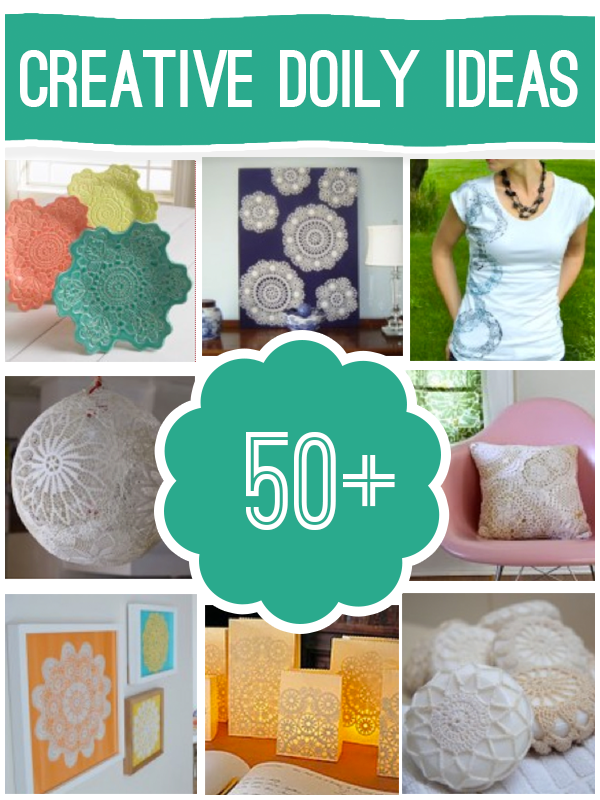
Enjoy this colorful list of DIY ombre projects, just in time for spring!


Thrifty Thursday Week 68

ThriftyThursday

Featured

LINKY STUFF:

How it Works: No giveaways, shop or links to your main blog, please. That way we know when we come to Thrifty Thursday, we will only encounter DIY projects and not end up sifting through a bunch of other links. Entries not related, or to main blog pages/shops/giveaways will be deleted.
Other stuff:
*Please add a text link or my button to your post!
*A few projects from the previous week’s linky will be spotlighted, so let them know they ROCK!
*Please visit the at least the 2 blogs above you and shower them with comment love.
*Leave me a comment and let me know you were here. I love hearing from you.
*Have fun and be inspired!
*My friend Nikki knows how to throw a great party too. Be there…
thrifty decorating 019 button 3 Thrift Thursday Week 67

FEATURES:

Fabric rose tutorialSJ at Homemaker on a Dime made these gorgeous fabric roses, and wait until you see the model.  Too cute!

DIY Stenciled CurtainsStencil your very own damask curtains with Becca at From Gardeners to Bergers!

Mod Podge and paper braceletIt is no secret that I love Carolyn’s Homework.  Check out her Mod Podge and paper charm bracelet tutorial!

PARTY!!

Polymer Clay & Resin Word Bracelet

Have you seen the polymer clay/Sizzix kick going on here at SBLC?  Well, I didn’t have a die to cut the exact circle I needed for these bracelet blanks, so I used a paper punch for a circle that fit perfectly.

You can easily make this beautiful custom word bracelet at home.  Here is how…

For this project you will need:

  • Polymer clay sheet at thickness of  7 (9 being thinnest), white, baked 45 min at 275
  • Alcohol inks in desired colors
  • Crafter’s pick glue
  • Circle punch to fit bracelet bezels (Epiphany Crafts 14 circle used here)
  • Letter stickers or rub ons
  • Magic glos resin

Instructions:

Polymer Clay Bracelet Tutorial

Polymer Clay Jewelry TutorialThat is it!


Stamped Polymer Clay Word Pendant

Stamped Polymer Clay Pendant

Today, I thought I would share with you another stamped polymer clay pendant.  I recently signed up with Cindy Lietz’s polymer clay library, and was reminded about how fun it is to make bezel pendants with clay.  The Polymer Clay Tutor video on stamped bezels inspired me to dive into these word pendants. If you are interested in developing your polymer clay skills, I cannot stress enough how wonderful, and under-priced, Cindy’s membership videos are.  I am not being compensated in anyway for saying so, I am just that excited about the tips, tricks and inspiration jam packed into each video I have watched so far.  Seriously, she is a fantastic teacher!!

Back to the pendants, I love how simple they are to create, and how each one comes out a little differently.

For this particular piece, I used the bezel from a pendant I scored for cents at a garage sale.  I took a hammer to it and rid it of its glass covered image so I was left with just the bezel.

Polymer Clay Word Pendant

Since the bezel was antiqued silver, I wanted to give the pendant an antique feel.  I mixed scrap clay to get the aqua you see in the final piece.  With my fingers, I mashed the clay into the bezel, and smoothed it out into its cabochon shape.  Once I was happy with the shape, I used metal stamps for the word “JOY”, and a clear cling butterfly stamp for the butterfly.  I used a stylus to add a little more texture randomly, then baked for 45 min at 275°.

TIPS:

  • Remove fingerprints in raw clay before baking by smoothing armor-all lightly over the area until prints are gone
  • Spritz stamp with armor-all or water before pressing into clay to prevent it from sticking

To finish, I used a mixture of glaze and black acrylic paint; painted the entire piece, then wiped away the glaze/paint mixture, leaving the black in the depressed areas.  When this dried, I sealed with 2 coats of sculpey satin glaze.  I love this stuff.  It is easy to apply, dries to a lovely finish, and is inexpensive.

Polymer Clay Pendant Tutorial

What do you think?  Don’t worry, I am still on my Sizzix kick.  Stay tuned!!

Sizzix Embossed & Die Cut Polymer Clay

DIe Cut Polymer Clay

Here is my first experiment with sizzix and polymer clay.  I conditioned the clay and rolled it out in my pasta machine to a thickness of 4 (1 being thickest and 9 thinnest).  I baked it for about 10 minutes, then removed it from the oven and let it cool.  Next I ran it through my sizzix in the Tim Holtz Dots texture fade folder.  Then I die cut it with Sizzix Originals circle die, to fit perfectly in my one inch circle bezels for the below pendants!
Embossing Polymer ClayThis is so exciting to me!  I have a bunch of jewelry dies on the way, and absolutely cannot wait to get my hands on them!! Between this and flower dies, I am a Sizzix maniac.  Any must know tips you seasoned sizzix-ers wanna throw my way would be appreciated.

Find it, Cut it, Wear it

Die cut flower pendant
My recent acquisition of the Sizzix Big Kick die cut machine has created a cut monster.  I had no interest in getting one of these since I have a Cricut, until I began dabbing with metal work in my jewelry.  Cricut will not even think about cutting metal.  Sizzix has dies that cut right through metal up to 24 mm thick (according to them), with tons of shapes to choose from, and I finally caved.

Since getting it, I have cut through several different materials (the popsicle stick pendant from the Scribble Challenge is a good example), and will be sharing my experiences and results with you as I go along.

This project was born out of my morning run.  I spied some random scraps of metal and plastic on the ground.  Immediately I pictured running them through my Big Kick, so I snatched them up and brought them home.

Make Jewelry With Sizzix

Die cut jewelry

You can make this necklace so easily with Sizzix.  All I did was die cut the shapes using the Sizzix Flower Layers #2 stack them, secure them with Crafter’s Pick, embellish with pearl in the center, and attach to chain with jump ring.  The bottom 2 layers are grungeboard with scrapbook paper glued to the top.  I had to hole punched a petal in the metal flower for the jump ring attachment.
Found Objects JewelryHere I made a flower embellishment for a pendant I had already created.  I simply cut a flower from the metal and the plastic I found in the road & adhered them with Crafter’s pick right on the front of my pendant.  The plastic layer (bottom) is colored with a pink copic marker.  What an easy way to completely makeover a pendant in a snap!

I am in love with this machine.  I don’t know what took me so long.  Wait until you see what you can do with polymer clay and the Sizzix!

50+ Doily Project Ideas

Doily crafts

I am completely amazed by what people do with doilies.  I have used them as stencils in mixed media pieces, and to texturize polymer clay, but that is just the tip of the iceberg.  This week’s 50+ is full of gorgeous doily home decor, some crazy purple doily clogs and much more.  Enjoy!!

[pinit]

Doily50plusPin

[pinit]

Thrift Thursday Week 67

ThriftyThursday

Featured

LINKY STUFF:

How it Works: No giveaways, shop or links to your main blog, please. That way we know when we come to Thrifty Thursday, we will only encounter DIY projects and not end up sifting through a bunch of other links. Entries not related, or to main blog pages/shops/giveaways will be deleted.
Other stuff:
*Please add a text link or my button to your post!
*A few projects from the previous week’s linky will be spotlighted, so let them know they ROCK!
*Please visit the at least the 2 blogs above you and shower them with comment love.
*Leave me a comment and let me know you were here. I love hearing from you.
*Have fun and be inspired!
*My friend Nikki knows how to throw a great party too. Be there…
thrifty decorating 019 button 3 Thrifty Thursday Week 66

FEATURES:

Spring Wall Art DIY

I am digging this simple stencil spring art DIY by The Latest Find.  Fantastic colors, and cute arrangement on the wall shelf with the flower.

Polymer Clay Rose Necklace TutorialHaute to Sew shared this beautiful polymer clay rose tutorial.

Free Photoshop Doodle Frames

Laura at Digiart Cafe generously shared these awesome doodle frame photoshop brushes for free download.  I am all over that.

PARTY!!

Scribble Shop Challenge Project

popsicle stick crafts

How excited was I when the box of craft supplies from Scribble Shop showed up at my door?!  Very… until I opened it.  For this challenge, a group of bloggers are to use as many of the supplies in the box as possible to create a project. I am not sure what I expected to be inside, but when I saw what I had to work with, I was unmoved.  What was I going to do with a ton of jumbo craft sticks, raffia, colored pencils, marbles, glitter buttons, stencils, pigment ink pad and rub-ons?

Scribble Shop online crafts


 SUPPLIES IN BOX:

Metallic Stamp Pad

Dress It Up Embellishments

Mod Podge

Stencil

Raffia

Glass Gems

Motivational Quotes

Popsicle Sticks

Colored Pencils

OTHER SUPPLIES I USED:

Vintaj Natural Brass Cable Chain

Crop a Dile

Eyelets

Sizzix 3D Flower Die

 As I pondered the various frames and coasters I could make from these sticks, I was thinking about how I am so inspired to make jewelry right now, and how annoying it was to have to take a break from that for this challenge.  That is when the idea came to me to die cut the craft sticks into pendant and charm shapes.

Here is what I did.

Altered pendant tutorial

For the rectangle shape, I didn’t have a die that was the size I wanted, so I went primitive and used scissors.  Sanding takescare of the rough edges that result.

Scrapbook paper jewelry
To finish, I sealed the rectangle with Mod Podge.  When that dried, I hole punched the pendant at the top and added the 2 eyelets for attaching to the chain.

The rose is made from cardstock cut with Sizzix 3-D flower die, with raffia leaves.  I am so glad I was forced to try to incorporate raffia.  I love it for the rose leaves, and I also tied a piece of it at

the bottom of the pendant.

Die cut jewelry tutorial

Here is the heart charm, which I ended up painting with gold acrylic paint, along with the pink pigment ink.  I punched a hole at each end to add the jumprings.

Upcycled Jewelry Tutorial

Big thanks to Scribble Shop, for forcing me to stretch the creativity!

To find everything I used for this project, visit the links in the supply list.  Scribble Shop has teamed up with SBLC to offer you 15% off of your entire order.  This offer expires 4/30/12.  Enter dicount code SVDLVCR8.  Be sure and visit them on facebook, twitter, and google + to keep updated.

***Disclosure: I received the challenge supplies at no cost and was compensated for my time.

Z Gallerie Finds

Z Gallerie Mirror

I had the opportunity to check out Z Gallerie in person a couple of weeks ago.  My phone camera was busy!  Interior decorating is not my gift, so I love soaking in the display settings for fantastic arrangement ideas that I would never come up with on my own.

Z Gallerie Ruffle Pillow

A few things that caught my eye are; luscious black ornate mirror ($399), ruffle pillows, yummy color pallets, fabric designs, numbered accessories, distressed frames, lotus flowers…

ZGallerieAccessories

Z Gallerie Bedding

Quatrefoil always does it for me!

Quatrefoil pattern

What are your favorite design trends?  Are you sick of chevron and quatrefoil yet?  Not I!

Privacy Policy