Archives for 2011

French Seam Envelope Pillow Covers

How to Sew Pillow CoversDo you want to refresh the look of your pillows and learn a fancy seam technique?  The French seam used in these envelope pillow cover means there are no raw edges, even on the inside cover’s inside.  The look is professional and neat.  No stray frayed ends.  Not that they are a huge deal since they would be on the inside, but the french seam is super easy.  If you are going to the trouble to sit in front of your machine, there is really no reason not to do it this way. I am a very new seamstress, so this tutorial is beginner friendly. Not to mention, it uses an old pillowcase and a tea towel, so you can probably make it now with things you have on hand.  If not, the supplies are no further from you than the nearest thrift store or Dollar Tree.

Easy Pillow Cover Tutorial

Supplies:

  • Fabric for front and back of pillow; Big enough to cut the following; for the front, 17 inch square and for the back 2 rectangles 17 x 12.75 inches each. This is for a 16 inch pillow form or throw pillow, with an extra inch for seam allowance.  If yours is a different size square, no problem.  Say you have a 20 in pillow form.  Cut your front square 21 in x 21 in (you don’t need to worry about adding seam allowance since the pillow will fit in and be nice and full).  For the 2 back rectangles, one dimension is the same as the length of your square sides (21), and the other is that length multiplied by 3/4.  For a 20 inch pillow, that would be 21 x 15.75  inches.

***For my fabric, I found an old shabby pillow case (the beige color on the back) and a cool striped tea towel for the front.

  • Self healing cutting mat and rotary cutter
  • Quilting ruler or other straight edge
  • Scissors
  • Threaded sewing machine in matching color to your fabric
  • Iron
  • Ironing board
  • pins
  • fabric pencils or air soluble disappearing marker

Instructions:

  • Cut your fabric on your cutting mat.  I like to measure and draw the lines on the back of the fabric.  In this case, the front and back of the tea towels are pretty indistinguishable.  If yours has a clear front and back, turn it over so you are looking at the back, and use your straight edge to draw the 17 inch square.  Then cut it with your straight edge and rotary cutter, making sure to cut away from yourself.  Here is my 17×17 square…
  • How to Sew PillowsSteam press the back fabric to smooth out wrinkles.  Now you are ready to cut your back pieces the same way, folding your fabric over on itself so that you can cut both rectangles at the same time, since they are the same size…


NOTE
:  If you are using an old pillow case or other fabric with seamed edges for the back, make sure your cut so that you have the the seamed edges as the long edges on your rectangles.  That way you will not have to seam the back flaps.

How to sew pillows

Sewing pillows

  • Now you are ready to pin the front to the back.  You will have WRONG sides together.  This is unusual, I know.  You want to be looking at the right (fabric side you want to end up showing in your final project) sides of the fabrics when they are pinned together for the french seam.  Pin about every inch or so, close to the edges, all the way around.  Sew straight stitch length setting 2.5, stopping to remove each pin before you get to it, pivoting at each corner.  (I don’t like sewing over pins, it stress me out).  Back stitch for stability when you get back to where you started.

Easy sewing project

Easy sewing project

  • Press your stitch line to set the stitches.
  • Now cut around the edges, very close to the line you just stitched.  This doesn’t have to be perfect, it is more just to get rid of the bulk of the excess fabric outside of the seams.  BE CAREFUL.  You don’t want to cut through what you just sewed, but if you do, just go back and sew that area again.

Easy sewing project

Easy sewing project

NOTE:  I am far from perfect in my cuts and stitch lines.  These things will look great, even if you are a little off.  Don’t be hard on yourself!

  • Now you are almost done!  Turn the pillow inside out (so that the wrong sides are now on the outside.  Use a bamboo skewer to gently push out the corners, being careful not to poke all the way through.  Press the piece, then go back to your machine and sew 1/4 inch from the egde all the way around the pillow.  This step hides the raw edges, so that when you turn the pillow cover the right way, no raw edges will be on the inside!  Pivot at each corner, keeping your 1/4 distance from the edge.  Reverse stitch when you get back to the starting point and you are done.  Cut the thread, turn your pillow right side out and push out the corners with your skewer or a not too sharp pencil.  Press if you want.  Shove your throw pillow or pillow form in there and beam with pride at the beautiful home decor accessory you just made from a towel and raggedy bed linen.  Yay you!

Easy sewing projectSee the stenciled word pillow from a couple of weeks ago.  I would love your feedback.  I am just getting to know my machine, and have never written this involved of a sewing tutorial.


Cutest Snowmen Ever


Lightly Felted Knit Snowman

I showed you these little guys 2 years ago, and just couldn’t resist bringing them back.  The pattern works up quickly, and involves light felting, for a tight knit look.  I used seed beads for the eyes, and a simple crochet hat and scarf on the bigger one.  I opted for earmuffs on the lumpy small one.  I can’t take it, they are so adorable.  I just stare at them.  Grab the free knitting pattern over at knit picks.  Warning:  making these things can be addictive.

knitted toys

Heart Dish From Magazine Pages


Heart Dish From Magazine Pages

Here is a coiled magazine page heart dish with lid, since you all loved the dish with lid I showed you here.  It is less time consuming than the first dish, but if you don’t have your strips folded and ready to go, I wouldn’t count on this being ready by Christmas!

Here is where I showed you how to fold the strips.  Since that time, I have made my strips slightly differently.  I start with 1/4 of a magazine page (using my paper cutter, I cut a stack of pages into quaters lengthwise) and dip them in 2 parts elmers glue, 1 part water, clipping them on a line to dry for a day or 2.  Then when I am ready to use them in a project, I spritz them with a little water.  This makes thinner strips that don’t rip and lend to beautiful, neat final projects.

To begin:

Recycled Magazine Page CraftContinue in this manner, gluing every inch or so, abutting new strips to the end of the previous one to keep going when your come to the end of a strip.  Eventually this heart shape will form.

Recycled Magazine Page Craft

Recycled Magazine Page Craft

When the base of the heart is  the size you want (mine is about 3.25 inches at its widest) you are ready to start building up and out for the sides of the dish.  To do so, glue the next strip so that its bottom half is adhered to the top half of the strip you are  attaching it to.  Go all the way around, and when you get back to the where you started, cut the end of the current strip so that it lines up with the beginning of the first strip on this level.  Continue in that manner until the dish is as tall as you want.

Recycled Magazine Page Craft

Recycled Magazine Page CraftTo construct the lid, you do pretty much the same thing.  When the lid is just smaller than the base, use strips twice the width of the onces you have been using (i.e. folded one less time) to go around the perimeter of the lid.  This creates the lip you see, to hold the lid in place on the base.  Go around with your regular strips once or twice after this to complete the lid.

Recycled Magazine Page Craft

To ensure durability of the project you have spent so much time creating, coat 3 times with finish of your choice.  I used mod podge matte finish.  That is it!! Enjoy.

Quick Fingerless Mitts for Last Minute Gifts

Fingerless Mitts

This pattern is for small women’s size

Size 8 Circular Needles or DPNs
Worsted Weight Yarn and fun yarn (optional)

Instructions:

Cast on 24 sts and distribute on circular needles (or DPNs)
Rows 1-8: k2p2 ribbing

**Pick up fun yarn at this point if you are using it**
Row 9-27: st st around (21 rounds)
Row 28: k5, pm, m1, k1, m1, pm, k18 (26st)
Row 29: Knit
Row 30: knit to marker, sm, m1, knit to marker, m1, sm, k18.
Row 31-34: Repeat rows 29 & 30 twice more
Row 35: k5, remove marker, K1 BO 8, remove marker, k18 (24st on needles)
Row 36-43: Knit around
Bind off in pattern.
Sew in all ends.

Free knitting pattern

Free fingerless mitt knitting pattern

Sweetgum Tree Christmas Decor

Sweetgum Tree Garland

I have been stepping on these spikey sphere thingies for the last 2 years of living where they are abundant.  Since the first time I saw them, I have wanted to use them in a crafty way.  They look all space age futuristic orbital starburst like.  So cool.  I finally decided to make some garland and filler for my Christmas decor.  It is perfect with the rest of my decor.

Sweetgum Tree Garland

I read that the sweetgum tree is found from the southwestern part of Connecticut to central Florida, west to Texas and north to Southern Illinois.  If you have them around you, you probably already know it.  There are tons of these spheres all over the sidewalks, and they are hard not to notice.  Here is how I made them all sparkly-pretty for the garland and filler…

I took a couple of plastic grocery bags and gathered the fallen spheres.  On a large cookie sheet, I baked them at 300° for 15 minutes to kill any critters that may have come along with them.  Once they cooled, I spray painted them with Krylon Glitter Blast.  This is the first time I have used it.  It did pretty well considering the receiving surface was less than smooth and uniform!

Natural Christmas Decorations

For the garland, I used an embroidery needle and some fire wire beading string.  After breaking about 4 needles, I finally resorted to a small diameter nail and hammer to pound a hole in the center of the sweetgum sphere so I could just pass the needle and thread through the hole.  For the filler, I just place the spray painted spheres in my vases and candle holders.  So festive and sparkly!  It doesn’t get much more frugal.

Handmade Christmas Nature Decorations

Handmade Christmas Decorations

Double Strand Newspaper Bead Necklace

Paper Craft Jewelry

This necklace is my favorite paper bead creation so far.  I love the round, shorter paper beads.  There is a wonderful video that helped me to figure out how to get this shape, as opposed to the longer oval beads.  The trick is to cut a really long, super skinny based triangle.

Paper Bead Necklace

For this piece, I planned the design, then made just the beads I needed, instead of my normal make a bunch of beads for days and days, then come up with projects.  The latter method always left me with tons of leftover bead soup.  I realized I was spending lots of time making paper beads for which I had no project in mind.  Not very efficient.

How to Make Paper Beads

I made the beads gradually smaller from front to back by decreasing the length of the triangle strip.  Here is the instructional video I mentioned above from paperbeads.org.  This site is amazing.  The majority of what I have learned about paper beads has come from there.

This is going to make one person on my gift list very happy.  Get rolling… you still have time!

Thrifty Thursday Week 53


I am glad you took time away from Christmas preparation to stop by and  join us for Thrifty Thursday, where creativity is shared, DIY style.  Thank you for being here!

How it Works: No giveaways, shop or links to your main blog, please. That way we know when we come to Thrifty Thursday, we will only encounter DIY projects and not end up sifting through a bunch of other links. Entries not related, or to main blog pages/shops/giveaways will be deleted.
Other stuff:
*Please add a text link or my button to your post!
*I will choose 2 participants to feature the following Thursday, Please drop by and love on the features! Their links are in the post where their projects are featured.
*Please visit the at least the 2 blogs above you and shower them with comment love.
*Leave me a comment and let me know you were here. I love hearing from you.
*Have fun and be inspired!
*Stop by and say hello to my crafty friend Nikki and link up to her thrifty party too…
thrifty decorating 019 button 3 Thrifty Thursday Week 52

Featured Projects:

How to make Christmas Wreath

This funky wreath at Sassy Style immediately caught my eye.  Immediate Christmas cheer.

Handmade Christmas Decorations

This simple, whimsical tree “Joy” block is a lovely way to bring in the holidays.  Check it out at Artsy Vava!

Lets get this thing going!


Defense Against Holiday Weight Gain

This is a Sponsored post written by me on behalf of Slim-Fast for SocialSpark. All opinions are 100% mine.

Slim-Fast Chocolate Shake

Slim-Fast has launched an all new delicious shake line, served up in easy grab and go bottles.  They sent me the milk chocolate flavor to try out, and I am hooked.  I just threw the bottle in my gym bag and drank the shake after my run.  I love love love the taste!  I expected it not to be very flavorful, but it was like rich chocolate milk.  It was also surprisingly satiating.  I had some carrots and almonds a couple of hours after the shake and then a regular dinner, never feeling hungry.  I could do this long term, no problem.  Now I can’t wait to finish my workout so I can get to my chocolate shake!

The milk chocolate was so good and I am excited to try the French Vanilla and Strawberries N Cream.  They also have Cappuccino Delight and Rich Chocolate Royale.  As part of the 3-2-1 plan, these shakes can help protect against unwanted holiday weight gain. The plan includes 3 snacks (such as Slim-Fast 100-calorie snack bars, fruit, nuts or veggies), 2 Slim-Fast Shakes or Meal Bars per day and 1 balanced meal per day.  This actually sounds do-able to me.  Less like a diet, and more like a lifestyle that happens to include 2 yummy shakes per day.  I know having a meal plan during this time of year is a sure fire way to avoid the overindulgence that goes along with the season’s festivities.

Stock up on your Slim-Fast meal bars, shakes and 100 calorie snacks at your local grocery in the pharmacy section, at Amazon.com and on the Slim-Fast Facebook Store. Don’t forget to like Slim-Fast on Facebook!

Visit Sponsor's Site

Magazine Page Bead Covered Vase

Recycled Magazine Paper Bead Vase

Don’t you love the recycled paper crafts taking over the craft world these days?  If you have been here before, you probably know that I am mildly obsessed with them.  Awhile back, I showed you this coiled magazine page vase.  It is gorgeous, but took a century to make and is not water friendly.  That, combined with the fact that I have rolled literally thousands of paper beads over the last couple of months, led me to create this glass carafe wrapped with magazine page beads. (For awesome video on how to make your own paper beads, see this post).

Magazine page bead vase

It took close to 1000 paper beads; 988 to be exact.  I strung a clear glass seed bead every 4th paper bead as well.  So, while it was a simple project, it, like all the paper coil and paper bead projects, is time consuming.  It didn’t seem like that long since I spread it over a long period.  I used fishing line, and strung about 30 beads at a time, placed a bead buddy after the last strung bead to hold the strand taut, and began wrapping around the carafe, adhering the strand with a dot of hot glue ever 10 beads or so.  I just kept on until I got to the top of the carafe where I ran out of paper beads I wanted the beads to end.  I sealed the whole beaded area with 2 coats of Mod Podge.

recycled paper vase

I can put real flowers in here, with water and everything!  And I got to use up my stash of extraneous paper beads that didn’t find their way into a piece of jewelry.  If all that weren’t enough to make me the happiest crafter, the carafe came from my neighbor’s recycle pile.  Score!

Paper bead crafts

Magazine page bead vase

Old T-shirt to Skirt {Who Cares if it’s Winter}

Old T-Shirt Crafts

I am soooo excited about this project!!  I really suck at sewing.  My sewing machine completely freaks me out.  I get way stressed when I think about threading a bobbin, and a gather stitch???  Forget it.  Nuh – uh.  Well guess what… I threaded my bobbin and turned an old T-shirt of hubby’s into a skirt, and used a gathering stitch in the process.

Here is how I did it…

Supplies:

  • Old T-shirt with a circumference 1/3 larger than your measured waist
  • Sewing machine with thread matching your fabric
  • 3 inch elastic band (I got mine from an old pair of thrift store leggins)
  • Fabric pencil
  • Straight edge
  • Fabric scissors

skirt from old t-shirt

Instructions:

  • Lay your t-shirt out and smooth it, making sure the bottom edges are lined up.

Recycled t-shirt craft

  • With your fabric pencil, draw a straight line horizontally across the T-shirt just beneath the armpits.

Recycled T-shirt crafts

  • Now cut across the line with your fabric scissors.

Recycled T-shirt skirt

  • 1/4 inch from the top of T-shirt segment you just cut, sew a gathering stitch (long straight stitch with low tension), leaving long thread tails.  Stitch again 1/2 inch from the top edge (so 1/4 inch below the line you just stitched).
  • Now for the waistband… Mine was already stitched at the edges since I cut it off of a pair of leggins.  {If yours is not, wrap it around your waist and mark where it feels snug (but not girdle snug), then mark 1 1/4 inch past that to account for seam allowance of 5/8 inch along both sides.  Align the ends and stitch, then stitch again 1/4 inch from the first stitch.  Zig zag finish the raw edges.}

skirt from old t-shirt

  • Right sides facing up:  Now position your waistband lower edge 5/8″ past the upper edge of the skirt  and pin.
  • Gently pull the lower thread tails to gather the upper edge of the skirt until it is the same circumference of the waistband.  Pin the heck out of it.
  • From the wrong side of the skirt, zig zag stitch over the gathering stitch through the band and skirt.

T shirt to Skirt DIY from @savedbyloves
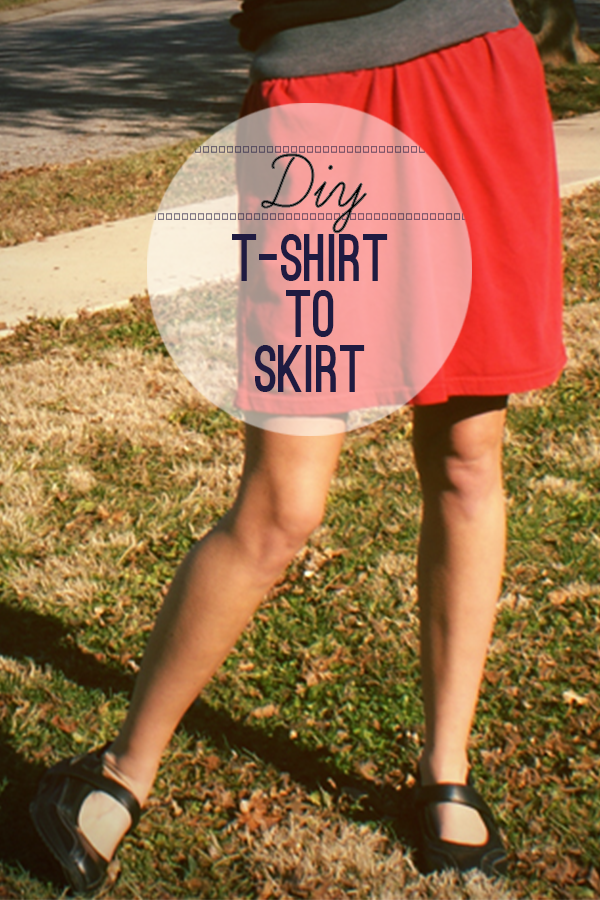
Then you are done.  Wear that bad boy out on the town.  I can’t believe it is 50° here in the middle of December.  I think that, mixed with the sunshine, contributed to my sudden urge to make a skirt.  Thanks for following along.  Let me know if you have questions.

Privacy Policy