 Do you want to refresh the look of your pillows and learn a fancy seam technique? The French seam used in these envelope pillow cover means there are no raw edges, even on the inside cover’s inside. The look is professional and neat. No stray frayed ends. Not that they are a huge deal since they would be on the inside, but the french seam is super easy. If you are going to the trouble to sit in front of your machine, there is really no reason not to do it this way. I am a very new seamstress, so this tutorial is beginner friendly. Not to mention, it uses an old pillowcase and a tea towel, so you can probably make it now with things you have on hand. If not, the supplies are no further from you than the nearest thrift store or Dollar Tree.
Supplies:
- Fabric for front and back of pillow; Big enough to cut the following; for the front, 17 inch square and for the back 2 rectangles 17 x 12.75 inches each. This is for a 16 inch pillow form or throw pillow, with an extra inch for seam allowance. If yours is a different size square, no problem. Say you have a 20 in pillow form. Cut your front square 21 in x 21 in (you don’t need to worry about adding seam allowance since the pillow will fit in and be nice and full). For the 2 back rectangles, one dimension is the same as the length of your square sides (21), and the other is that length multiplied by 3/4. For a 20 inch pillow, that would be 21 x 15.75 inches.
***For my fabric, I found an old shabby pillow case (the beige color on the back) and a cool striped tea towel for the front.
- Self healing cutting mat and rotary cutter
- Quilting ruler or other straight edge
- Scissors
- Threaded sewing machine in matching color to your fabric
- Iron
- Ironing board
- pins
- fabric pencils or air soluble disappearing marker
Instructions:
- Cut your fabric on your cutting mat. I like to measure and draw the lines on the back of the fabric. In this case, the front and back of the tea towels are pretty indistinguishable. If yours has a clear front and back, turn it over so you are looking at the back, and use your straight edge to draw the 17 inch square. Then cut it with your straight edge and rotary cutter, making sure to cut away from yourself. Here is my 17×17 square…
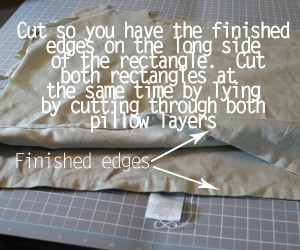
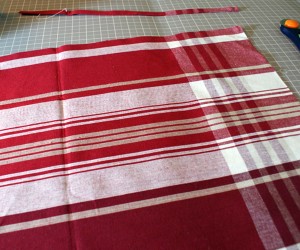 Steam press the back fabric to smooth out wrinkles. Now you are ready to cut your back pieces the same way, folding your fabric over on itself so that you can cut both rectangles at the same time, since they are the same size…
NOTE: If you are using an old pillow case or other fabric with seamed edges for the back, make sure your cut so that you have the the seamed edges as the long edges on your rectangles. That way you will not have to seam the back flaps.
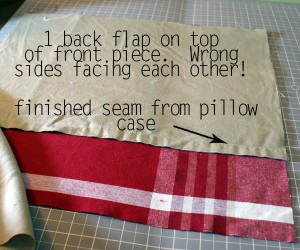
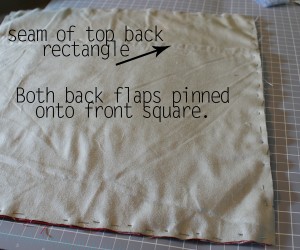
- Now you are ready to pin the front to the back. You will have WRONG sides together. This is unusual, I know. You want to be looking at the right (fabric side you want to end up showing in your final project) sides of the fabrics when they are pinned together for the french seam. Pin about every inch or so, close to the edges, all the way around. Sew straight stitch length setting 2.5, stopping to remove each pin before you get to it, pivoting at each corner. (I don’t like sewing over pins, it stress me out). Back stitch for stability when you get back to where you started.
- Press your stitch line to set the stitches.
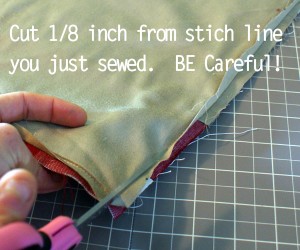
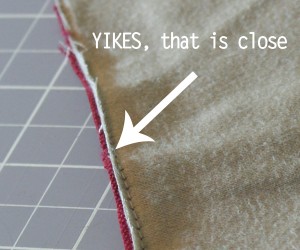
- Now cut around the edges, very close to the line you just stitched. This doesn’t have to be perfect, it is more just to get rid of the bulk of the excess fabric outside of the seams. BE CAREFUL. You don’t want to cut through what you just sewed, but if you do, just go back and sew that area again.
NOTE: I am far from perfect in my cuts and stitch lines. These things will look great, even if you are a little off. Don’t be hard on yourself!
- Now you are almost done! Turn the pillow inside out (so that the wrong sides are now on the outside. Use a bamboo skewer to gently push out the corners, being careful not to poke all the way through. Press the piece, then go back to your machine and sew 1/4 inch from the egde all the way around the pillow. This step hides the raw edges, so that when you turn the pillow cover the right way, no raw edges will be on the inside! Pivot at each corner, keeping your 1/4 distance from the edge. Reverse stitch when you get back to the starting point and you are done. Cut the thread, turn your pillow right side out and push out the corners with your skewer or a not too sharp pencil. Press if you want. Shove your throw pillow or pillow form in there and beam with pride at the beautiful home decor accessory you just made from a towel and raggedy bed linen. Yay you!
 See the stenciled word pillow from a couple of weeks ago. I would love your feedback. I am just getting to know my machine, and have never written this involved of a sewing tutorial.

