Archives for October 2011

Thrifty Thursday Week 43


This week has screamed by so fast.  So much fall decor to whip up around here.  I am loving your festive creativity. Thanks for stopping by and linking.  I can’t wait to see what you’ve been up to this week.

How it Works: No giveaways, shops or links to your main blog, please. That way we know when we come to Thrifty Thursday, we will only encounter DIY projects and not end up sifting through a bunch of other links. Entries not related, or to main blog pages/shops/giveaways will be deleted.
Other stuff:

*Stop by my new Facebook page and Like it, if you like it – Click here.
*Please add a link or my button to your post!
*I will choose 2 participants to feature the following Thursday, Please drop by and follow the features! Their links are in the post where their projects are featured.
*Please visit the at least the 2 blogs above you and shower them with comment love.
*Leave me a comment and let me know you were here. I love hearing from you.
*Have fun and be inspired!
*Stop by and say hello to Nikki and link up to her thrifty party too…

Weekly Featured Projects:

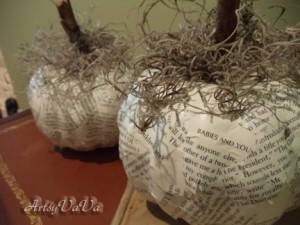
*These book page covered pumpkins over at Artsy VaVa are right up my alley.  Must do!

Decoupage Pumpkins

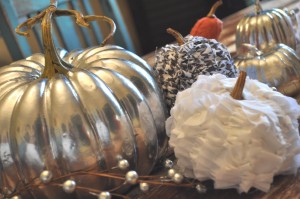
*Natalie at Johnny in a Dress made  a variety of gorgeous pumpkins, some with fabric and others with spray paint.  Lovely!

How to Decorate Pumpkins

Party hard!

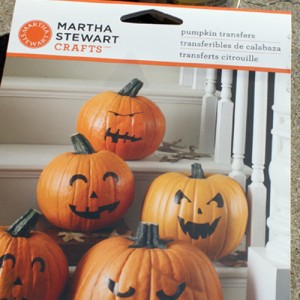
Martha Stewart Pumpkin Transfers

How to decorate for fall

Last minute pumpkin decorating is a cinch with Martha Stewart Pumpkin Transfers.  If you are looking for a quick, no carve way to create festive Halloween decor, this is a great option.  Several designs are available, from spiders to witches to traditional pumpkin faces.  A $4 package will adorn several pumpkins with crisp, clean lined transfers in no time.

Supplies:

  • Pumpkins
  • Martha Stewart Pumpkin Transfers
  • Damp Paper Towel

Halloween Martha Stewart

Instructions:

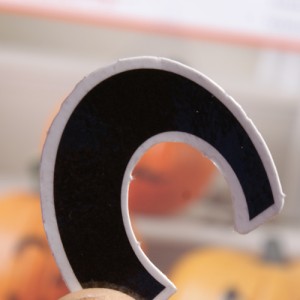
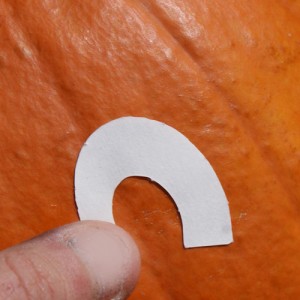
  • Remove the desired transfer from perforated sheet

Halloween Martha Stewart

  • Peel away clear protective sheet

Halloween Martha Stewart

  • Place image side down on clean, dry pumpkin

Halloween Martha Stewart

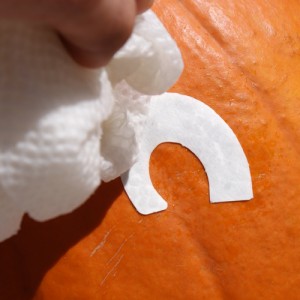
  • Pat white backing paper with damp paper towel, making sure to wet entire surface of backing

How to Pumpkin Decorating

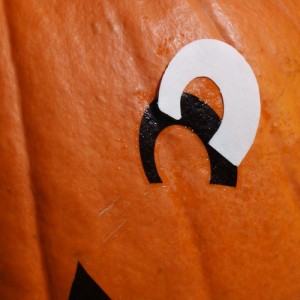
  • Slide backing away carefully, leaving transfer

Halloween Martha Stewart

That is it.  Way simple.  I used these pumkins for part 2 of Harvest Bomb.  SO fun!!  Stay tuned this week to learn about the $12 urns, and dimensional polka dot pumkpins…

Halloween Martha Stewart

Halloween Martha Stewart Decorating


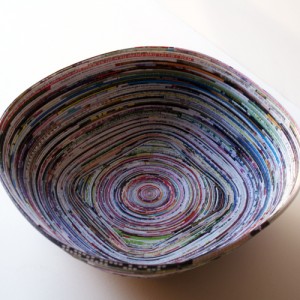
Recycled Magazine Page Bowl

Recycled Paper Bowl

At it again.  Today I have some new tips to share with you that will make these projects easier.  They are still time consuming as all get out, but with a couple of extra steps you can be sure to get beautiful results with your magazine strips everytime.

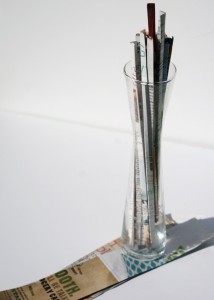
Here I showed you how to fold and coil strips.   I have been folding and gluing for awhile now, and I am finding it much easier to use 1/4 magazine page sections to make the strips.  They are easier to fold, and look neater (since they are not as thick) than the 1/2 page method I showed you in the link above.  I use a paper cutter to cut a stack of magazine pages into quarters lengthwise (the vase in the pic is sitting on 1/4 pages).

Recycled Paper Bowl

The next tip is so helpful.  If you dip each strip in glue, let them dry, then spritz them with water, they become easier to work with and shape into your desired creation.  It kinda becomes like working with clay!  To do this, I put 2 parts elmers glue, one part water in a vase like the one above (which I got at the dollar tree).  I dipped the strip in, flipped it over and dipped the other half and ran it through 2 fingers to remove excess glue.  Then I placed each strip on a non stick craft sheet.  Wax paper would work too.

I let them dry for a couple of days, spritzed them with water in a mister bottle, and began coiling and shaping.  SO much easier this way.  I still sealed the final piece for durability and strength.

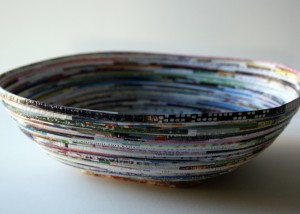
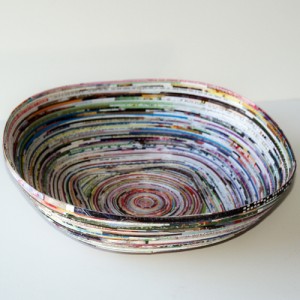
For the bowl, I started with a coil at the center, then made a rounded corner square by cutting strips in graduated lengths and creating the four corners.  Once I had the corners in place, I began coiling around the entire shape, working up and out to make the bowl.  Hard to explain, but you can see what I did in the pics.   Working on a video tutorial!

Recycled Paper Bowl

Recycled Magazine Paper Bowl

Recycled Paper Bowl

Drop a Harvest Bomb

Fall Wreaths

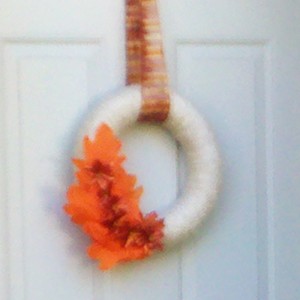
Have a college student, or friend/relative in a situation that prevents them from decorating for fall, even thought they would love to boast a festive porch?  I say harvest bomb them.  Go ahead.  You must have seen the yarn bombers by now?  Apply that philosophy to autumn decor and surprise your loved one.

This all came about when my stepdaughter, admiring our fall porch, expressed how nice it would be if her house were festive on the outside.  As soon as she left, I pulled out the glue gun and wreath form and went to work.  Here is a step by step photo montage of  Harvest Bomb day one.  Stay tuned for more.  I plan to add things daily over the next week, and will update this post with a final picture.

Fall Porch


Six Dr. Oz Natural Remedies

Dr. Oz Natural Remedies

I love it when I catch the natural remedies segment of the Dr. Oz Show.  If you are a sucker for anti-aging, anti cellulite beauty products, you definitely want to read this article for home remedies that won’t drain your bank account.  I have tried 5 of the 6 myself, with better results than any expensive miracle product I have fallen prey to in the past!

1. Red Wine Facial for Sagging, Blotchy Skin

Red wine contains resveratrol, an antioxidant. Honey reduces blemishes and redness, while yogurt moisturizes.

1 cup yogurt

2 tbsp honey

4-5 tbsp red wine

Directions: Combine yogurt, honey and red wine. Apply to face and let dry. Rinse clean with warm water.

2.  Toothpaste to Zap a Zit

Toothpaste dries and absorbs oil, thereby healing zits.  Be careful about which toothpaste you choose; bleaching varieties have hydrogen peroxide that burn the skin. Red pastes or ones with cinnamon can cause irritation as well.

Directions: Apply a generous amount of toothpaste onto your pimple. Let dry and then rise with warm water.

3.  Expresso Mask for Tighter Skin

Honey hydrates the skin.  Caffeine improves circulation and creates a taut, supple look.

Directions: Combine equal amounts of dry expresso and honey. Mix together and apply to your face for 10-15 minutes.

4.   Aspirin and Lemon Juice for Flawless Skin

Aspirin contains salicylic acid, which acts as a chemical peel to reduce acne and lesions. Lemon juice contains vitamin C, with acts as an antioxidant to nourish your skin if and combat damage from sun exposure. It also acts as an exfoliant because of its acidity.

Directions: Take 6-12 non-coated aspirin and crush them up into a powder. Combine with fresh, real lemon juice. Let it dissolve into more of a paste for about 5-10 minutes. Lightly apply to blemish. Remove with a cotton ball dipped in a solution of baking soda and water.

5.  Coffee Grinds Scrub for Cellulite

Caffeine enhances fat metabolism, particularly just beneath the skin. It’s easily absorbed when applied directly on the skin. It’s also a diuretic, so it gets some of the fluid out of the fat beneath your skin so that cellulite is less visible. Olive oil is a moisturizer and an emollient, which softens the skin. The brown sugar works as an exfoliant. Although this is not permanent cellulite fix, it’s a great temporary solution.

Directions: Combine 1/2 cup coffee grinds with 1/4 cup brown sugar. Place olive oil over areas of cellulite and then rub the rub mix into skin in a circular motion. Scrub for 5 minutes to exfoliate.

6.  Chapped Lips Home Remedy

The sugar helps to remove dead skin that accumulates from chapping.  The baking soda helps the mixture to lather. To make this a perfect treatment, you need to bring moisture back to the lips. Try adding some olive oil to the mixture!

Directions: Mix 1 tablespoon of sugar, a tablespoon of baking soda and a tablespoon of water together. Dip a tooth brush into the mix and brush your lips. Rinse off with water for a smooth and exfoliated lip.


Privacy Policy