Archives for October 2011

How Tile Color Affects Your Bathroom

glass tiles
A bathroom is one of the most difficult areas of a home to decorate. Everyone who visits your home – even short-term guests or one-off visitors – could find themselves in this room. So it’s important to get the look and ambiance right.

Many people focus on items such as sanitary-ware or storage when redesigning a bathroom. But one of the biggest ways you can change or shape the décor of a bathroom is to update its tiling.

Every bathroom has tiling, whether it is a contemporary wet room, or simply practical splashbacks. These touches can completely change the atmosphere of the room and should never be overlooked.

Like any room, color can make a huge difference to the environment. The hues that are select to adorn the walls can invite or repel and should be considered carefully. Whether you aim to create a warm, rustic atmosphere or a cutting-edge contemporary feel, there is a shade that will suit your purpose.

Owing to its clear aquatic connections, many homeowners select blues for their bathroom. But the spectrum is enormous: do you want to have dramatic, statement colour or a light, ambient splash? Pastels and soft hues are soothing and airy, and are particularly suited to large areas. Accent blues could include navy and royal shades, which may be worked in stripes or one-off tiles.

Alternatively, if you want to turn your bathroom into a modern-day powder room for the ladies of the household, pinks are the obvious choice. Candy-floss colors and ‘touch-of pink’ choices are excellent options for the majority of your walls. Or, if you’re feeling brave, fuchsia and rose are perfect.

Neutral colors like hessian and magnolia create a blank canvas for the rest of your décor, while not being as stark as brilliant white. However, if you want to introduce real drama, a monochrome palate of black, white and grey or silver – including options such as marble and granite – will give your bathroom a modern, striking look.

As well as color, there are all manner of patterns and effects available in a range of tiling options. Everything from metallic flecks to brocade embellishment can be found and, whether selected for every tile or simply one or two accent panels, they can give a sense of luxuriousness to the design.

Whatever your desired affect, bathroom tiles can achieve amazing and beautiful results that are limited only by your imagination.

Thrifty Thursday Week 46

ThriftyThursday

Featured

Thanks for coming by!  Join in the fun and share what you have been up to.  This is the last Thrifty Thursday before Halloween, so bring it.  I am going to be in pumpkin withdrawal next week.

How it Works: No giveaways, shops or links to your main blog, please. That way we know when we come to Thrifty Thursday, we will only encounter DIY projects and not end up sifting through a bunch of other links. Entries not related, or to main blog pages/shops/giveaways will be deleted.
Other stuff:

*Stop by my new Facebook page and Like it, if you like it – Click here.
*Please add a text link or my button to your post!
*I will choose 2 participants to feature the following Thursday, Please drop by and love on the features! Their links are in the post where their projects are featured.
*Please visit the at least the 2 blogs above you and shower them with comment love.
*Leave me a comment and let me know you were here. I love hearing from you.
*Have fun and be inspired!
*Stop by and say hello to my crafty friend Nikki and link up to her thrifty party too…
thrifty decorating 019 button 3 Thrifty Thursday Week 45Weekly featured blogs:

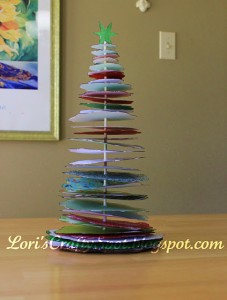
  • You may have noticed I can stay away from paper.  No surprise that this adorable Christmas tree over at Lori’s Crafty Spot caught my eye.  Paper has no limits!

paper christmas decorations

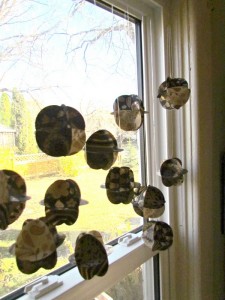
  • Sticking with the paper theme, check out this cool mobile like window dressing at Etcetorize.

Paper Home decor

Let the sharing begin!


Plaid’s New “Easy to Paint” Line Project

Plaid Easy to Paint Line

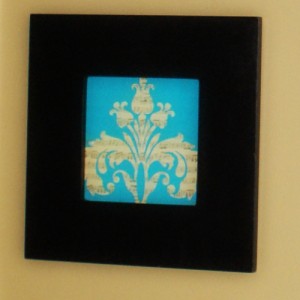
The creative minds at Plaid are at it again, with their new Easy to Paint craft line. You can pick these up today at AM Moore and Michaels craft stores! I received a sample of products to test drive, and I think you guys are going to love stencils, and the various project ideas provided.  I used them to turn a goodwill find into a lovely wall piece.

Here is what I started with…

stenciled wall art

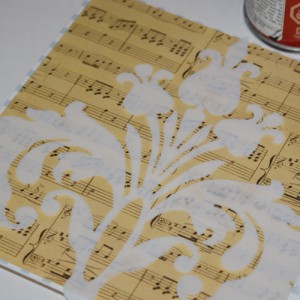
I spray painted the frame black, and covered the inner piece with a square of music note printed scrapbook paper, using mod podge to adhere the scrapbook paper to the square.

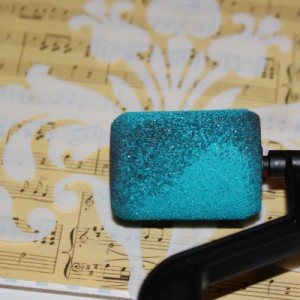
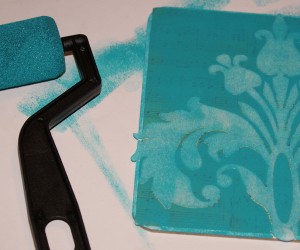
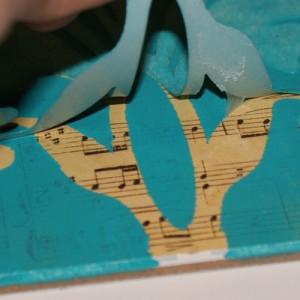
I picked out a Folk Art painting stencil from the new line, and using a roller sponge applied folk art acrylic paint in aqua.  I love love love this color.  Anyway… I used stencil adhesive to keep the stencil in place.  The lines were crisp and perfect (which, given my history with stenciling is impressive)!

Folk art stencil project

Folk art stencil project

Folk art stencil project

How to stencil

In retrospect, I would have diluted the paint with a little bit of water so the to make the paint layer more transparent, but I still love it.  Fits right in my with my fall entryway.

Folk art stencil project

There are cool peel and stick stencils for curved surfaces like glass, that I can’t wait to use with Folk Art’s enamel paint.  The stencil packaging comes with step by step instructions for inspiring projects that look pretty easy to pull off.

You will be seeing a peel and stick stencil project soon.  Have you tried these?  Do share.

Paint Chip Garland DIY


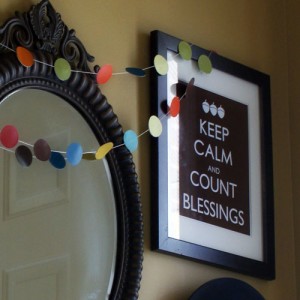
Paint Chip Garland

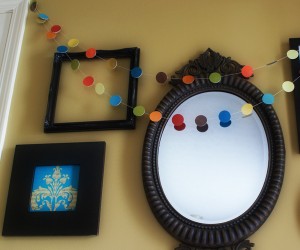
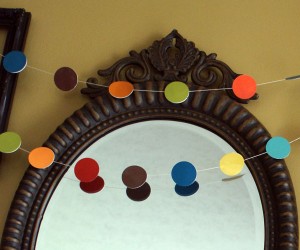
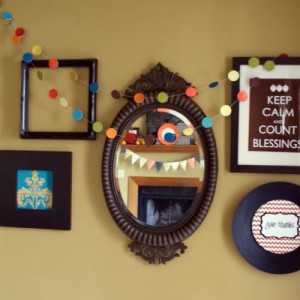
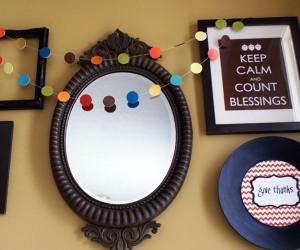
With so many fantastic colors in the form of paint chips, it is no surprise crafters everywhere are busy making cool stuff with them.  Inspired by this simple and lovely project at Carolyn’s Homework, I decided to create my own garland with chips that tie in the hues in my fall decor.  This is a simple, essentially free way to seasonally update your home.  It would also be perfect for parties, and Christmas decor.

Supplies:

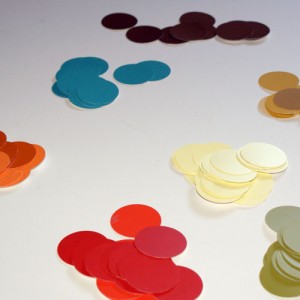
  • paint chips in coordinating colors
  • glue
  • twine or thread of your choice
  • Paper shape cutter

Instructions:

  • Gather your paint chips and punch out a pile of shapes.  I went with the circle.

Paper Crafts

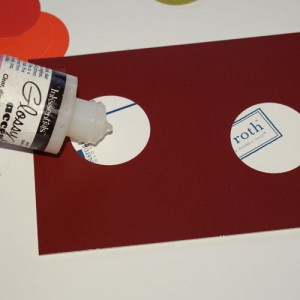
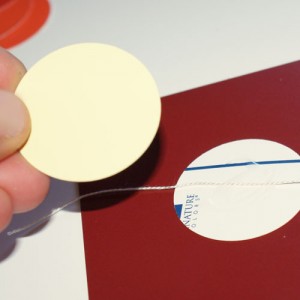
  • I made a sandwich with the string and a thin layer of glue between 2 circles.  That way there will be color on both sides when the inevitable twisting occurs.  You can use any glue.  I am addicted to Glossy Accents because of how quickly it grabs and dries.

Paper garland

Paper garland

  • Continue gluing chips until the garland is the length you want, and hang!

Paper garland

What are you favorite paint chip crafts?

Fall Printable: Keep Calm Count Blessings

Keep Calm Free Printable

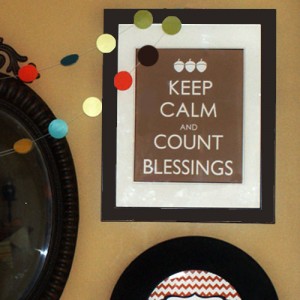
Fall decorating with printables is inexpensive, quick and easy, especially if you can just use your home computer.  This is an 8×10, framed in a garage sale frame that I picked up for a couple of bucks and spray painted black.  Jumping on the “Keep Calm” bandwagon, here is a Thanksgiving themed version for you to print.  I plan to display it until Christmas, and switch it out with a holly jolly version.

Keep Calm Free Printable

To download, Click here and “Save Image As”.

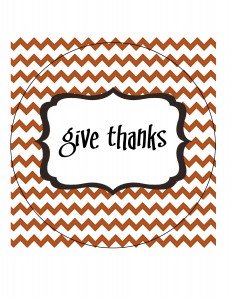
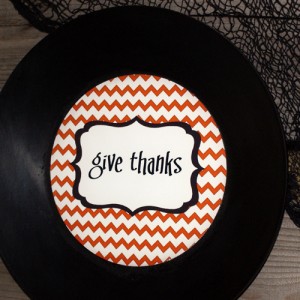
For the chevron “Give Thanks” printable, click here.

Fall Free Printable

I would love to hear about your fall decor!

Easy Crochet Scarf Pattern

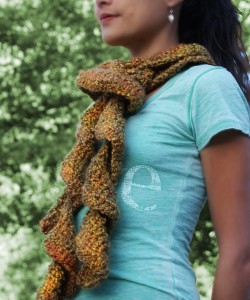
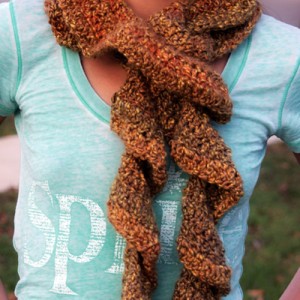
Easy Crochet Scarf

It was love at first stitch with me and Lion Brand Homespun yarn.  Rummaging through the ol’ yarn supply, I found a single skein of this fluffy, soft, variegated fiber in the warm color scheme “Bourbon”.  A simple scarf I whipped up a few years back came to mind, and I got busy.   Today I will share with you this beginner level, super fast pattern that creates an elegant spiral effect, using evenly spaced increases every row.  The only stitch you need to know besides chain stitch is double crochet.  I made this in a single evening while catching up on a miniseries.  I plan to make a few more for Christmas gifts.  This project is ideal for sharing some holiday handmade love!

Easy Crochet Scarf

You will need:

  • Size K crochet hook
  • Single skein of Lion Brand Homespun, or other bulky weight 5 yarn
  • Netflix 🙂

Instructions:

  • Chain 144
  • Row 1:  Double crochet in fourth chain from hook, *double crochet in next chain, 2 double crochet in next chain; repeat from * to end of row.
  • Row 2: Chain 3, turn, double crochet in same space, *double crochet in next two double crochet, 2 double crochet in next double crochet; repeat from * to end of row.
  • Row 3: Chain 3, turn, double crochet in same space, *double crochet in next three double crochet, 2 double crochet in next double crochet; repeat from * to end of row.
  • Row 4: Chain 3, turn, double crochet in same space, *double crochet in next four double crochet, 2 double crochet in next double crochet; repeat from * to end of row.  Fasten off.  Weave in ends.

Crochet gift ideasIf you have never crocheted, I hope this inspires you to learn.  It brings great joy in many ways.  For my favorite resources to get you started, visit my craft links page and look under “Crochet”.  I taught myself using Crochet Cabana, which you will find linked there.  Happy hooking!

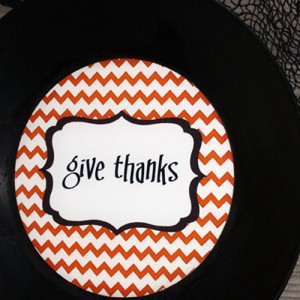
Chevron Give Thanks Printable Decor

free printable

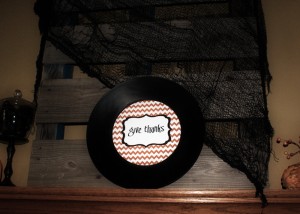
How are those fall mantels coming along?  There are so many options for decor this time of year, that I have been overwhelmed with choices and unable to decide on anything.  Today, I share with you the chevron “give thanks” printable, as well as a step by step for how I created the plate that is bring all of this together… Finally.

Supplies:

  • Click here for printable…
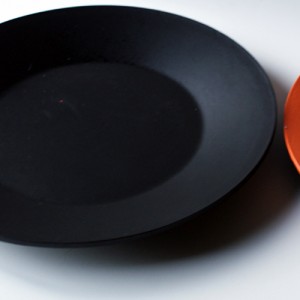
  • Chevron Free PrintablePlate or MDF candle holder (I got mine at Michaels recently for $3

How to decorate plates

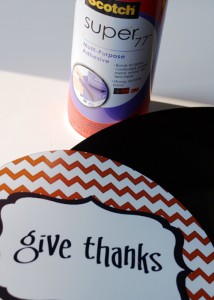
  • Super 77 or your choice of adhesive
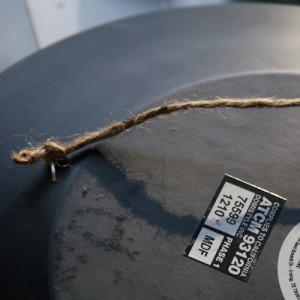
  • Wire or jute and staple gun (glue gun if you are using glass or plastic plate)  if you want to hang your plate
  • Medium grit sand paper (150)
  • Lint free cloth

Instructions:

  • Lightly sand your plate and wipe away debris with a damp, lint free cloth
  • Measure the inner circle diameter of your plate, and size the free printable accordingly.  Mine was exactly 7.5 inches.  Print image on glossy photo paper and let dry 10 minutes before moving to the next step
  • Cut out using black circle outline as your guide (which you should have sized to match the diameter of the inner circle)

Fall Free Printable

  • Spray Super 77 or other mounting spray on surface of plate and back of image, BOTH.
  • Press image down onto center of plate, making sure you get placement right before making contact.  This stuff really sticks.
  • Use palm of hand to smooth image down from the center out.
  • To hang, I stapled jute to the back with my staple gun.

Free Printable

You may want to seal with a layer of mod podge for protecting the image.  I was too eager to hang it up, so I skipped this part, but should do it for when I change my mantel and store this for next year.

Super easy project and I love how it looks.  What do you think?

Free Fall Printable

Free Printable

Easy Crochet Shawl Pattern

Crochet Shawl Pattern

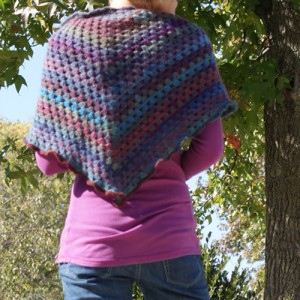
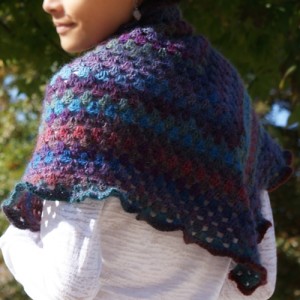
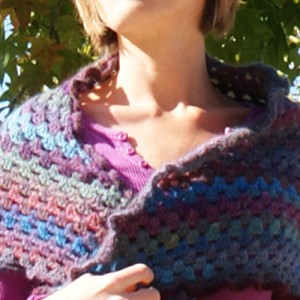
Are you working on your handmade Christmas gifts yet?  This “8-hour” shawl is a quick, simple, and beautiful gift to mark some girlfriends off of your list.  I found the pattern by A la Sascha on ravelry, and it is free to download, here.

Shawl Pattern

The yarn I used for this project is  a lovely worsted weight, soft wool blend; Lion Brand Amazing in Ruby.   The  vivid colors and a light softness are irresistable.  The pattern calls for 3 skeins, but I wanted the shawl larger, so I used 4 skeins, and crocheted 33 rows before beginning the edging, which I did as the pattern instructs.  I love the ruffled edging.  I finished this project in 3 days, and my niece is gonna love her new shawl.

What is on your hook today?

Crochet shawl pattern

Thrifty Thursday Week 45


Brrrr!!!  It is cold, windy and rainy here in my hood.  Aside from my fall decor flying around the porch on occasion,   I love it.  Feels like Halloween.

Thanks for stopping by Thrifty Thursday and sharing what you have been crafting.  I love to see your ideas each week.

How it Works: No giveaways, shops or links to your main blog, please. That way we know when we come to Thrifty Thursday, we will only encounter DIY projects and not end up sifting through a bunch of other links. Entries not related, or to main blog pages/shops/giveaways will be deleted.
Other stuff:

*Stop by my new Facebook page and Like it, if you like it – Click here.
*Please add a text link or my button to your post!
*I will choose 2 participants to feature the following Thursday, Please drop by and love on the features! Their links are in the post where their projects are featured.
*Please visit the at least the 2 blogs above you and shower them with comment love.
*Leave me a comment and let me know you were here. I love hearing from you.
*Have fun and be inspired!
*Stop by and say hello to my crafty friend Nikki and link up to her thrifty party too…

Weekly featured projects:

  • Check out this adorable pallet art at Hope Abound.  I have some extra pallets, and this got my brain spinning.

Wood pallet crafts

  • This paper garland at Carolyn’s Homework is fantastic.  I love the dollar store crows holding it at each end!

Paper garland

Party party!!

Make Crepe Paper Garland – {A Girl and Her Scout}

 Paper Crepe

I have developed quite the crush on garland lately, just cannot get enough.  The wide array of supplies used to make it never ceases to amaze me.  This project is perfect for you DIYers who love decorating with things you have on hand to create simple beauty from the everyday.  Please welcome Allison!

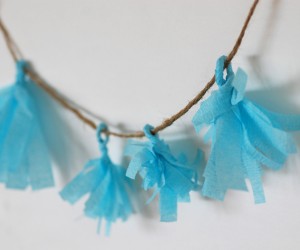
Hello All!  My name is Allison.  I am the one-woman show behind hoop~da~loop (www.hoopdaloop.etsy.com), my Etsy shop of whimsical party decorations and unique gifts, and my little blog A Girl and Her Scout (www.agirlandherscout.blogspot.com).  I am passionate about creating handmade party supplies and creating fun events that ooze personality with a dash of crazy!  I am so pleased to share a little DIY with you guys today that is EXTREMELY customizable for your needs and really affordable and simple!  See how to make these Crepe Paper Tassel Garlands in four easy steps below.


Materials:


  • Crepe paper in any colors of your choice
  • Scissors
  • String of any kind (I am using natural jute, but yarn, thread, hemp… it all works just as well.)


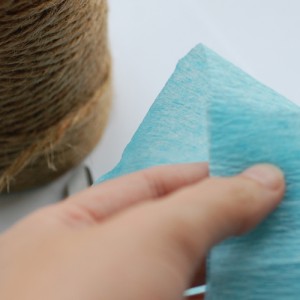
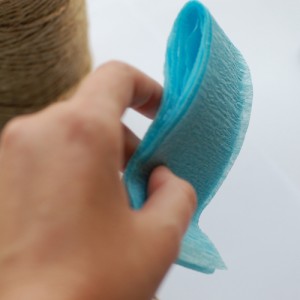
Step one:  Cute a few strips of crepe paper (in a square or rectangle shape).  Depending on how large you want to make your tassels, you can cut them at whatever length.  I suggest starting with five inches.  You can also make your tassels thicker and thinner.  I like to mix it up, but start with using three rectangles to get the hang of it and play with it from there.

Paper Crafts - Crepe Garland

Paper Crafts - Crepe Garland


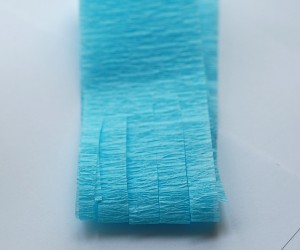
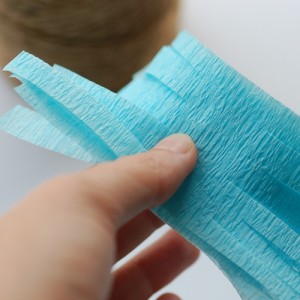
Step two: Cut the crepe paper longwise almost to the middle on both sides.  (be sure to snip the ends if they are connected like mine!)  See photo below.

Paper Crafts - Crepe Garland

Paper Crafts - Crepe Garland

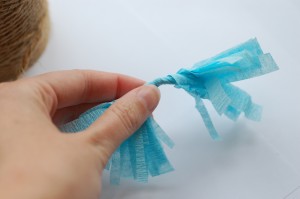
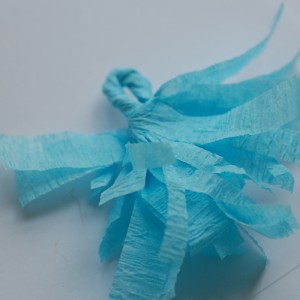
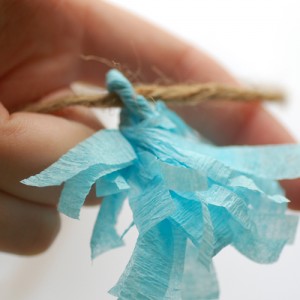
Step Three.  Twist the crepe paper in the middle tightly, gradually bending it into a loop and twist that a couple of times to make sure it stays in place.

Paper Crafts - Crepe Garland

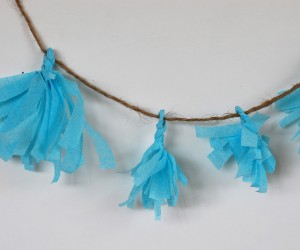
Step Four:  String them on your string of choice!

Paper garland

Paper Garland

You can make these as long and as short as you want.  Hang your garlands in a nursery, at a wedding, or even attach them to lollipop sticks to create a cake topping.  The possibilities are endless!  And don’t forget- you don’t have to attach the tassels to the string.  You can put them on lots of things like this pail I have in my shop (http://www.etsy.com/listing/82681548/custom-wedding-favor-tin-wedding-favor).  This would look really cute with some saltwater taffy for a wedding favor.

Paper crepe garland


What will you use your tassel garland for?

Privacy Policy