

7 hours after application of color; transparent now!

Color just applied and still mainly opaque.
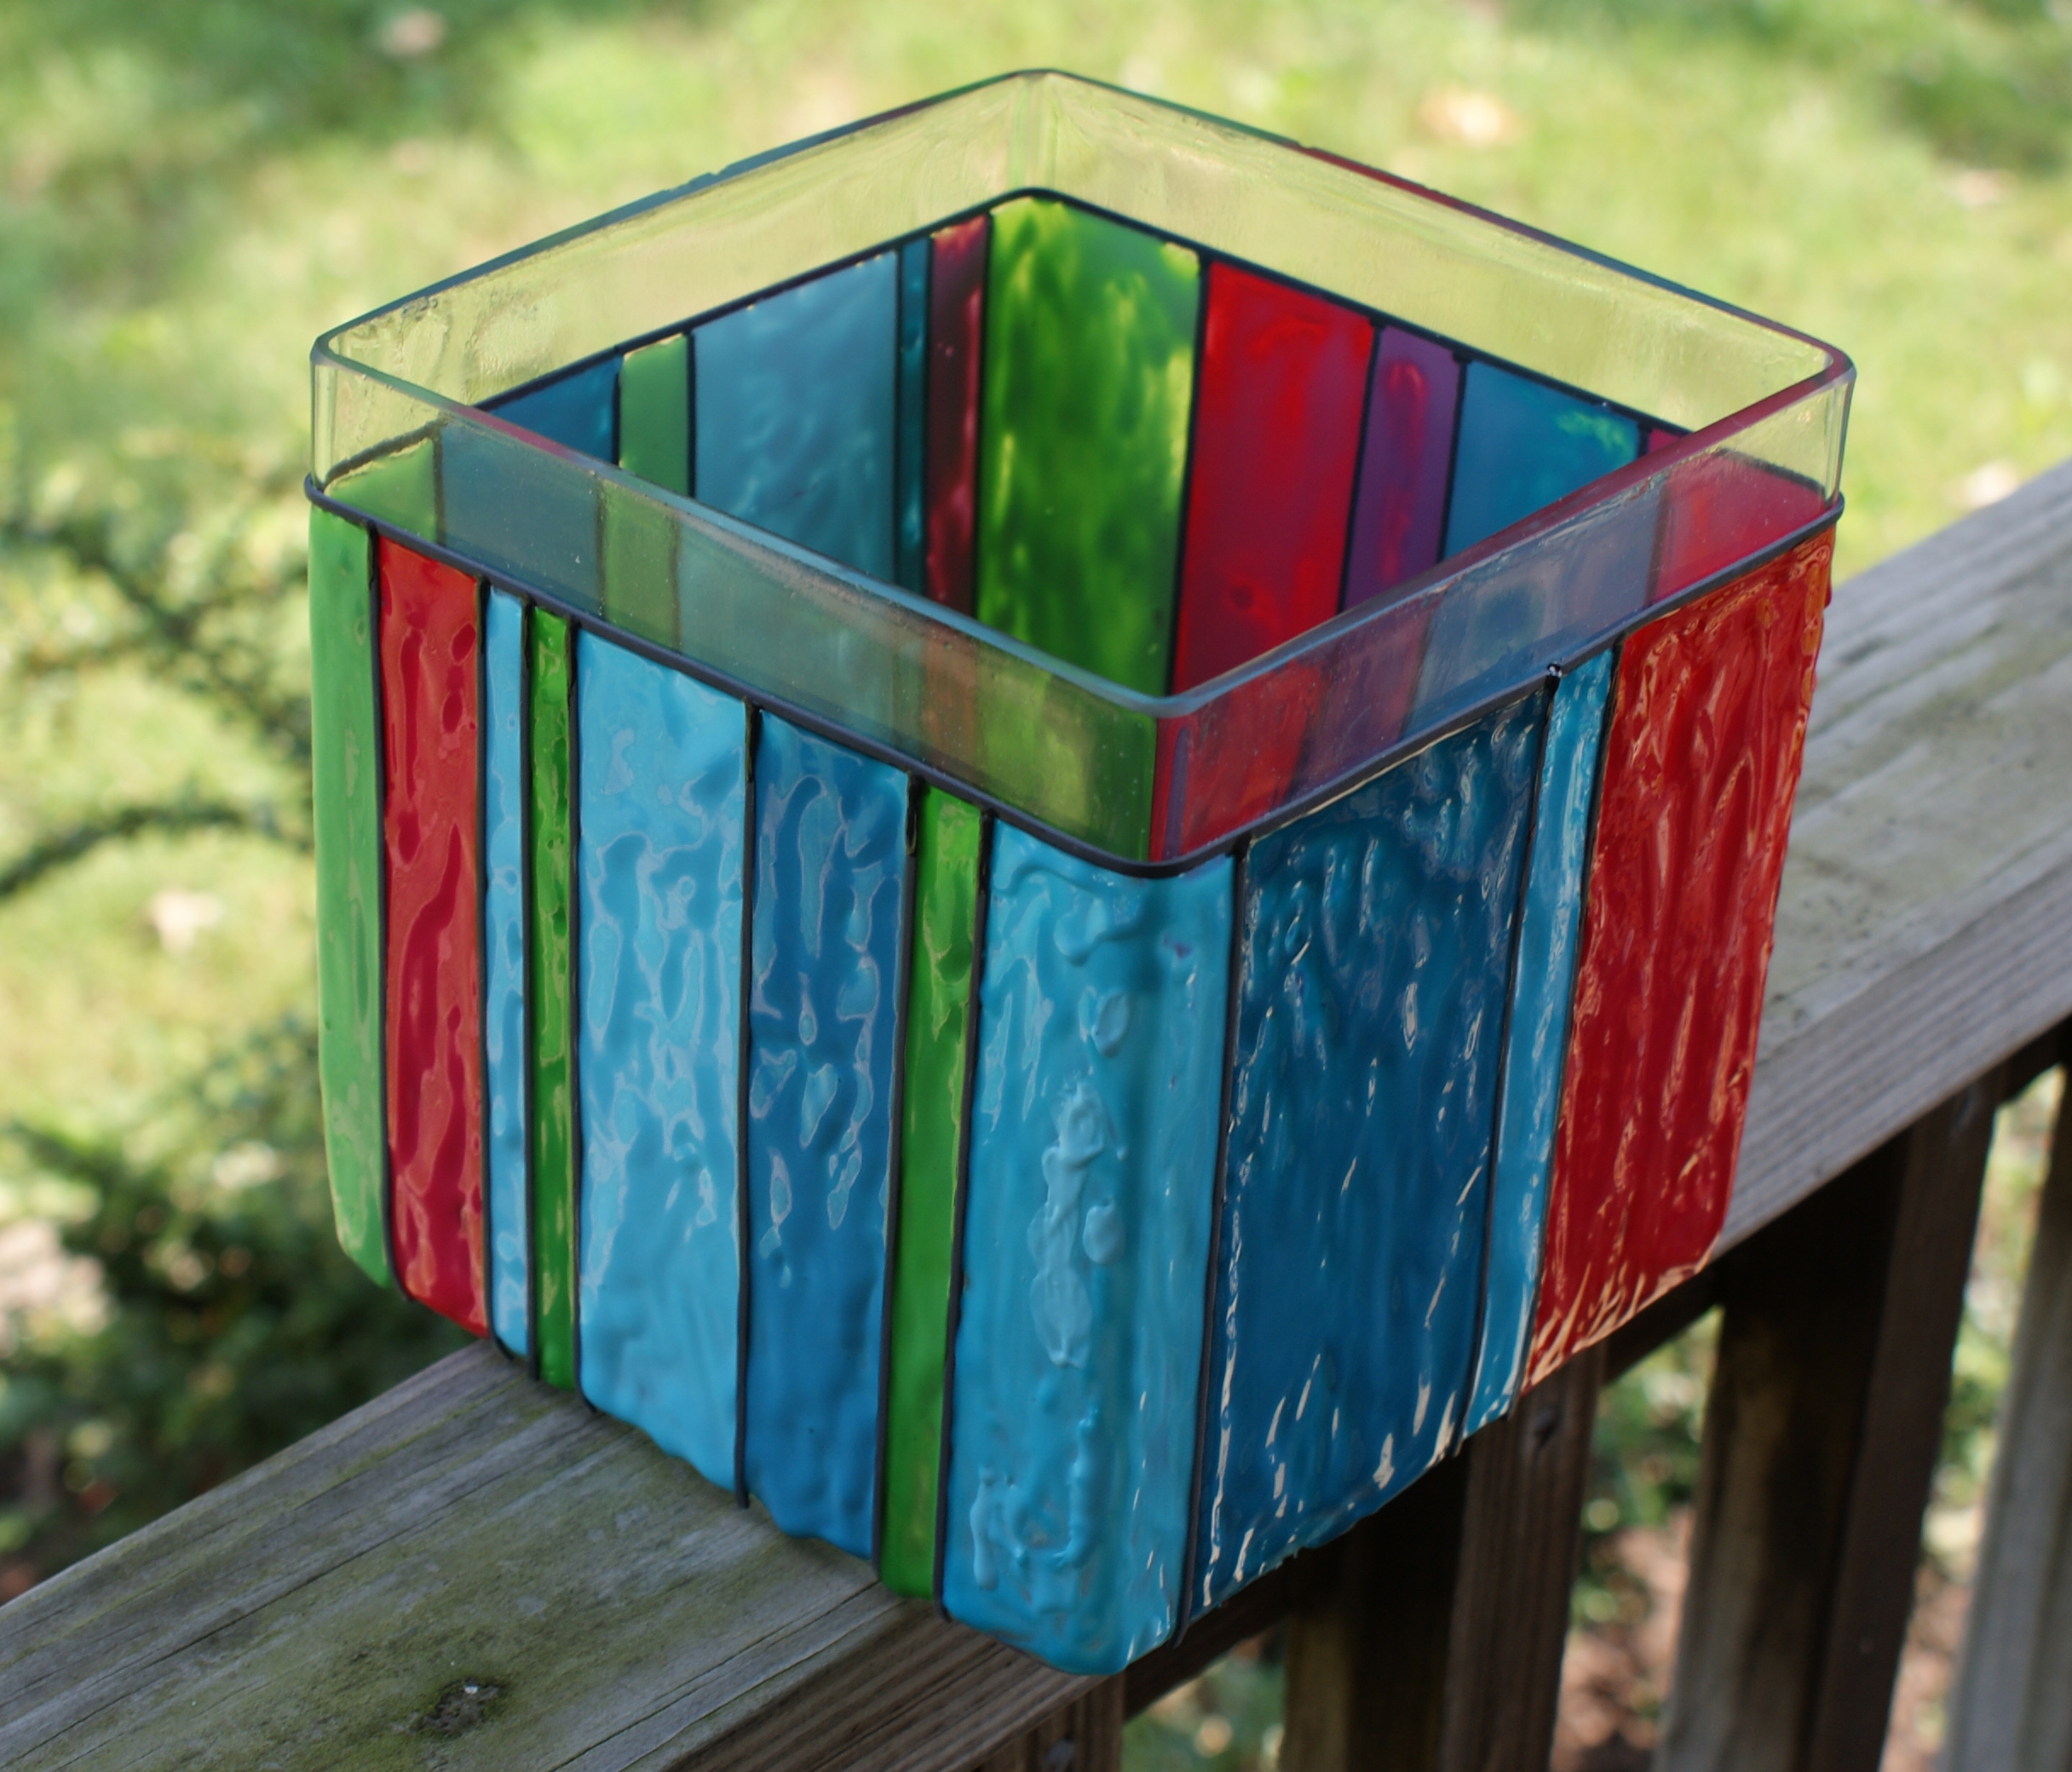
I got the inspiration for this striped vase from a Joann Fabrics project sheet. It is a pretty straightforward project, involving Gallery Glass window color and Redi lead tacky strips. The application of the color took a little longer than I expected, but that is probably because I had never used it. It always takes awhile to get the hang of a new medium’s character, and how to best manipulate it. Total time was about 2.5 hours. Here is the full tutorial…
Supplies:
- Gallery Glass Window Color; I used Ruby Red, Berry Red, Turquoise, Aqua and Lime Green.

- Thin Redi-Lead Lines
- Glass Vase
- Toothpicks
- Baby wipes or paper towels for cleaning as you go
Instructions:
- About an inch down from top of vase, lay Redi-Lead line around the entire vase, horizontally. This took more than one line. Just start with another line where your first one left off, and trim excess when you meet up beginning to end.


 Create vertical stripes in a variety of sizes around the vase with the Redi-Lead Lines. They are pretty easy to reposition if you find one is crooked (thank heavens).

 Once you have place all your vertical lines, seal the joints where the lines meet with a drop of black liquid leading.


 Apply window color to the stripes. This part was tricky at first. I found the easiest, neatest way to do this is by placing vase upright on flat surface and working over the top of it. Start at the top of the vase and let the color run down. You just have to play with it to get the hang. The instructions on the bottle say to start by adding color next to the lead lines, around the perimeter of the area, then filling in the middle. Toothpicks are very handy in spreading the color around. Have them nearby. TIP: No freaking out when you see the color as it is first applied to the glass. It dries to match the label on the bottle. Yay! You need to let the color dry for 12 hours before handling.


